
Masar Process Suite
Process mapping and process governance on Nintex Automation K2 5.9.1 - on-premises
Release 2.6 · 22 Oct 2026
| Document | User and Administrator Guide |
| Version | Release 2.6 (R1, R2, R3 and releases 2.1 to 2.6) |
| Date | 22 Oct 2026 |
| Product release | Masar release 2.6. Release 2.5 was built and tested on Nintex Automation K2 5.9.1 from 17 to 19 Oct 2026 (the state of each part is in Part G). Release 2.6 adds ActiBot AI, included with Masar and tested on the same server on 22 Oct 2026 (Part H). The 2.6 installation package carries ActiBot AI in the folder ai/runtime. |
| Platform | Nintex Automation K2 5.9.1, SQL Server, Power BI Report Server |
| Prepared by | ActiBot |
ActiBot · Nintex partner
About this guide
This guide explains how to use and administer Masar release 2.6, a process-mapping and process-governance product that runs on your own Nintex Automation K2 5.9.1 server. Part A is for everyone who reads, writes, approves, reviews or automates processes. Part B is for the administrator who sets the product up and keeps it running.
About the product. Masar is an add-on for Nintex Automation K2, implemented by ActiBot, a Nintex partner. ActiBot implements Nintex solutions and adds enhancements on top of them; Masar is not a Nintex product, and ActiBot claims no ownership of, or right to reproduce, Nintex products. Nintex, Nintex Automation and K2 are trademarks of their owner.
The guide covers the whole product: process authoring and governance (R1); imports, exports, checklists, costs, Process Discovery and Automate with ActiBot (R2); and the BPMN model editor, variations, Word export, event-log mining and documenting K2 workflows (R3). Part C adds release 2.1 (chapters 27 to 31), Part D release 2.2 (chapters 32 to 41), Part E release 2.3 (chapters 42 to 44), Part F release 2.4 (chapters 45 to 54), Part G release 2.5 (chapters 55 to 66): risk and compliance, incidents, training, the AI Process Generator, process capture and MCP access among others, and Part H release 2.6 (chapter 67): ActiBot AI, included with Masar. Screen names, field labels, buttons and messages are written as they appear on the pages. Where a function works with a known limit, the guide says so in a Note.
- Button and field names are in bold, for example Submit for approval.
- Each page shows one language at a time: English left to right or Arabic right to left; switch with EN / Arabic in the header. This guide gives the English labels; the Arabic guide gives the Arabic ones.
- User names are shown in the K2 form label:name, for example K2SQL:user1; where Masar knows the person, the full name is shown as well. Your own K2 user names will differ.
- The pictures show the pages in English with the light look, unless the caption says otherwise. Names such as "Demo - Approve a leave request", demo1 and eval1, and the people named in the pictures, are fictional demo data.
Part A - User guide
Chapters 1 to 19: reading, finding, writing, approving, reviewing, archiving and automating processes, your profile, the reports, imports and exports, the model editor, working together, costs and comparisons, Process Discovery, variations and governance.
1 Introduction
1.1 What Masar is
Masar keeps your organisation's processes in one library: who does what, in which order, with which systems, tasks, notes, links and targets. Each process has an owner and an expert, a swim-lane map, a procedure, a version history and a review date. Changes are approved before they are published, readers can give feedback, and a published process can be turned into a running K2 workflow with one request (Automate with ActiBot), and the real paths of running workflows can be compared with the documented process (Process Discovery).
It brings a complete process management suite to the Nintex Automation K2 platform you already own, on premises, for organisations that cannot or prefer not to use a cloud product. All data stays in your own SQL Server database on your own servers; nothing is sent to a cloud service.
The product is made of parts that share one process key:
Table 1 - The parts of Masar
| Part | What it does | Status |
|---|---|---|
| Shared base | Departments, roles, systems, company settings and theme, audit, role members and role requests, user preferences, the message board between the parts and its sweeper | Built |
| Process Suite | Groups (library, versioned), processes, versions, activities and decisions, tasks/notes/links, triggers/inputs/outputs/targets, map with overlays, procedure, RACI, feedback, favourites, search, reviews, archiving, imports (text, BPMN, Visio, package, K2 workflow), exports (BPMN, map, Excel, package, PDF and Word BRD), model editor, variations, checklists, suggestions, acknowledgements, costs, sharing | Built (R1, R2, R3) |
| K2 Link | "Automate with ActiBot": request with data fields, decision rules, deadlines, integrations, test users and schedule; readiness check; request e-mailed to ActiBot (PDF, JSON, BPMN); status back; automated activities; documenting existing K2 workflows; automation out of date | Built (R1, R2, R3) |
| Process Discovery | Reads K2's own workflow logs, or a pasted CSV / XES event log, to find the real paths, times and bottlenecks and compares them with the documented process; live map overlay; drift found | Built (R2, R3) |
1.2 Who uses it
Table 2 - Roles in Masar
| Who | What they do in Masar |
|---|---|
| Every staff member | Opens and searches processes, prints them, marks favourites, gives feedback and ratings, asks for a response, asks to join or leave a role. |
| Process owner | Is accountable for a process. Receives the approval task for every new version, the review task when a review is started, and feedback that asks for a response. Approves archiving when the group has no champion. |
| Process expert | Keeps the process up to date day to day: edits it, saves versions and submits it for approval. Sees it under My processes. |
| Group champion | Looks after a group of processes in the library. Approves archiving and unarchiving of the processes in that group. Shown as Accountable in the RACI. |
| Approver | The person who receives an approval task. For process versions this is the process owner; for role requests it is the role approver set in Company settings. |
| Requester | The person who clicks Automate with ActiBot (usually the owner or expert). Completes the automation request and sends it to ActiBot. |
| ActiBot | The Nintex partner that implements Masar. Through Automate with ActiBot it receives the request, builds, tests and deploys the K2 workflow, and sends the status back. |
| Administrator | Maintains Company settings, the theme, departments, roles, systems and groups; grants K2 rights; deploys new releases with ActiBot. |
1.3 How a process moves through its life
A process has one of four states. The state decides which buttons work.
Table 3 - Process states
| State | Meaning | What can happen next |
|---|---|---|
| InProgress | Being written or changed (versions 0.1, 0.2 ... or 1.1, 1.2 ...) | Edit, Save version, Submit for approval, Archive |
| AwaitingApproval | Submitted; the owner has an approval task. Editing is locked. | Approve (publish) or Decline (back to InProgress) |
| Published | Approved; version is a whole number (1.0, 2.0 ...) | Edit (starts the next minor version), Start review, Archive, Automate with ActiBot, Start checklist |
| Archived | Taken out of use; hidden from lists and search | Restore from Company settings, with approval (see chapter 9) |
2 Getting started
2.1 Sign in
- Open the Masar link your administrator gave you. It opens the form Masar - Home in the K2 SmartForms runtime.
- Sign in with your usual K2 account (the same sign-in as other K2 applications in your organisation). There is no separate password for Masar.
- The Home page opens. Everything you do from now on is recorded under your K2 user name.
2.2 The Home page
The Home page has these areas, from top to bottom:
- Header - the Masar logo; the menus Home, Processes, Governance, Automation and Admin with the pages of the product; the language switch EN / Arabic; the look switch (light or dark look); and your account (chapter 45).
- Open panel - fields Group, Process and Search, and the buttons Open, Search, New process and Import from text. My profile, Automation, Reports, Company settings, Suggest a process, Governance and the other pages are in the menus of the header.
- Count cards - Library, Published, My processes, In progress, Review due and Favourites; click a card to show those processes in the library list under the cards (chapter 46).
- My tasks - your K2 tasks from Masar workflows only: approvals, reviews, feedback, archival and automation requests. Comment tasks are not K2 tasks; they are in My work (chapter 49).
- My work - what waits for you, including the comment tasks given to you (chapter 49); Changes to acknowledge and My checklists - see chapter 15.
- My processes - processes where you are the owner or the expert.
- In progress and Favourites - see chapter 3.
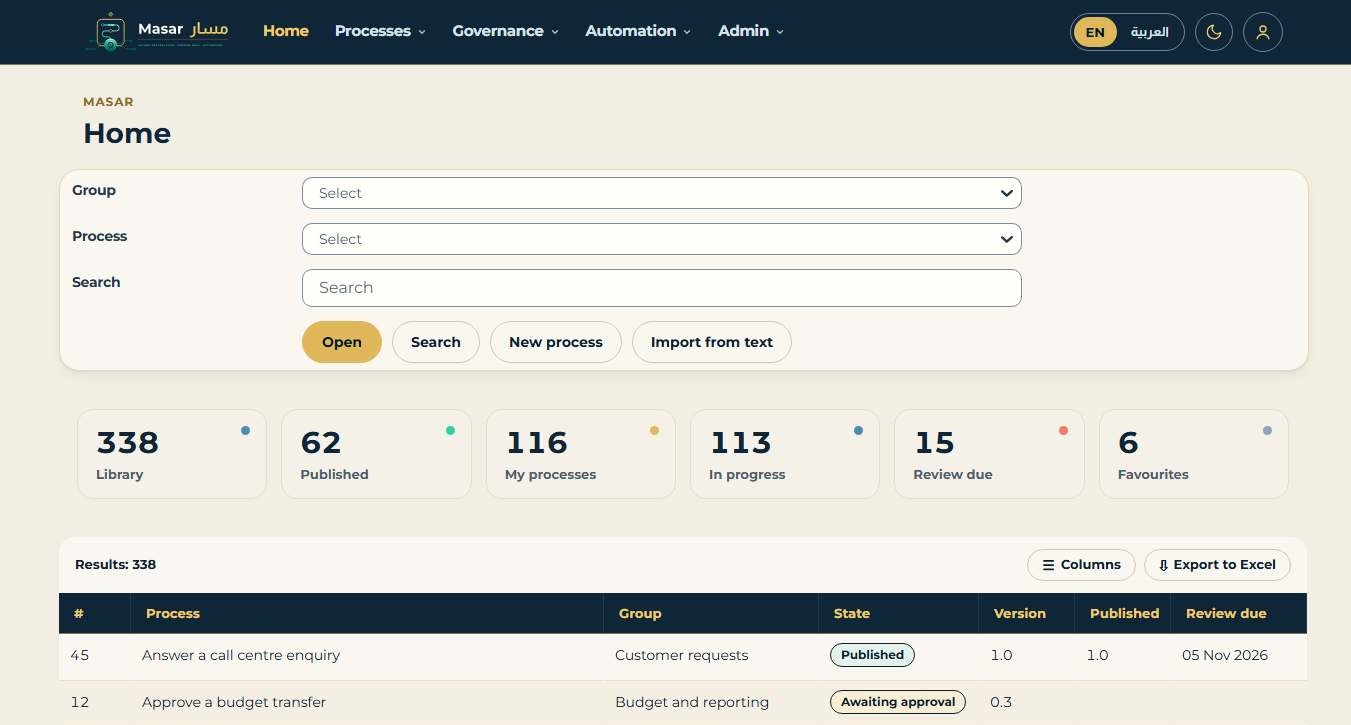
Figure 1 - Home page: the header, the open panel, the count cards and the library list
2.3 Language of the pages
Each page shows one language at a time. English pages run left to right and Arabic pages right to left; switch with EN / Arabic in the header (chapter 54). Titles, objectives, activities, questions, items and triggers can be written in both languages: each has an English field and an Arabic field (for example Title and Arabic title).
Your preferred Language, Time zone and E-mail are kept in My profile (section 11.2). Documents come in either language: the PDF and Word BRD of a process (section 13.5) are produced in English or in Arabic; the Arabic PDF is laid out right to left with a mirrored map (lanes on the right, flow from right to left).
2.4 My tasks
My tasks is the K2 worklist filtered to the workflows of Masar. It shows the columns Activity name, Folio, Task start date and Workflow name. Comment tasks from the collaboration pane are not listed here (chapter 49). Click a task to open it. The approval task opens the approval task form (chapter 6); the other tasks offer their actions, for example Reviewed or Edit, when you open them.
Table 4 - Tasks you can receive
| Task name | Comes from | Your actions |
|---|---|---|
| Approve process version | A process was submitted for approval (you are its owner) | Approve, Decline |
| Review the process | A review of your published process was started | Reviewed, Edit |
| Answer the feedback | A reader asked for a response to feedback on your process | Resolved, Not applicable |
| Approve archival | Someone asked to archive or unarchive a process in your group | Approve, Decline |
| Approve role change | A user asked to join or leave a role (you are the role approver) | Approve, Decline |
| Complete the automation request | You clicked Automate with ActiBot | Send to ActiBot, Cancel |
| Work through the checklist | Someone ran a process as a checklist for you | Checklist done, Cancel |
| Decide on a suggested process | Someone suggested a process in your group (you are its champion) | Approve and create the process, Decline |
The worklist shows ten tasks at a time; click Load more at the bottom for the rest. Use the search box and filter icon at the top of the worklist to find a task by folio. The folio is the process title, for example "Review Leave request".
3 Finding processes
3.1 Open a process by group
- On the Home page, pick a group in Group. The list shows the top-level groups of the library.
- Pick a process in Process. The list shows the processes of that group, including shortcuts to processes that live in another group. Archived processes are not listed.
- Click Open. The process page opens. If you click Open without a process, the message "Pick a process first" appears.
3.2 Search
- Type at least two characters in Search on the Home page.
- Click Search. The search page opens with the results.
- Pick a result and open it with the open panel at the top of the search page, or note its group and open it from Home.
Search looks in English and Arabic titles, objectives, search keywords, activity titles and the titles and details of tasks, notes and links. The column Found in says where the term was found: Title, Objective, Keyword or Procedure. Title matches come first. Archived processes are not searched. Up to 200 results are shown.
3.3 Favourites
On a process page, click Favourite. The message "Favourites updated" appears and the process is added to the Favourites list on your Home page. Click Favourite again to remove it.
3.4 My processes and In progress
Table 5 - Lists on the Home page
| List on Home | Shows |
|---|---|
| My processes | Every process (not archived) where you are the owner or the expert. |
| In progress | Processes in state InProgress or AwaitingApproval where you are the owner, the expert or the person who created them. |
| Favourites | Processes you marked with Favourite. |
Since release 2.4 these lists are filters of the library list (the count cards, chapter 46). Each list shows #, Process, Group, State, Version, Published (the last published version) and Review due, ten rows per page.
4 Reading a process
The process page shows everything about one process, from top to bottom: the summary and buttons, the map with overlays, BPMN export and downloads, sharing, who is here and acknowledgement, exports and checklist, the procedure, tasks and notes, triggers/inputs/outputs/targets, RACI, the feedback box and list, the change log and versions, acknowledgements, variations, and the mini page and embed code.
4.1 Summary
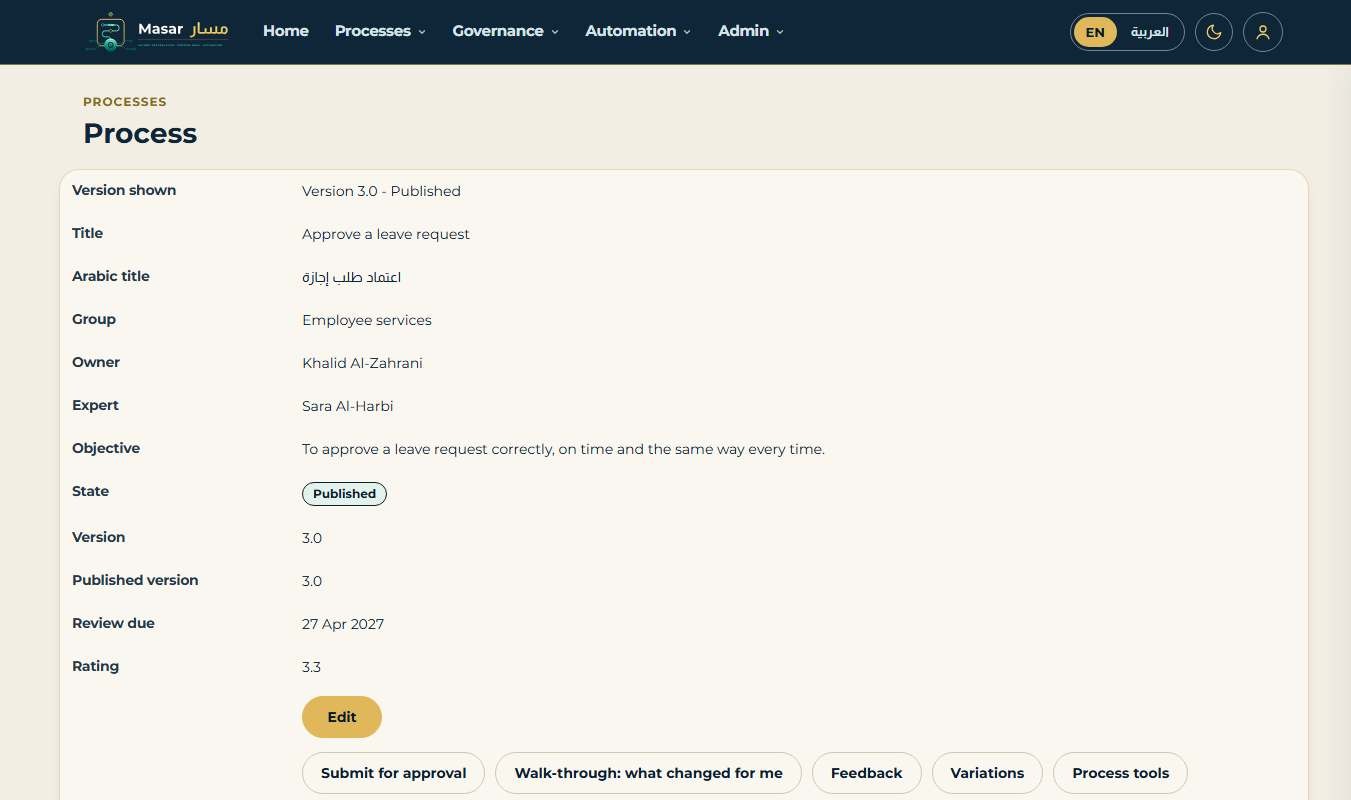
Figure 2 - Process page: summary and buttons
Table 6 - Summary fields
| Field | Meaning |
|---|---|
| Title / Arabic title | Name of the process in English and Arabic |
| Group | The library group the process belongs to |
| Owner | K2 user accountable for the process; approves its versions |
| Expert | K2 user who keeps it up to date |
| Objective | Why the process exists |
| State | InProgress, AwaitingApproval, Published or Archived |
| Version | Current working version, for example 0.2 or 1.1 |
| Published version | The last approved version, for example 1.0 (empty until first published) |
| Review due | Date by which the owner should review the process, shown as dd MMM yyyy (for example 27 Apr 2027) |
| Rating | Average of the ratings (1 to 5) readers gave in feedback |
The buttons are Edit, Submit for approval, Favourite, Start review, Archive, Automate with ActiBot, Print and Home. Each is explained in the chapter about that task.
4.2 Swim-lane map
The map is drawn from the procedure in the swim-lane layout (chapter 47). There is one lane per role, in the order the roles first appear. Start and End mark the two ends of the flow. Each activity is a card with its type chip, number and name; a decision is a card with the D chip and its question. Both outcomes (Yes and No) are written on their lines. The outcome that branches runs its branch activities and then ends the process. The other outcome continues with the next activity. Activities without a role are drawn in the lane UNASSIGNED. The map follows the look: ivory in the light look and navy in the dark look.
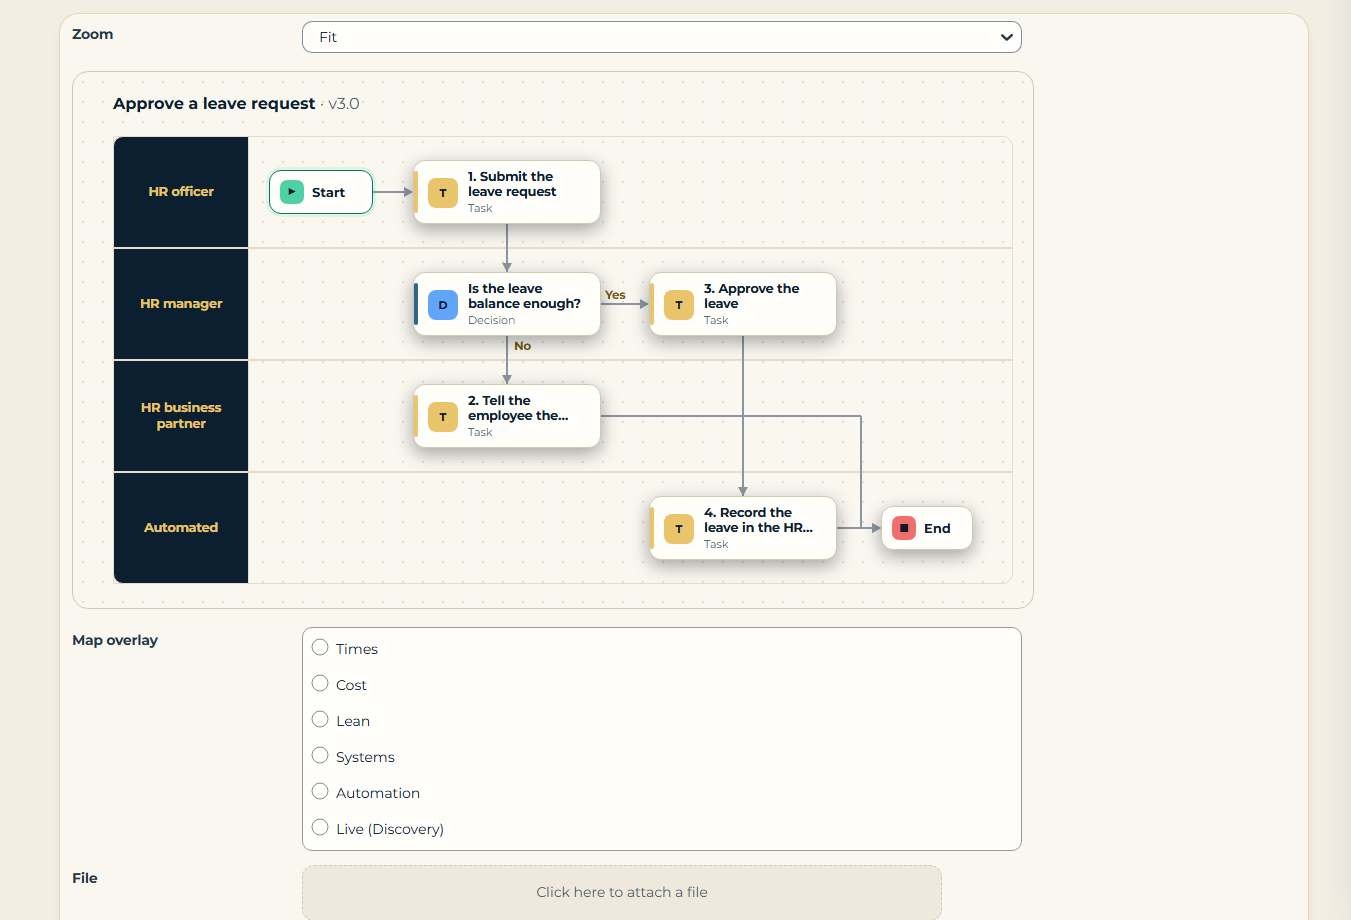
Figure 3 - The map and the map overlays on the process page
4.3 BPMN 2.0 export
Under the map, the box BPMN 2.0 export holds the process as BPMN 2.0 XML, with diagram information (positions of lanes and shapes) and the process key, version and activity ids in a pm: extension. Click Download BPMN to get it as a .bpmn file (section 13.5), or copy it:
- Click in the box and select all its text (Ctrl+A), then copy it (Ctrl+C).
- Paste it into an empty text file and save the file with the extension .bpmn.
- Open the file in your BPMN 2.0 modelling tool.
Download map gives the map as an HTML page, and Edit the model opens the model editor (chapter 14). The Map overlay choice above the map is explained in section 16.2.
4.4 Procedure
The procedure list shows every row of the process in order: # (activity number 1.0, 2.0 ...; decisions have no number), Kind (Activity or Decision), Activity, Arabic, Roles, Systems, Timeframe and Id. The Id is the number you need when you change an activity on the edit page.
4.5 Tasks, notes and links
Each activity can carry items. The list shows the activity number and a letter (a, b, c ...), Type, Item, Details and Link. Item types are Task, Note, WebLink, Policy, Form, Image, Guide, Information, Training and Video. Tasks are lettered separately from the other items.
4.6 Triggers, inputs, outputs and targets
These describe the process as a whole: Type (Trigger, Input, Output or Target), Text, From / to (where an input comes from, or which process an output goes to) and Measure (how a target is measured).
4.7 RACI
The RACI list is built automatically from the process:
- Responsible - every role and every system named on an activity (system roles such as UNASSIGNED are left out).
- Accountable - the process owner, the process expert and, when the group has one, the group champion.
4.8 Change log and versions
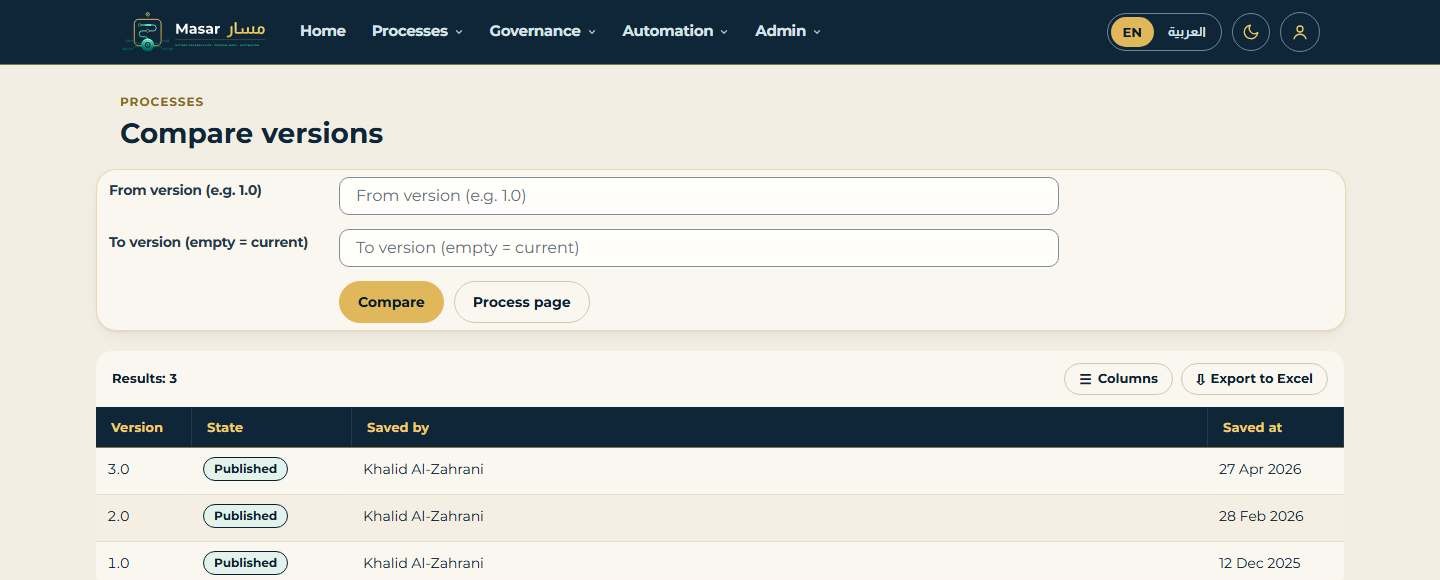
Figure 4 - The versions of a process with their state, who saved them and when
The change log lists every event with Date, Version, Event, Comment and User, newest first. The versions list shows each saved version with its State, Saved by and Saved at. A full copy (snapshot) of the process is kept for every version.
Table 7 - Change log events
| Event | Written when |
|---|---|
| Created / Imported | The process was created on the New process page / imported from procedure text |
| Saved | Save version was clicked (with the change comment) |
| SubmittedForApproval | Submit for approval was clicked |
| Published / Declined | The owner approved (new whole version) / declined (with the reason) |
| Restored | An earlier version was restored ("Restored from version x") |
| Reviewed / ReviewEdit / ReviewOverdue | The owner answered a review with Reviewed / Edit, or did not answer in time |
| Archived / Unarchived / ArchiveDeclined / UnarchiveDeclined | An archival request was approved or declined |
| AutomationRequested / Automated | Automate with ActiBot was clicked / the K2 workflow was deployed |
| AutomationOutOfDate | A newer version of an automated process was published (chapter 19) |
| DriftFound | Process Discovery found that the real paths differ from the process (chapter 17) |
| Saved (model editor) | The model was saved in the model editor ("Model edited in the BPMN editor") |
4.9 Approval seals
Every approval (Published) and every decline is sealed. The seal records the process, the version, the decision, who decided and when (UTC), together with a fingerprint (SHA-256) of the approved content, and signs this record with a certificate held in the product database. The Approval seals list on the process page shows each seal with Verification:
Table 8 - Approval seal results
| Verification | Meaning |
|---|---|
| Valid | The seal and the approved content are exactly as they were at the decision |
| Altered | The sealed record or the approved content was changed afterwards (for example directly in the database) |
| Not sealed | The signing key could not be used when the decision was made (for example right after the database was moved to another server) |
The seal is a tamper-evident record of the K2 approval, not a legal e-signature. An auditor can get the public certificate from the administrator (SmartObject ProMap_K2_ApprovalSeal, method Certificate).
4.10 Print
Click Print to open the print page. At the top, PDF (English), PDF (Arabic), Word (English) and Word (Arabic) make the business requirements document of the process as a file (section 13.5). Below, it shows the summary, the map, the procedure text and the RACI, ready for the browser's print function (Ctrl+P). The procedure text uses the same layout as the import (section 5.3): one line per activity with its roles in brackets, tasks and notes indented under it.
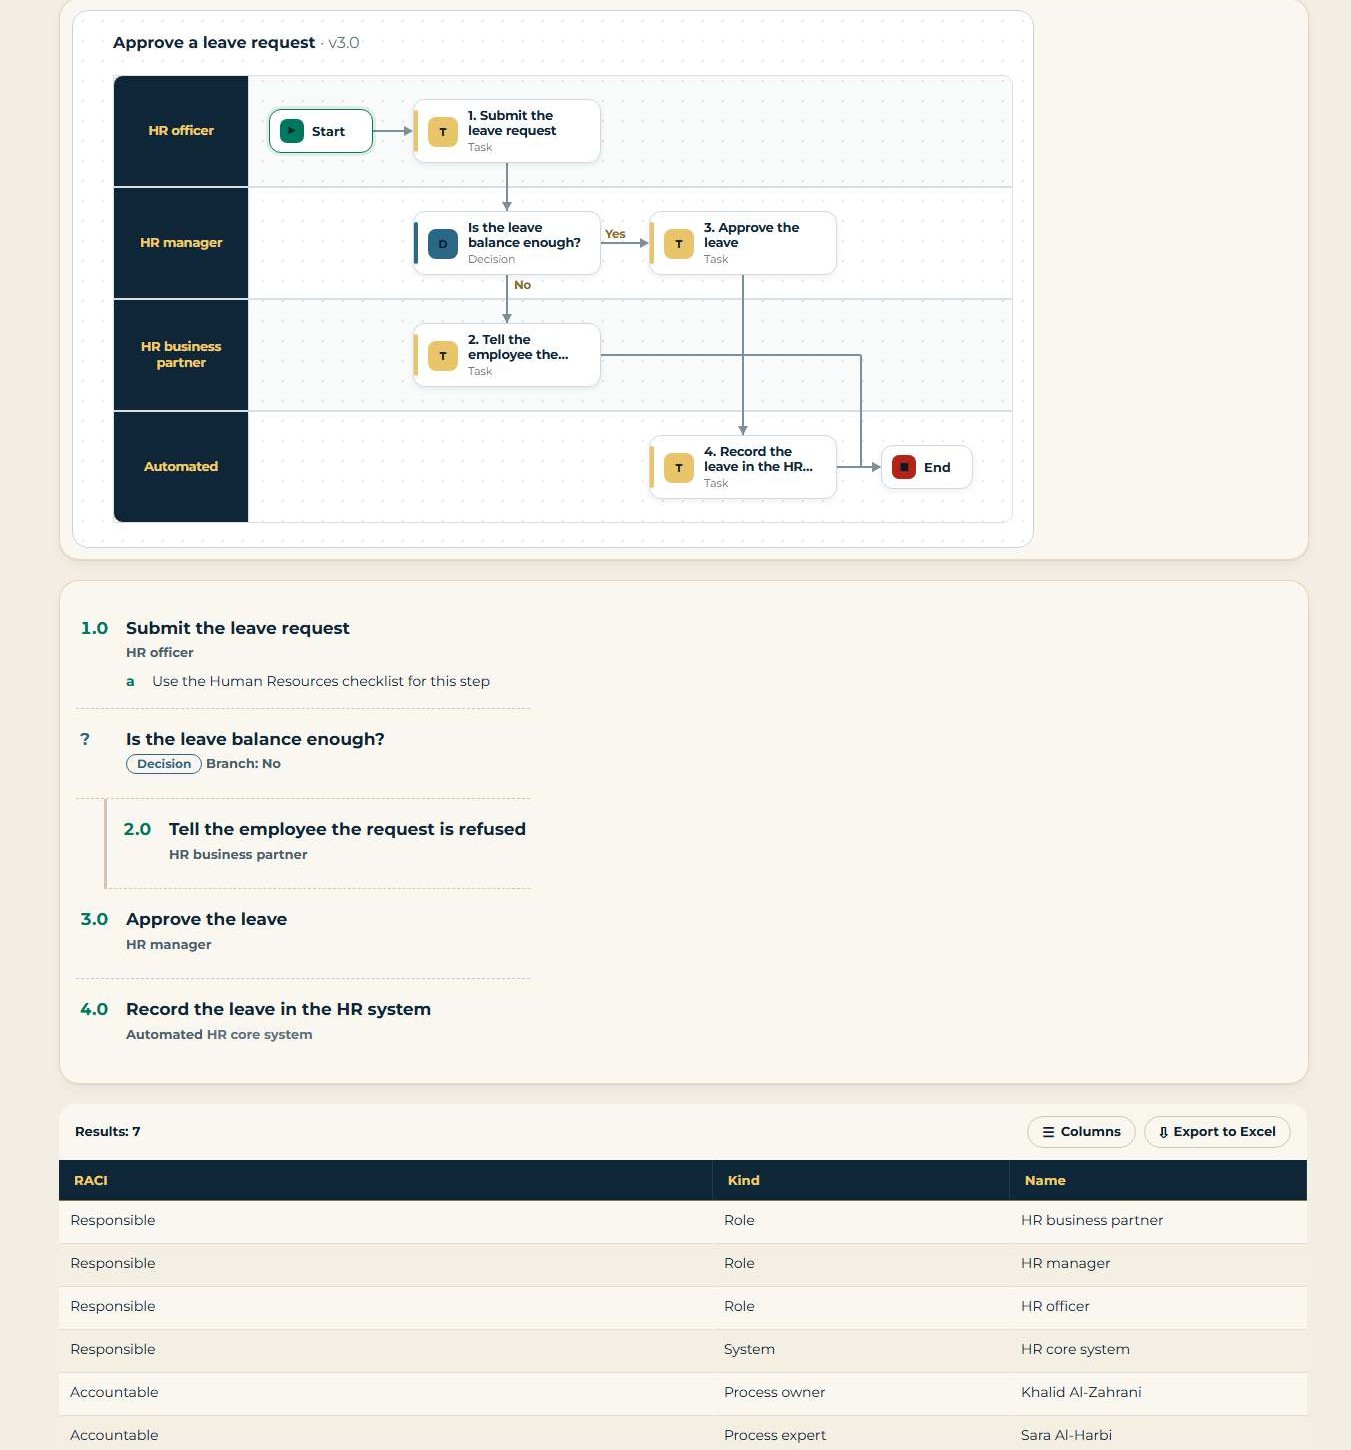
Figure 5 - Print page: the map, the procedure text and RACI
5 Creating and editing a process
5.1 Create a new process
- On the Home page, pick the Group the process belongs to (optional; you can pick it on the next page).
- Click New process.
- Fill Group, Title, Arabic title, Owner (K2 user), Expert (K2 user), Objective and Arabic objective. Type owner and expert as K2 user names, for example K2SQL:user1.
- Click Create. The process is created as version 0.1 in state InProgress, the change log records "Created", and the edit page opens.
Group, title and objective are required; if one is empty the message "Group, title and objective are required" appears. Always fill the owner and the expert: the owner receives the approval task.
5.2 Import from procedure text
If a procedure already exists in text (for example in a Word document or a text export from another process tool), you can paste it and the product builds the activities, decisions, roles, tasks, notes and links for you.
- On the Home page, click Import from text.
- Fill Group, Title, Owner (K2 user) (used as owner and expert) and Objective.
- Paste the procedure into Procedure text (one activity per line, [Role] at the end; tasks indented).
- Click Import. The process is created as version 0.1 (change log "Imported") and the edit page opens so you can check and complete it.
Group, title, objective and text are all required; if one is missing the message "Group, title, objective and text are required" appears.
5.3 Procedure text format
Table 9 - Procedure text format
| Line | Meaning |
|---|---|
| Title [Role][Role] [System] | An activity. The names in square brackets at the end are its roles and systems. A name that matches an existing system becomes a system; any other name is a role. Unknown roles are created automatically. [UNASSIGNED] means no role. |
| DECISION: Question [Role] | A decision. The activity on the next line is its branch (the Yes outcome branches). |
| tab + text | A line that starts with a tab (or two spaces) belongs to the activity above it. Plain text is a task. |
| tab + NOTE: title | A note; the next indented line is the note text. |
| tab + [Web Link] title | A web link; the next indented line is the address (https://...). |
| tab + [Policy] title | An item of type Policy, Form, Image, Guide, Information, Training or Video (write the type in brackets); an optional next indented line is its address. |
| empty line | Ignored. |
Example (each indented line starts with a tab):
Check the receipts
NOTE: Original receipts only
Copies are not accepted
DECISION: Are the receipts complete? [Claims clerk]
Ask for the missing receipts [Claims clerk]
Pay the claim [Finance officer]
[Web Link] Payment policy
This creates three activities and one decision with its branch: if the receipts are not complete, "Ask for the missing receipts" is the branch; otherwise the process continues with "Pay the claim". The roles "Claims clerk" and "Finance officer" are created if they do not exist.
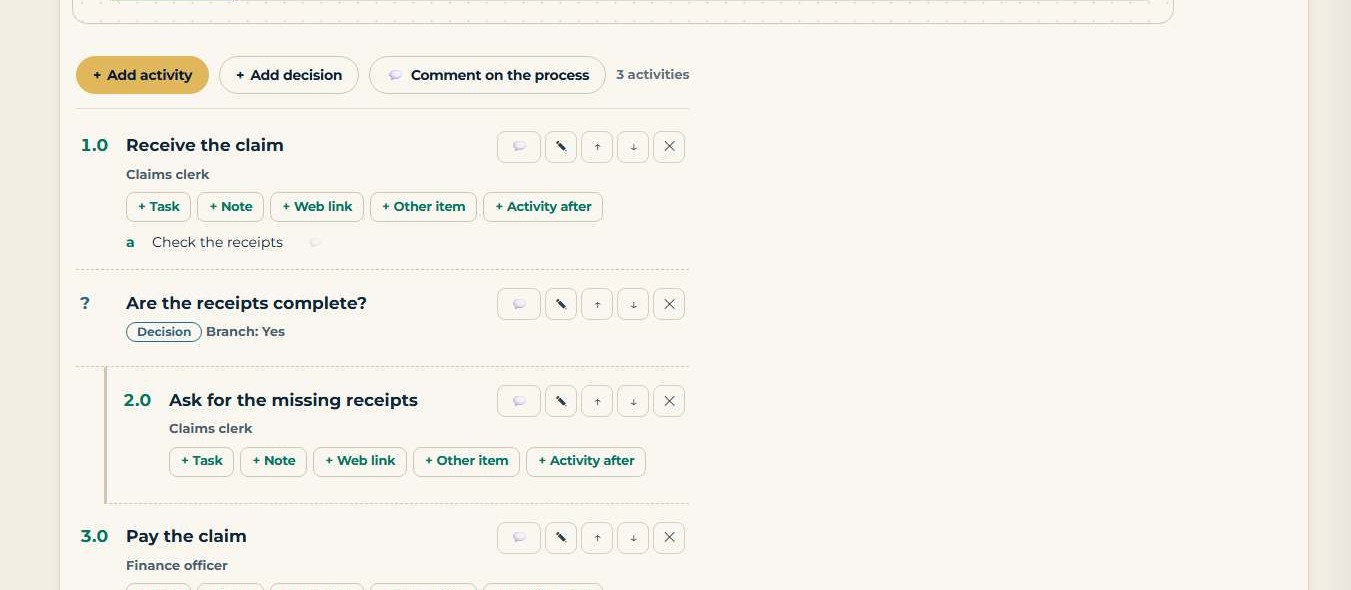
Figure 6 - Procedure of a process imported from text
5.4 The edit page
Open a process and click Edit. The edit page has these panels, from top to bottom: summary, save and restore, procedure list, add an activity, add a decision, change an activity (update, move, roles and systems, delete), tasks and notes list, add a task/note/link, triggers/inputs/outputs/targets list and add one.
Every change on the edit page is stored as soon as you click its button. Save version then records a numbered version of the whole process with your change comment (section 5.11). After adding or changing activities, refresh the browser page (F5) to see the lists updated - the message "Activity added - refresh the page to see it" reminds you.
5.5 Edit the summary
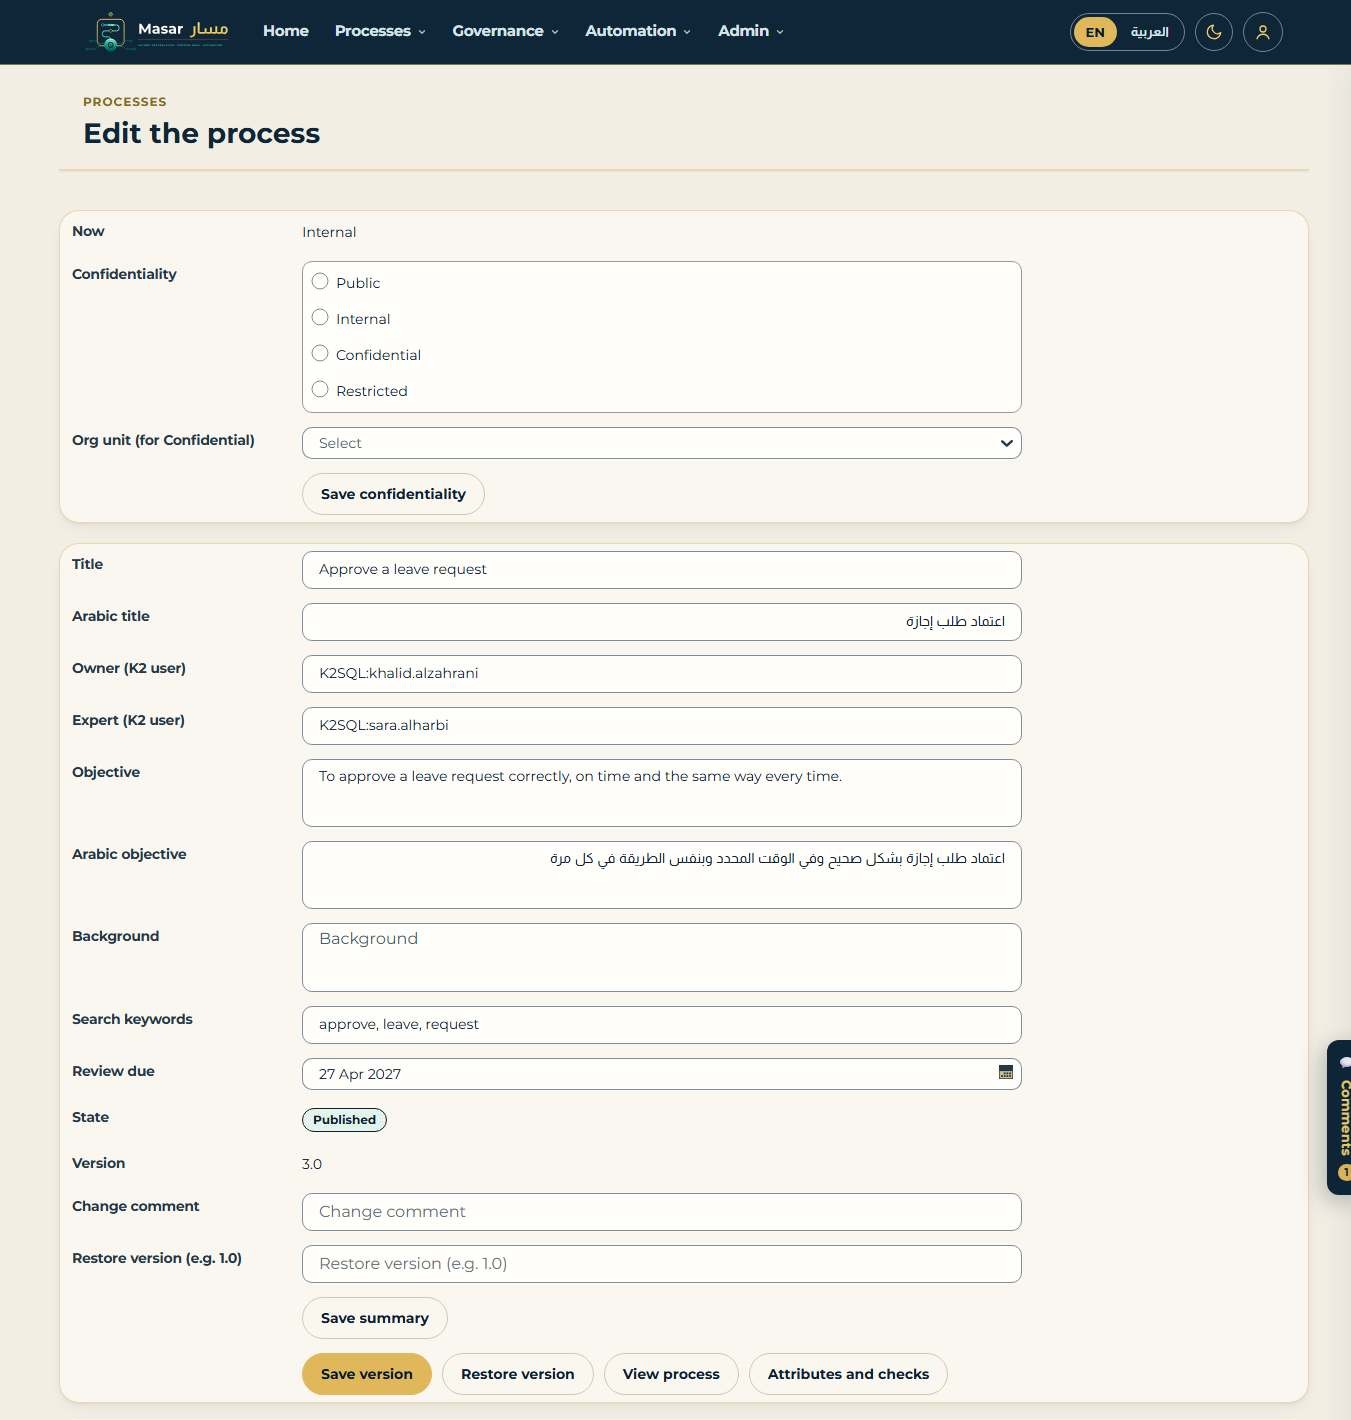
Figure 7 - Edit page: confidentiality, summary, change comment, save and restore buttons
- Change Title, Arabic title, Owner (K2 user), Expert (K2 user), Objective, Arabic objective, Background, Search keywords and Review due as needed. Search keywords are extra words that help search find the process.
- Click Save summary. The message "Summary saved" appears.
View process returns to the process page.
5.6 Add activities
- In the panel Add an activity, type Activity (and Arabic activity).
- Pick its Role.
- In After activity no. (empty = last) type the row position after which the activity goes, counting every row of the procedure list including decisions; leave it empty to add it at the end.
- Click Add activity, then refresh the page.
5.7 Add decisions and branches
A decision is one question with two outcomes, Yes and No. One outcome branches: it runs its branch activity (and the ones after it in the branch) and then the process ends. The other outcome continues with the next activity of the main path.
- In the panel Add a decision, type the Question (and Arabic question), for example "Is the request complete?".
- Choose the Outcome that branches: Yes or No.
- Type the Branch activity, for example "Return the request to the requester". If you leave it empty, the branch is created with the text "@TODO: Enter some text here" for you to change later.
- In After activity no. type the row position after which the decision goes, or leave it empty for the end.
- Click Add decision. The message "Decision and its branch added" appears.
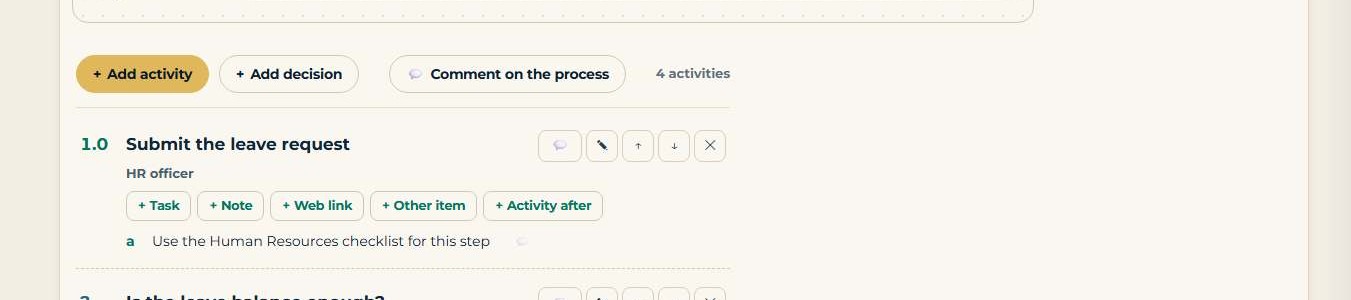
Figure 8 - Edit page: + Add activity and + Add decision above the procedure
5.8 Change an activity: update, move, roles and systems, delete
All changes to an existing activity or decision are made in the panel Change an activity. Start by finding the activity's Id in the procedure list (last column) and typing it in Activity Id (from the list). Since release 2.4 the same changes can also be started from the tools on the step's row in the procedure (chapter 48).
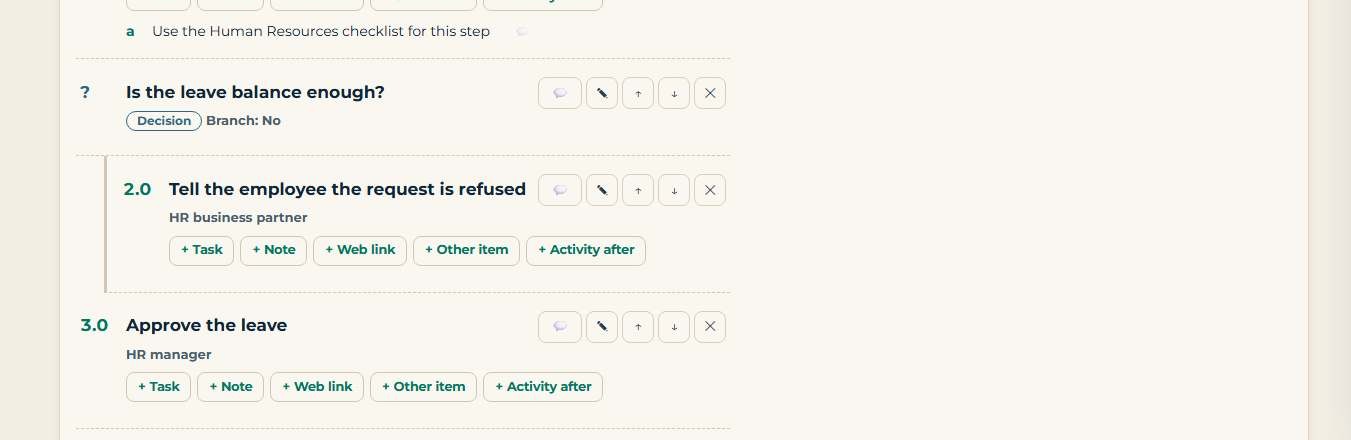
Figure 9 - Edit page: every step has its tools on its row (comment, edit, move up or down, delete)
5.8.1 Update the title and timeframe
- Type the title in Title (current or new): the new title, or the current one if you only change the timeframe. Type a New Arabic title if needed.
- Choose the Timeframe type: Normal, SLA or KPI.
- Type the Active time (minutes) (working time) and the Waiting time (minutes).
- Click Update activity. The message "Activity updated" appears. The Timeframe column of the procedure list shows the type.
The Id and the title are required ("Enter the activity Id and its title (current or new)"). Fields you leave empty keep their values.
5.8.2 Move, add or remove roles and systems, delete
- To move the activity, choose Up or Down in Move and click Move - it swaps places with the row above or below.
- To add a role, pick it in Add role and click Add role; to take it off, pick it and click Remove role ("Role removed"). An activity can have several roles.
- To add a system, pick it in Add system and click Add system; to take it off, pick it and click Remove system ("System removed").
- To delete the activity, click Delete.
5.9 Add tasks, notes and links
- Type the activity's Id in Activity Id (from the list) in the panel Add a task, note or link.
- Choose the Type: Task, Note, WebLink, Policy, Form, Image, Guide, Information, Training or Video.
- Type the Title (and Arabic title), the Details if needed, and the Link (https://) for a web link or document.
- Click Add. The message "Item added" appears.

Figure 10 - Edit page: + Task, + Note, + Web link and + Other item under a step
A web link must start with https:// ("A web link needs an https:// address").
5.10 Add triggers, inputs, outputs and targets
- In the last panel choose the Type: Trigger, Input, Output or Target.
- Type the Text (and Arabic text).
- For an input, type in From / to where it comes from; for an output, the process it goes to. For a target, type the Measure.
- Click Add.
5.11 Save a version with a comment
- Type what you changed in Change comment, for example "Added the approval step".
- Click Save version. The version number goes up by 0.1 and the message shows the new version, for example "Version 0.3".
A copy of the whole process is kept for the new version and the change log records "Saved" with your comment. Once a process has been published, a change comment is required: without it the message "A change comment is required for a process that has been published" appears (Company setting Editing.RequireCommentOnPublished). Saving a published process puts it back to InProgress; the Published version field still shows the version that was last approved.
5.12 Version numbering
Table 10 - How version numbers change
| Action | Version before | Version after | State after |
|---|---|---|---|
| Create or import | - | 0.1 | InProgress |
| Save version | 0.1 | 0.2 (then 0.3 ...) | InProgress |
| Submit for approval | 0.3 | 0.3 (unchanged) | AwaitingApproval |
| Approve (publish) | 0.3 | 1.0 | Published |
| Decline | 0.3 | 0.3 (unchanged) | InProgress |
| Save version after publishing | 1.0 | 1.1, 1.2 ... | InProgress |
| Next approval | 1.2 | 2.0 | Published |
| Restore an earlier version | 1.2 | 1.3 | InProgress |
Minor numbers count on past nine: after 0.9 comes 0.10. Publishing always moves to the next whole number.
5.13 Restore an earlier version
Every saved and published version is kept as a full snapshot. Restoring a version makes its content the working copy again and saves it as a new minor version with the comment "Restored from version x"; nothing is lost, the versions in between stay in the list.
- On the process page, find the version you want in the versions list, for example 1.0.
- Click Edit and type that number in Restore version (e.g. 1.0).
- Click Restore version. The message "New version x.y" shows the new working version: for example, restoring 0.1 when the process is at 0.2 gives 0.3.
If the field is empty the message "Type a version number from the versions list" appears; a number that is not in the list gives "Version not found". A process that is awaiting approval cannot be restored. The restored content is published only after it is submitted and approved like any other version.
6 Approval and publishing
6.1 Submit for approval
- Make sure the process is complete and you have saved a version with a change comment.
- On the process page, click Submit for approval. The message "The process was sent to its owner for approval" appears.
- The state changes to AwaitingApproval, the change log records "SubmittedForApproval", and the process is locked for editing until the owner decides.
Only a process in state InProgress can be submitted ("Only a process in progress can be submitted"). A process needs at least one activity before approval.
6.2 Approve or decline (the owner)
The owner receives the task Approve process version in My tasks. Clicking it opens the approval task form, which shows the summary (Title, Group, Owner, Objective, State, Version, Published version), the procedure and the tasks and notes.
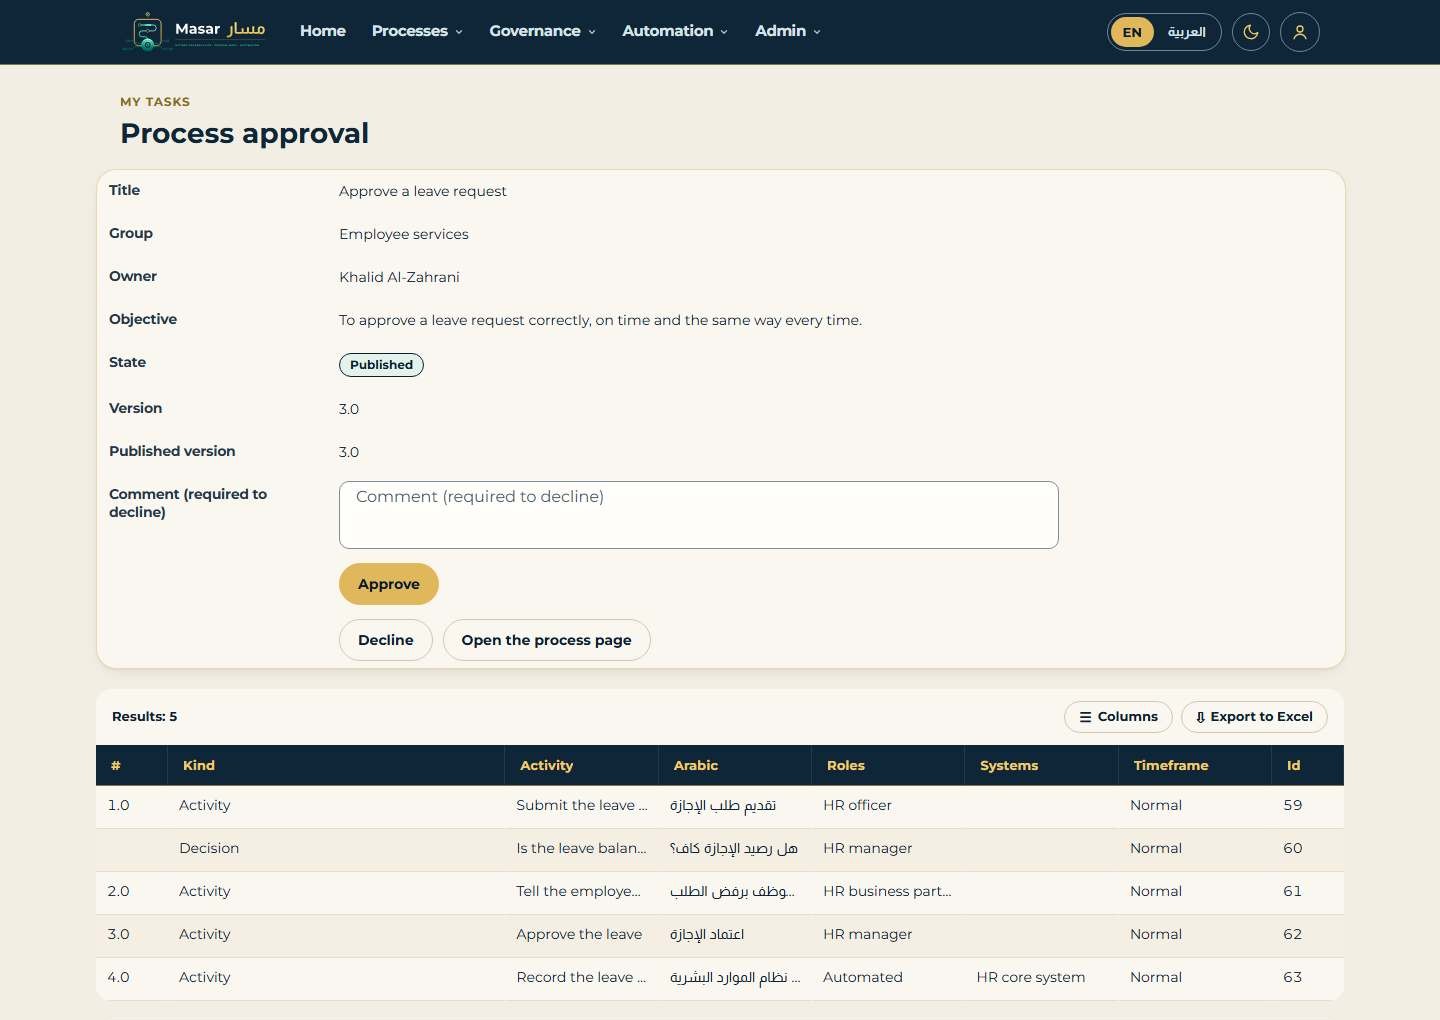
Figure 11 - Approval task: Process approval
- Read the procedure on the form, or click Open the process page to see the map and everything else.
- To approve, optionally type a Comment (required to decline) and click Approve. The message "The version was approved and published" appears.
- To decline, type why in Comment (required to decline) and click Decline. The message "The process was returned to its author" appears. Without a comment the form shows "Write why you decline".
A declined process goes back to InProgress with the same version number; the change log records "Declined" with your reason so the author knows what to change.
6.3 What publishing does
- The whole process is approved and published as one version - not individual changes.
- The version moves to the next whole number (0.3 becomes 1.0, 1.2 becomes 2.0) and Published version shows it.
- The state becomes Published and a snapshot of the published version is kept.
- Review due is set to today plus the review frequency in Company settings (Review.DefaultMonths, 12 months by default), and any open review of the process is closed (outcome "Republished").
- The change log records "Published" with the owner's comment, and a "Published" event is written to the message board for the other parts and the reports.
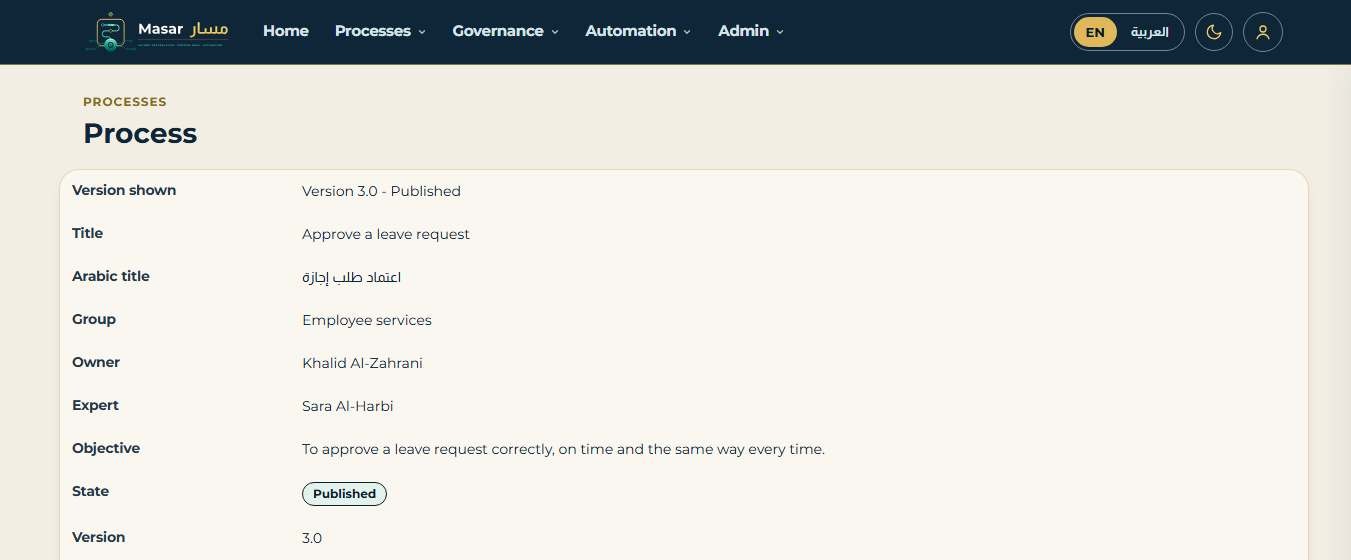
Figure 12 - Process page after approval: state Published, version 3.0, review date set (27 Apr 2027)
7 Reviews
Every published process has a review date. A review asks the owner to confirm that the process is still correct, or to change it.
7.1 Start a review
- Open the published process and click Start review. The message "The review was sent to the process owner" appears.
- The owner receives the task Review the process.
Only a published process is reviewed ("Only a published process is reviewed").
7.2 Answer a review (the owner)
The task says: "The review date of this process has come. Choose Reviewed if it is still correct (the next review date is set from Company settings), or Edit to change it and publish a new version."
Table 11 - Review outcomes
| Action | What happens |
|---|---|
| Reviewed | Review due becomes today plus Review.DefaultMonths (12 months by default). The change log records "Reviewed". |
| Edit | The change log records "ReviewEdit". Change the process, save a version and submit it for approval. When the new version is published, Review due is set again from Review.DefaultMonths. |
| No answer in time | After Review.EscalateDays (14 days by default) the task is closed as overdue. The change log records "ReviewOverdue" and a "ReviewOverdue" event goes to the message board and the reports. |
8 Feedback
8.1 Send feedback
- On the process page, type your comment in Feedback.
- Optionally pick a Rating from 1 (poor) to 5 (very good).
- Click Send. The message "Your feedback was sent" appears and the feedback shows in the feedback list.
The Rating in the process summary is the average of all ratings. If the feedback box is empty, the message "Write your feedback first" appears.
8.2 Ask for a response
- Type your comment in Feedback.
- Click Send and ask for a response. The message "Your feedback was sent to the process owner for a response" appears.
8.3 Answer feedback (the owner)
The owner receives the task Answer the feedback: "A user gave feedback on your process and asked for a response. Open the process, act on the feedback, then choose Resolved or Not applicable."
Table 12 - Feedback outcomes
| Action | What happens |
|---|---|
| Resolved | A reply "Resolved by the process owner" is added under the feedback and the feedback is marked resolved. |
| Not applicable | A reply "Not applicable" is added and the feedback is marked resolved. |
| No answer in time | After Feedback.ResponseDays (5 days by default) the task is closed as overdue; the audit records it and a "FeedbackOverdue" event goes to the message board. |
The feedback list shows Date, User (marked "Process Owner" or "Process Expert" when they write), Activity, Feedback, Rating and Resolved.
9 Archiving and restoring
9.1 Archive a process
- Open the process and click Archive. The message "The archival request was sent for approval" appears.
- The group champion of the process's group (or the process owner when the group has no champion) receives the task Approve archival.
- The approver clicks Approve to archive the process or Decline to keep it.
When approved, the state becomes Archived and the change log records "Archived". An archived process no longer appears in the group lists, in search or in the Home lists; it is listed in the Archived processes report. When declined, the change log records "ArchiveDeclined" and nothing else changes.
A process that is awaiting approval or already archived cannot be archived ("This process cannot be archived now").
9.2 Restore an archived process (unarchive)
Archived processes are hidden from the lists, so a restore is requested from Company settings (usually by the administrator):
- Open Company settings from the Home page and go to the panel Restore an archived process.
- Pick the process in Archived process.
- Click Request restore. The message "The restore request was sent for approval" appears (without a process: "Pick a process").
- The group champion (or the owner) receives Approve archival and approves or declines.
Unarchiving uses the same workflow and the same approver. When approved, the process returns to Published if it had a published version, otherwise to InProgress; the change log records "Unarchived".
10 Automate with ActiBot
A published process can become a running K2 workflow on your own K2 server without anyone building it by hand. You complete one request in Masar: who does each step, the data the workflow collects, the decision rules, deadlines and escalations, the systems it talks to, the test users and, if it should start by itself, a schedule. When nothing is missing, the request is e-mailed to ActiBot (Company setting ActiBot.RequestEmail) with three attachments. ActiBot needs nothing else from you: it builds the workflow, tests every path and deploys it, and the status comes back into the process.
10.1 Start a request
- Open the published process and click Automate with ActiBot.
- The task Complete the automation request is created for you and the request form opens. The change log records "AutomationRequested" with the proposed K2 workflow name, for example PM_DEMO0004.
Only a published process with at least one activity can be automated ("Only a published process can be automated"). The form shows the Process, Version, Proposed workflow name and State at the top.
10.2 Complete the request
Table 13 - The panels of the request form
| Panel | What you enter |
|---|---|
| Request | Why automate, expected benefit, Priority (Low, Normal, High, Urgent), Target go-live date, Business owner (K2 user), UAT approver (K2 user) and Your e-mail for questions. Click Save details. |
| Still missing before sending | A live list of what stops the request: step and what is missing (for example a role without a K2 recipient, a decision without a rule, a system step without its integration, a role without a test user, request details not filled). It must be empty before the request can go. |
| Test users per role | For every role, a K2 user ActiBot uses to test the workflow: Role, Test user (K2 user), Save test user. A later request takes them from the last request of the same process. |
| Data the workflow collects | Field Id (empty = new), Field name, Arabic name, Type (Text, Number, Decimal, Date, YesNo, List, File, User), Required, List values (separated by ;), Personal data (PDPL) and Notes; Save field or Remove field. Then who enters a field: Activity Id, Field name and Access (Enter, Edit, View), Save access. |
| Decision rules | For each decision: Decision Id, Rule in words (Yes when ...), and optionally the Field, Operator (=, <>, >, >=, <, <=, contains), Compared with (value or field) and Yes means. Save rule. |
| Deadlines, notices and integrations | Per activity: Deadline (hours), Escalate to (K2 user, role or "manager"), Notify on start, Notify when done, and for a system step the System action (Read, Create, Update, Delete, Notify), Data sent to the system and Data back. Identity check or e-signature step: None, Nafath or E-signature, with the customer tool or SmartObjects if known. Only a step marked here carries a placeholder in the request; ActiBot then uses the customer's own Nafath SmartObjects or e-signature tool in the automated workflow. Save automation details. |
| Scheduled start | For a process that starts by itself: Start the workflow every (Minutes, Hours, Daily, Weekly, Monthly), Every (number), First run and On; Save schedule. Next run shows when it starts next. |
10.3 Send the request
- When Still missing before sending is empty, click Send to ActiBot. The message says "If the request is complete it is sent to ActiBot; otherwise the task comes back to you with the list of what is missing".
- The workflow runs the readiness check again. If anything is missing, the task Complete the automation request comes back to you.
- If the request is complete, the product builds the ActiBot request and e-mails it with three attachments: the request PDF (the BRD of the process with all automation details), the request JSON (format ActiBot.Request/1, with the BPMN model, the procedure text, the test scenarios per path and a SHA-256 fingerprint) and the BPMN 2.0 file. The send is recorded and the request state becomes Sent.
- To stop, click Cancel request; the request state becomes Cancelled.
10.4 What ActiBot does with it
ActiBot builds the K2 workflow from the request in the K2 category of Company setting Link.WorkflowCategory, gives each task to the K2 recipient of its role, applies the data fields, decision rules, deadlines, escalations and notices, and tests every path with your test users before it deploys the workflow. For a schedule it also deploys a small starter workflow (<workflow>_Schedule) that starts the process at the times you set.
10.5 Status back and automated activities
ActiBot writes the status back on the Automation form: Request #, State (Building, Passed, Deployed or Failed), K2 workflow version and Detail, then Save status ("Automation status saved"). The list Automation requests shows #, Process, Version, Workflow, State, K2 version, Steps and Requested by.
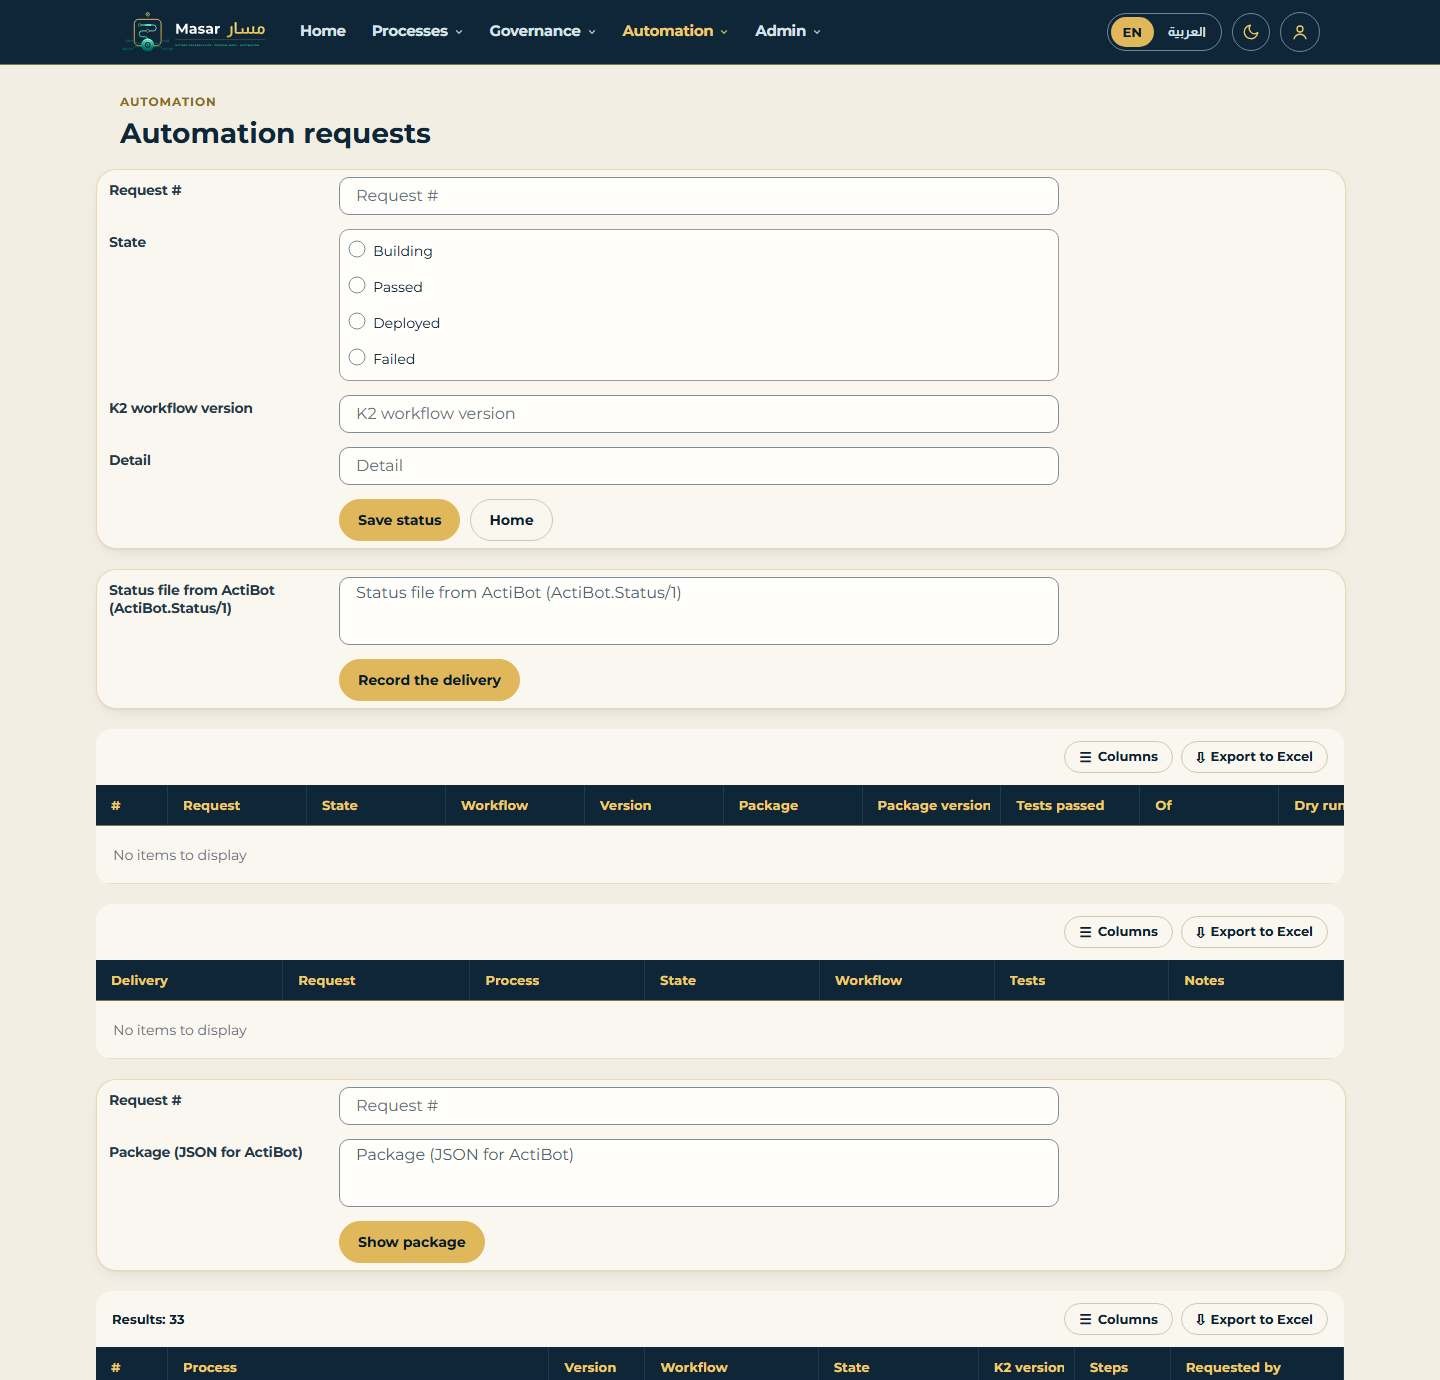
Figure 13 - Automation requests: status, delivery from ActiBot and package
- When the state is Deployed, every activity that became a task, decision, system or e-mail step is marked automated with the K2 workflow name, and the change log records "Automated" with the K2 version.
- When the published process changes later, the governance page lists it under Automation out of date (chapter 19) so a new request can be sent; running workflow instances stay on the version they started on.
- Tested: the demo leave process was requested and e-mailed, ActiBot delivered the workflow PM_DEMO0004, both paths passed, the status Deployed came back and the activities were marked automated.
11 My profile and role requests
Click My profile on the Home page. The page shows your preferences, a role request panel, My roles (Role, Arabic, Type, Department, Since) and My processes.
11.1 Ask to join or leave a role
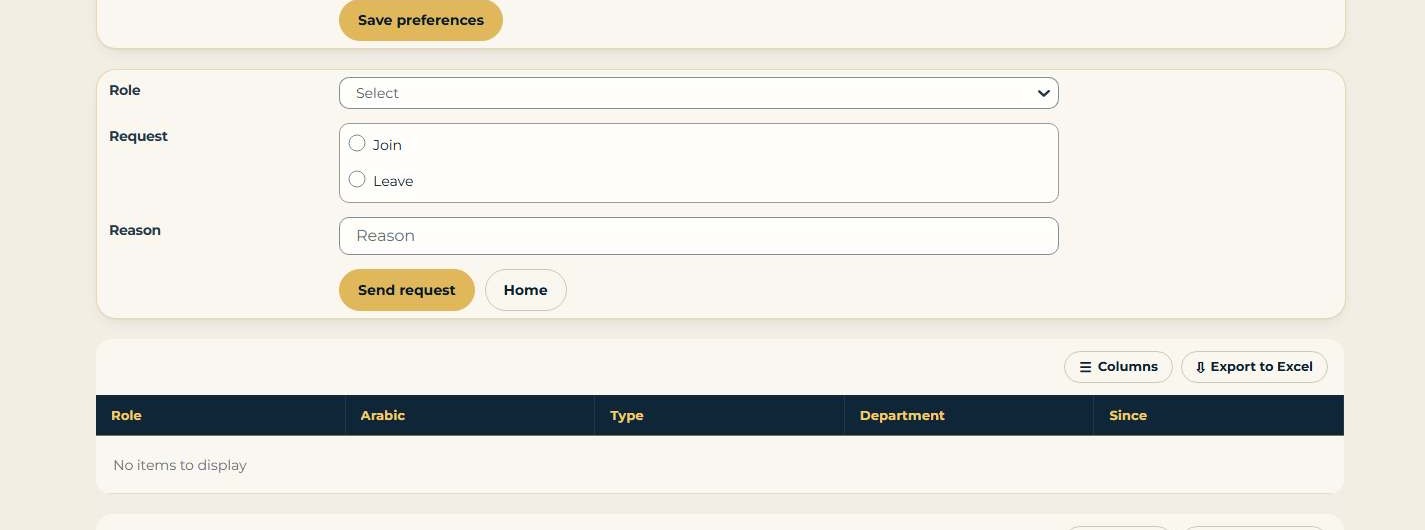
Figure 14 - My profile: role request and my roles
- Pick the Role you want to join or leave.
- Choose Join or Leave in Request.
- Type a Reason.
- Click Send request. The message "Your role request was sent for approval" appears.
The role approver (Company setting Admin.RoleApprover) receives the task Approve role change. Approve adds you to the role (or removes you); Decline keeps the members as they are. Role and Join/Leave are required ("Pick a role and join or leave"). System roles (UNASSIGNED, All Staff, Automated) cannot be requested.
11.2 My preferences
In Profile - my preferences choose your Language (ar or en), Time zone and E-mail, and click Save preferences. Processes I own or am expert for lists your processes. Without a preference the company defaults are used (Company.DefaultLanguage, Company.TimeZone).
12 Reports and dashboard
Reports run on your on-premises Power BI Report Server, in the folder /ProMap_K2: 44 paginated reports and four Power BI dashboards in release 2.6. The Reports button on the Home page opens the form Masar - reports, which shows the dashboard and the review-dates report inside K2. All reports read the same SQL Server database as the forms, so they are always up to date.
12.1 Paginated reports
Table 14 - The first paginated reports (chapter 31 lists the others)
| Report | What it shows |
|---|---|
| Process list | Every process by group, state and owner, with counters (processes, published, in progress) and a chart by state |
| Change log | Every change in a date range you choose, with a chart of changes by type |
| Review dates | Published processes by review date, overdue first, with counters Overdue and Due in 30 days and the days left |
| Unpublished changes | Processes with saved changes that are not yet published |
| Role responsibilities | The activities each role performs, in published and draft processes, with the top 15 roles in a chart |
| Process ownership | Who owns and who is expert for each process |
| Feedback | Feedback given on processes, with ratings and whether it was resolved |
| Archived processes | Processes that were archived |
| Automation status | Processes sent to K2 and where they are (Requested, Packaged, Building, Passed, Deployed, Failed, Rejected) |
| Systems in processes | Which systems are used by which activities and processes |
| Suggestions | Suggested processes by state and source (user, list import, Discovery) |
| Checklists | Checklist runs per process: open, overdue, done, hours to done |
| Acknowledgements | Who has and has not acknowledged the published version of each process |
| Costs | Cost per run and per year of each process, from activity times, role costs and annual volume |
| View analytics | Views and viewers of each process over time |
| Process Discovery | Discovery runs: cases, variants, conformance, average time and findings |
12.2 Power BI dashboard
Table 15 - Dashboard pages
| Page | Shows |
|---|---|
| Overview | Tiles: Processes, Published, Overdue reviews, Automated in K2; processes by department; processes by state |
| Owners and roles | Owners and roles, with a department slicer |
| Changes | Changes per day and by type |
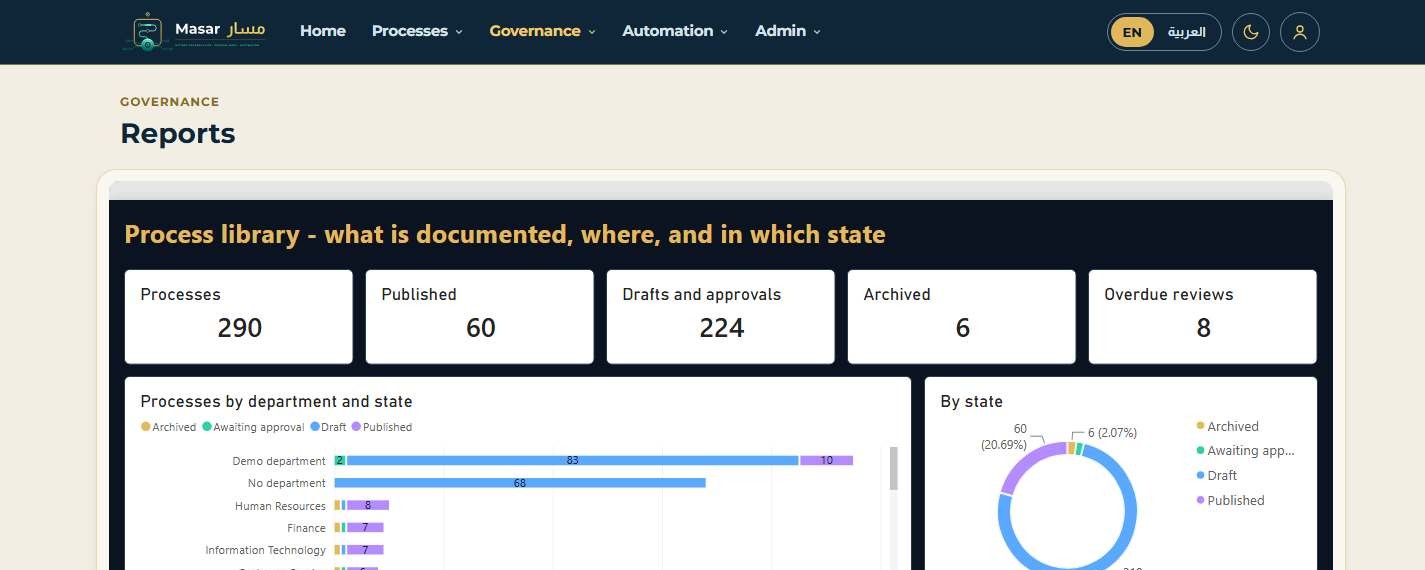
Figure 15 - Dashboard, Process library page (on the Reports page)
The second dashboard, ProMap_K2_Governance, shows the library health: processes, overdue reviews and unpublished changes by group, open and overdue checklists, views per day, conformance from Process Discovery and suggestions by state. It refreshes every hour.
13 Importing and exporting processes
Processes can come in from other tools and go out to other tools and people. All imports are on the page Import from text (Home page button), which has five panels; all exports are on the process page and the print page.
13.1 Import a BPMN 2.0 model
- Open Import from text and go to the panel New process - import BPMN 2.0.
- Pick the Group and type a Title (leave it empty to take the name from the file).
- Open the .bpmn file in a text editor, copy all its text and paste it into BPMN 2.0 model (paste the .bpmn file content).
- Click Import BPMN. The message "Imported" shows the import notes and the process is created as version 0.1.
Tasks become activities, exclusive gateways become decisions with their branch, lanes become roles, and the main path is followed from the start event. Import notes lists anything that was not mapped (for example a parallel gateway or a message event).
13.2 Import a Visio drawing
- In the panel New process - import a Visio page, pick the Group.
- Choose the file in Visio file (.vsdx) and click Show pages. Pages lists every page with its number of shapes and connectors.
- Type the Page number to import and, optionally, a Title (empty = the page name).
- Click Import page. The process is created and the edit page opens.
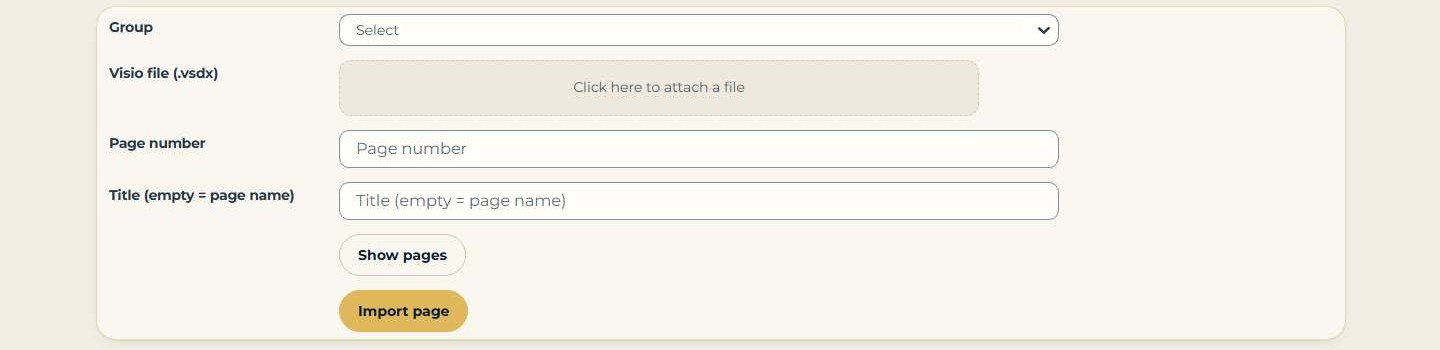
Figure 16 - Import a Visio page: the group, the drawing, the page number and the buttons
The drawing is read on the server (no Visio needed): process shapes become activities, decision shapes decisions, swim lanes roles, and the connectors give the order. Shapes that could not be placed are listed in the import notes.
13.3 Import a Masar package
A package (.promap.json) carries one process with everything in it, for moving a process between two Masar installations. Pick the Group, paste the content of the file into Package (content of the .promap.json file) and click Import package.
13.4 Document an existing K2 workflow
Workflows built in K2 before Masar (or by ActiBot) can be documented as processes, so the library shows what really runs.
- In the panel New process - document a K2 workflow, pick the Group.
- Pick the workflow in K2 workflow. The list shows the K2 workflows of the folders in Company setting Discovery.WorkflowFolders.
- Type a Title or leave it empty for the workflow name, and click Document the workflow.
The product reads the deployed design of the workflow from K2 (read only): every step becomes an activity, a step whose outcomes go different ways becomes a decision with the outcome labels, and technical steps (K2's own Start step, logging steps and "Decide" steps) are left out. The process is associated with the workflow and the change log notes it was documented from K2.

Figure 17 - Document a K2 workflow: pick the workflow
13.5 Downloads from the process page
Table 16 - Downloads
| Button | Where | What you get |
|---|---|---|
| Download BPMN | Map panel | The process as a BPMN 2.0 file (with lanes, gateways and diagram layout) |
| Download map | Map panel | The swim-lane map as an HTML page |
| RACI to Excel | Exports panel | The RACI as a CSV file that opens in Excel |
| Costs to Excel | Exports panel | The cost per activity as a CSV file |
| Process package | Exports panel | The .promap.json package of the process |
| PDF (English) / PDF (Arabic) | Print page | The business requirements document (BRD) of the process as a PDF, in English or in Arabic (right to left, mirrored map) |
| Word (English) / Word (Arabic) | Print page | The same document as a Word (.docx) file to edit |
| Process list to Excel | Governance page | All processes as a CSV file |
After a click, the file appears in the File field of the panel with a download link; click it to save the file.
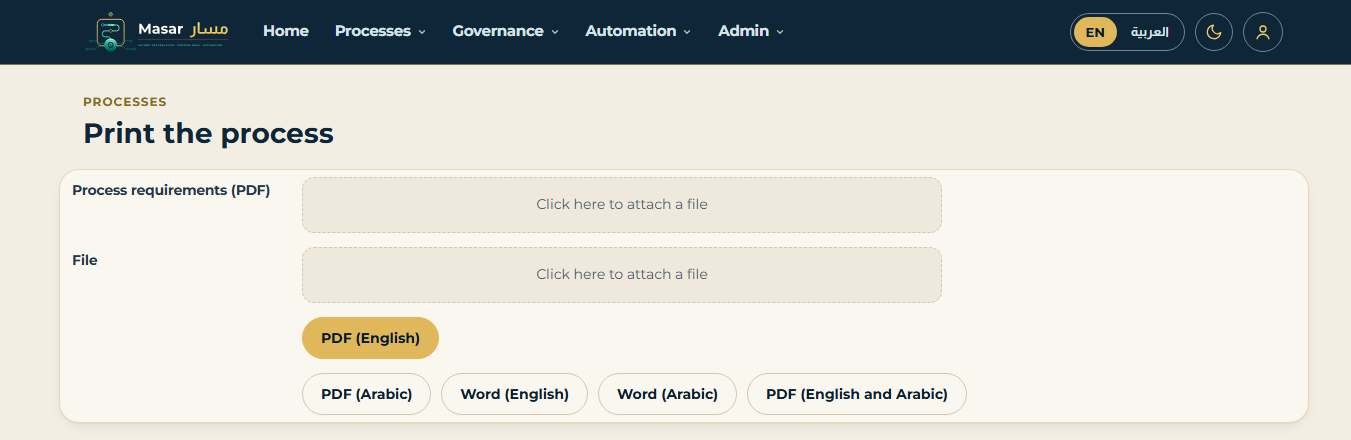
Figure 18 - Print page: the PDF and Word buttons
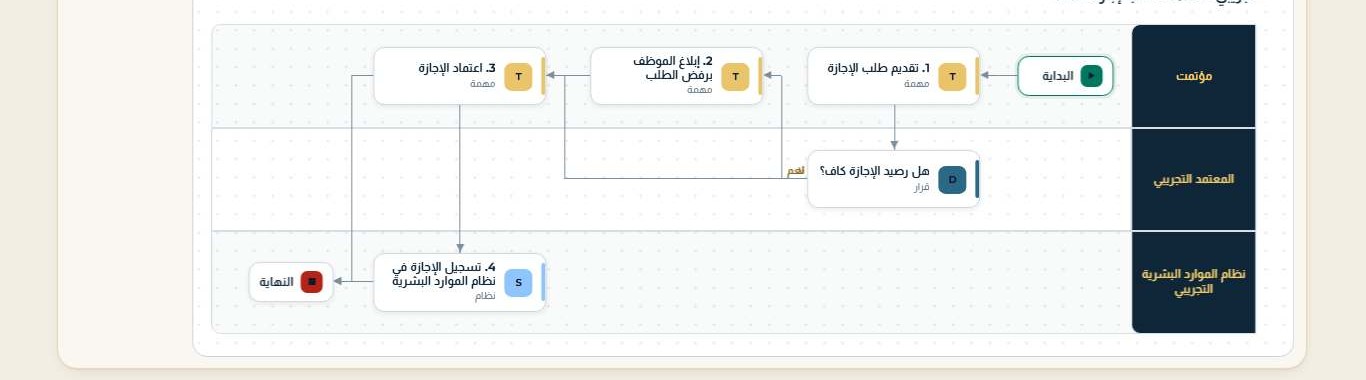
Figure 19 - Print and PDF: the map on paper; in an Arabic PDF the same map is mirrored right to left
14 The BPMN model editor
Besides the edit page, a process can be changed by drawing: the model editor opens the process as a BPMN 2.0 diagram in the browser (a canvas built on bpmn.io). It runs entirely on your K2 server; nothing is loaded from the internet.
- On the process page, click Edit the model (map panel). The page Masar - model editor opens with the diagram: one lane per role, start and end events, tasks and decisions.
- Use the palette on the left: add a task, a gateway (decision) or an event, connect shapes with the arrow tool, double-click a shape to rename it, drag shapes between lanes to change their role, press Delete to remove a shape.
- Type what you changed in Change comment.
- Click Save model. The message "Saved as version x.y" shows the new working version.
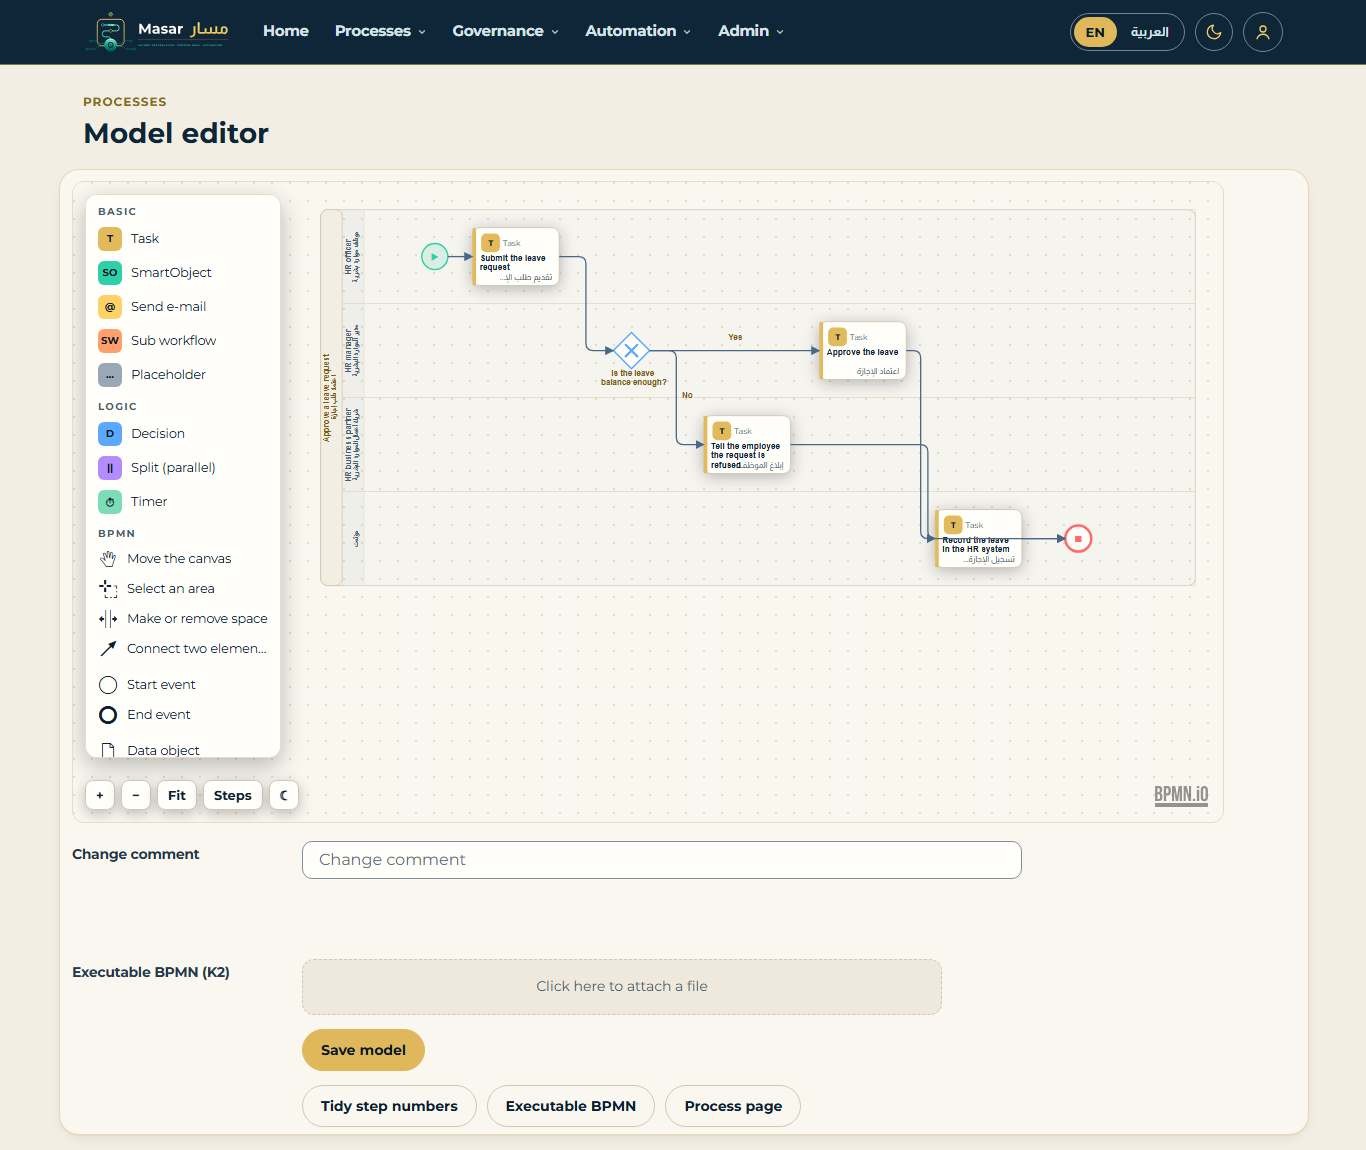
Figure 20 - Model editor: the step palette, the canvas and the model buttons
Saving replaces the activities with the drawing and saves a new minor version, like Save version on the edit page. Everything the drawing cannot carry is kept for every step whose title did not change: the Arabic title, times, tasks, notes and links, systems, data fields, decision rules and automation details. A renamed or new step starts empty; complete it on the edit page.
15 Working together
15.1 Share a process
The share panel of the process page shows the Link of the process page. QR code shows a QR code to scan with a phone; Share by e-mail sends the link to the address in Send to (e-mail) with your Message. Company setting Company.SiteUrl gives the address used in links and QR codes.

Figure 21 - Downloads on the process page: the map as an HTML file and the map buttons
15.2 Who is here, and acknowledging a change
- Also here now shows the other users who have the process open (in the last Presence.Minutes, 10 by default); on the edit page a Notice warns when someone else is editing the same process.
- Views counts how often the process was opened.
- When a new version is published, the stakeholders of the process (its roles' members, owner and expert) see it under Changes to acknowledge on their Home page. Open it and click I have read this version. The panel Acknowledgements on the process page shows who has acknowledged which version.
15.3 My work and preferences
My work on the Home page gathers what waits for you, newest first: drafts to finish, versions awaiting your approval, open and overdue reviews of your processes, feedback to answer, your automation requests that are not finished yet and, since release 2.4, the comment tasks given to you (chapter 49). Your checklists and the changes to acknowledge have their own lists on the Home page. My profile has My preferences: Language, Time zone, E-mail, and the list of processes you own or are expert for.
15.4 Run a process as a checklist
- On the process page (Exports panel), type the K2 user in Run as a checklist: assigned to (K2 user) and a Due date.
- Click Start checklist. The assignee receives the task Work through the checklist with every activity and task of the published version as an item.
- The assignee ticks items on the checklist form (Item Id, Comment, Tick / Untick) and clicks Checklist done. With open items the task comes back; Cancel checklist closes it. Past the due date the checklist is recorded as overdue.
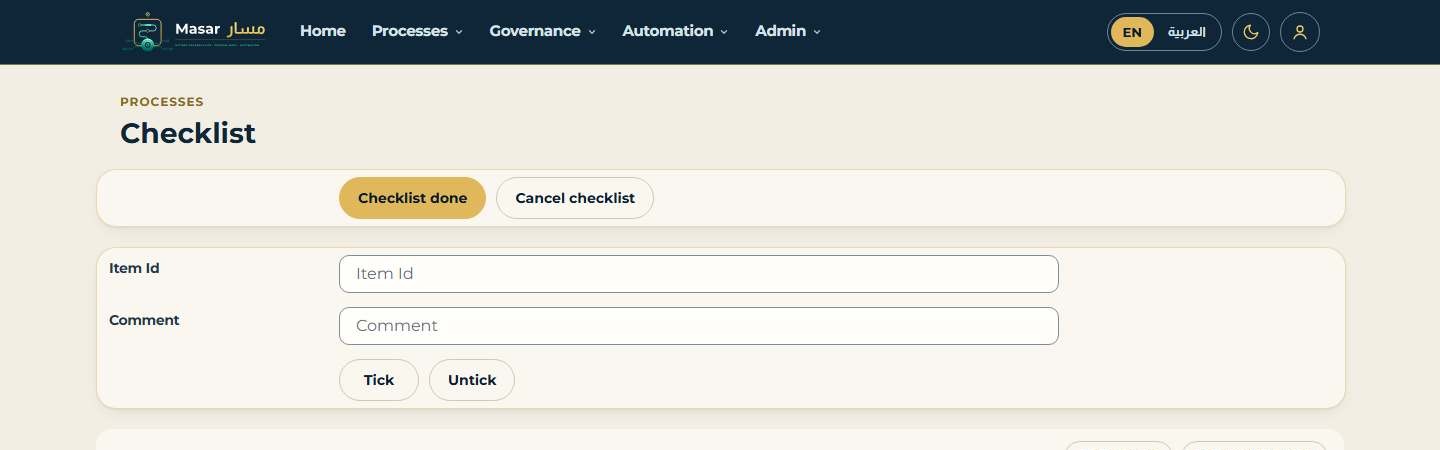
Figure 22 - Checklist page
15.5 Suggest a process
Anyone can suggest a process that should be documented: Home page, Suggest a process, then Group, Suggested process title, Arabic title and Why it should be documented, and Suggest. Many suggestions at once can be pasted as a list (Title,Group,Reason per line, for example from Excel saved as CSV) and imported with Import list. The champion of the group receives Decide on a suggested process: Approve and create the process creates it in the group (version 0.1), Decline closes the suggestion. The list Suggestions shows them all with their state.
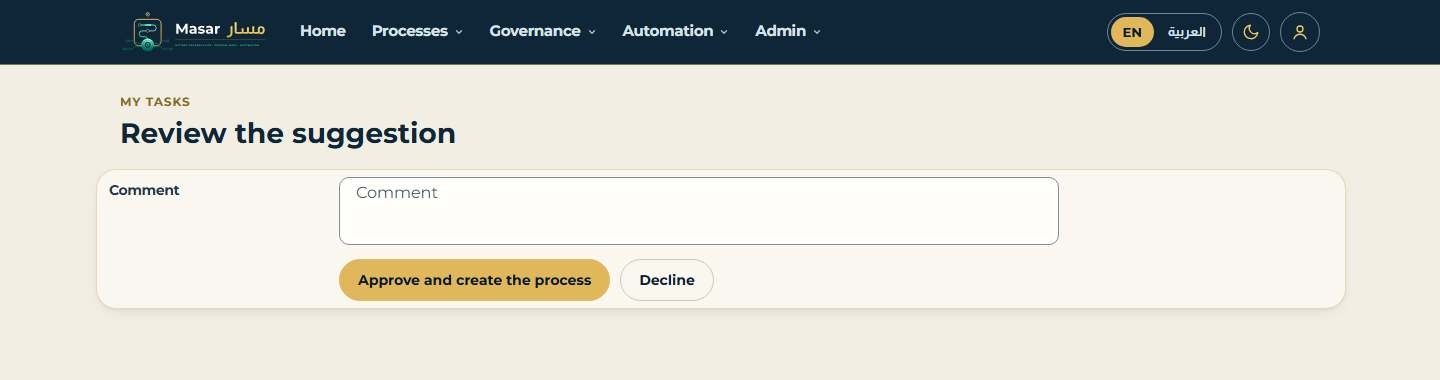
Figure 23 - Task: decide on a suggested process (Review the suggestion)
16 Costs, map overlays and comparisons
16.1 Costs and savings scenarios
Click Costs on the process page. Costs - summary shows Runs per year (save it with Save volume), the Currency, Active hours per run, Elapsed hours per run, Cost per run and Annual cost. Cost per activity shows each activity's roles, active and waiting minutes, hourly cost (from the roles' annual cost and Timeframes.HoursPerDay / DaysPerWeek), cost per run and per year.
To see what a change would save, add a scenario: Scenario name, Volume change %, Time change % (e.g. -60 after automation), Add scenario. The list Scenarios shows the cost now and after, and the annual savings.
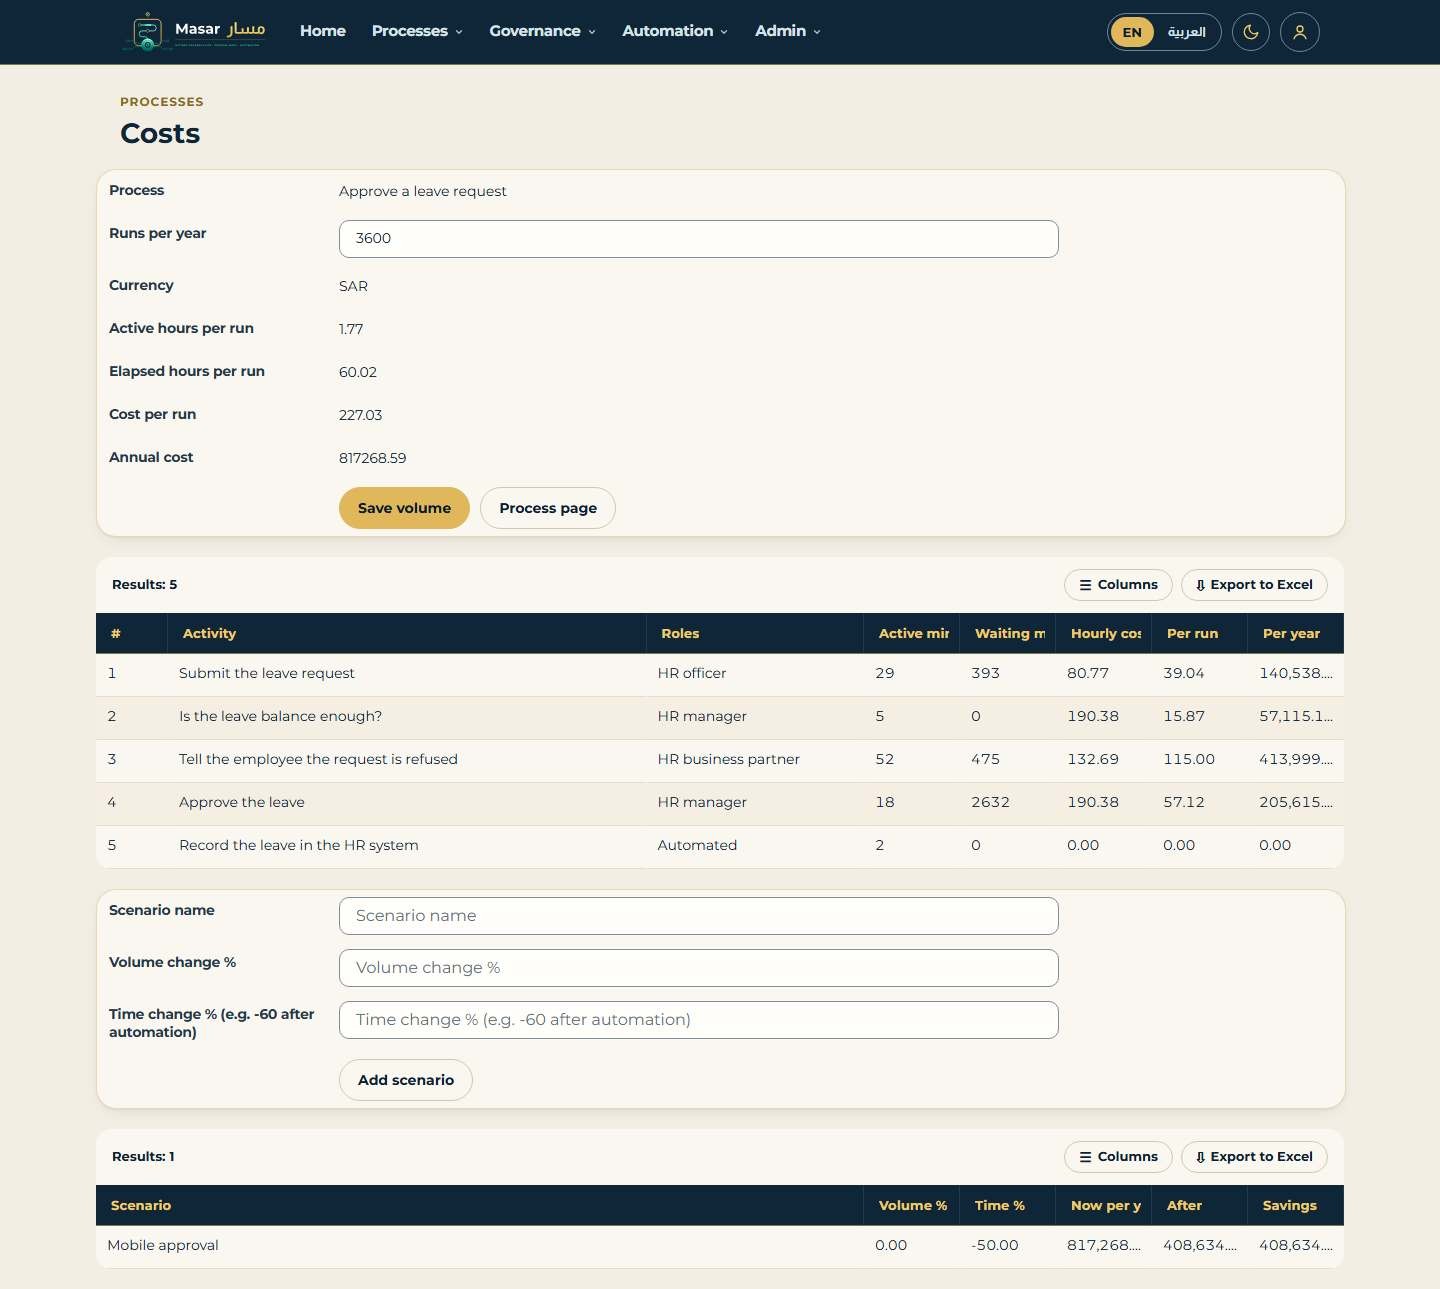
Figure 24 - Costs: summary, cost per activity and scenarios
16.2 Map overlays
Above the map, choose an overlay in Map overlay and click Show overlay. A badge appears on every activity:
Table 17 - Map overlays
| Overlay | Badge on each activity |
|---|---|
| Times | Minutes of work and of waiting, and SLA or KPI when set |
| Cost | Cost per run in the company currency |
| Lean | Flow efficiency (work / (work + wait)) and the waiting minutes; red when the step waits more than three times its work |
| Systems | The systems used |
| Automation | The K2 workflow, when the step is automated |
| Live (Discovery) | From the last Process Discovery run: average real minutes and how often the step ran; red for a bottleneck or a step never done |
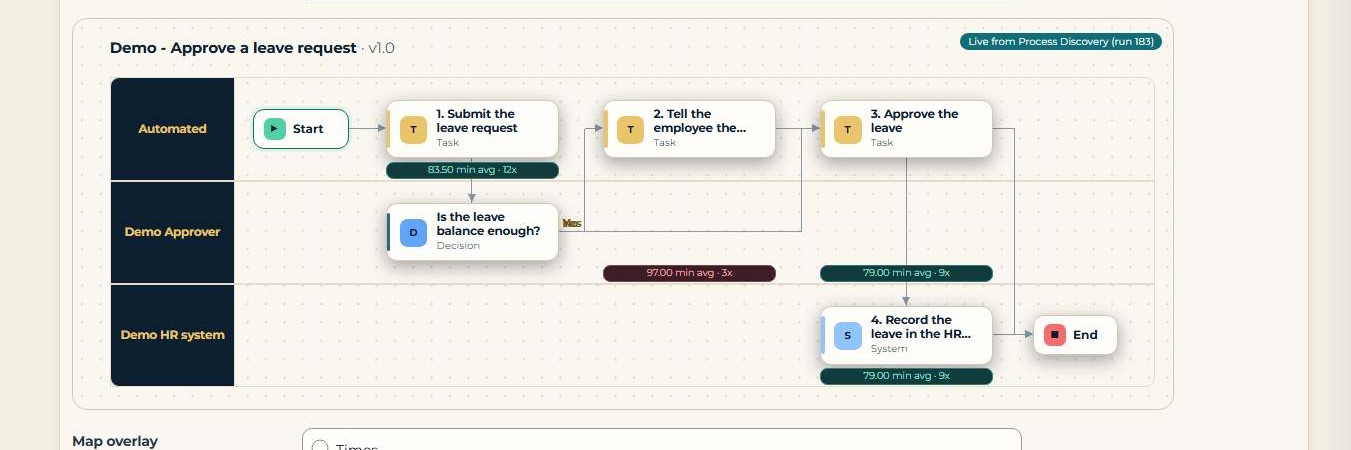
Figure 25 - A map overlay (here Live, from Process Discovery): the timings under each step, lane by lane
16.3 Compare versions
Click Compare versions on the process page (Exports panel). Type From version (e.g. 1.0) and To version (empty = current) and click Compare: Changes lists every activity added, removed or changed between the two versions. Opened without a version, the page compares the last saved version with the current content.
16.4 Compare two processes
On the compare page, type the number of another process in Other process number (#) and click Compare steps. Steps compared lists each step as Same, Only in the first or Only in the second - for example a documented process against the workflow documented from K2 (section 13.4).
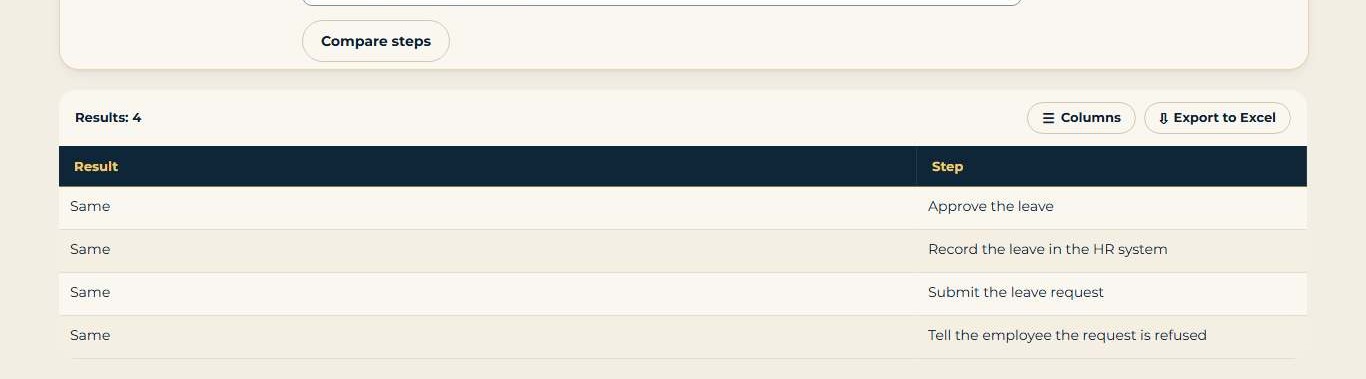
Figure 26 - Steps compared: a process and the workflow documented from K2
17 Process Discovery
Process Discovery compares what really happens with what is documented. It reads the K2 log of the workflow automated from the process (read only), or an event log you paste, and shows the paths taken, how long each step took, the bottlenecks and how many cases followed the documented process.
17.1 Mine the K2 log
- Click Discovery on the process page (Exports panel).
- Click Mine the K2 log now. The panel shows the Findings and Follow the documented process %.
- Read Variants (each path taken, its cases and %, whether it is as documented, average minutes) and Steps (each activity: times done, average and maximum minutes, documented minutes, bottleneck).
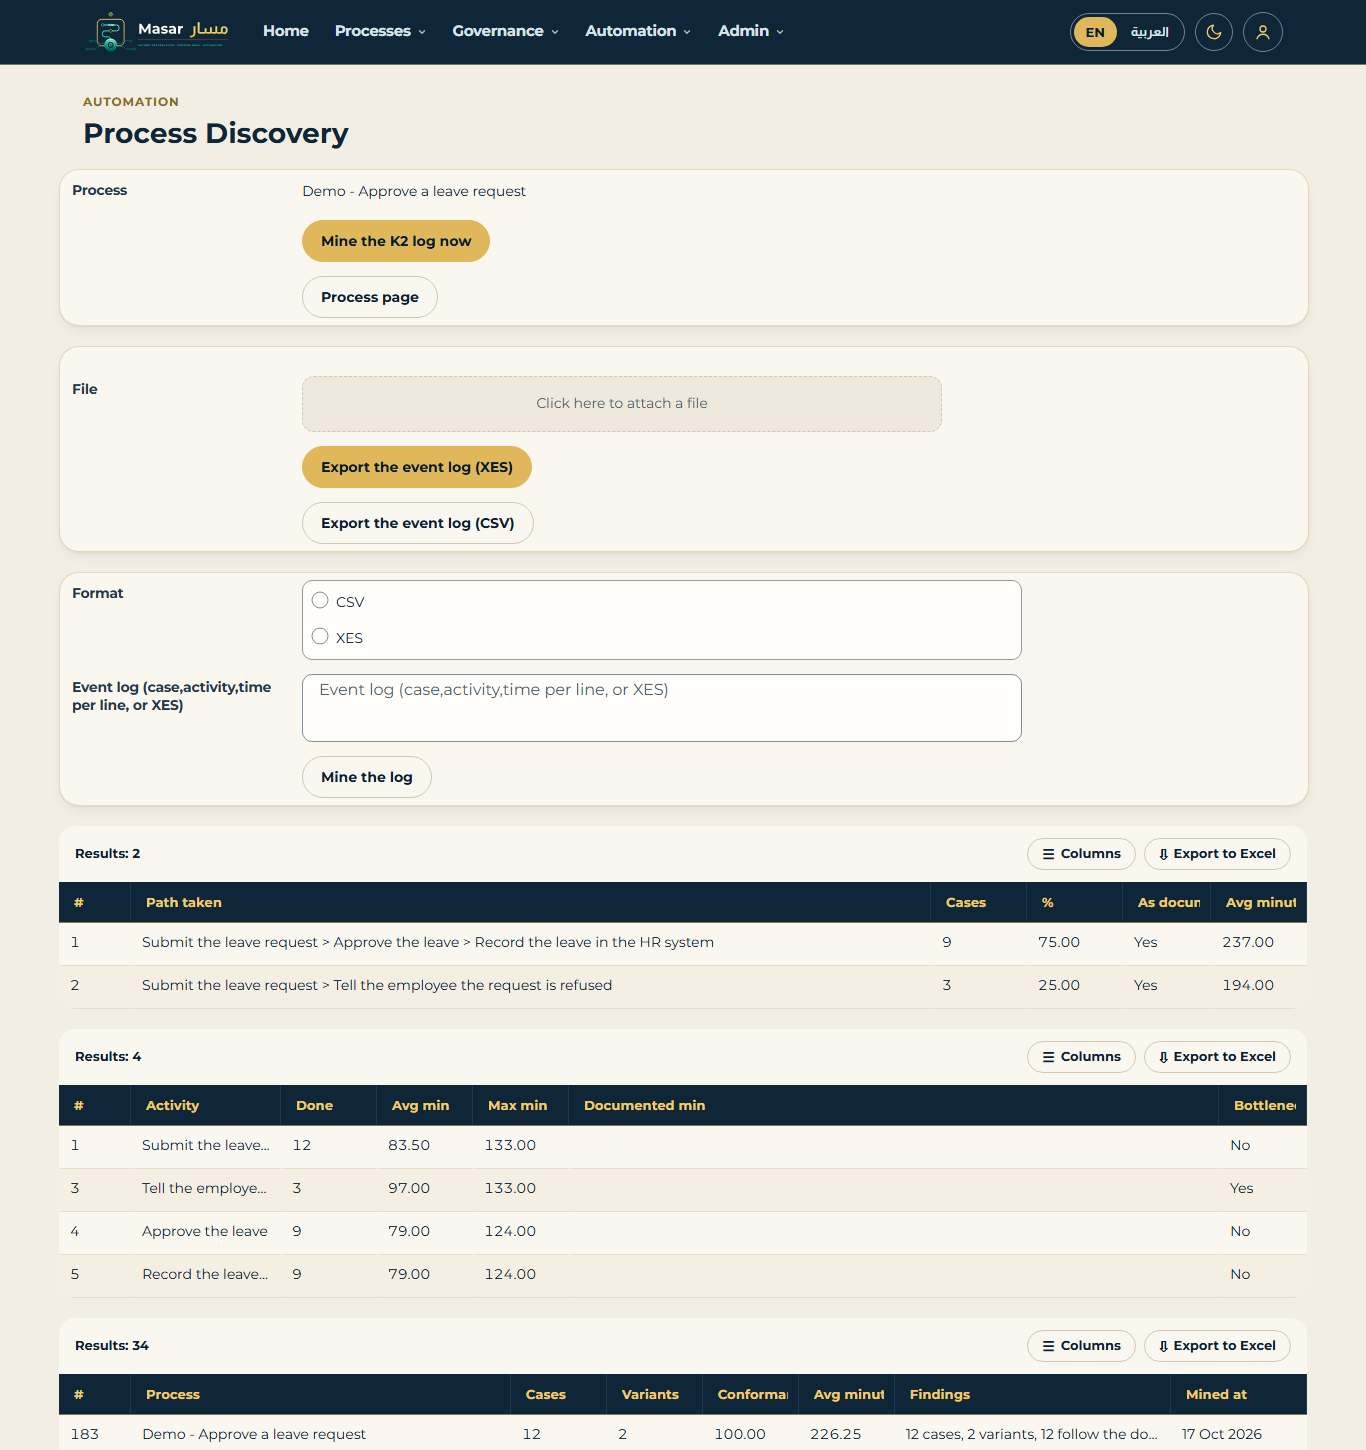
Figure 27 - Process Discovery: findings, variants and steps
A step is a bottleneck when its average time is more than Discovery.BottleneckFactor (1.5) times its documented time. A step never done, or a path not documented, is reported in the findings and written to the message board as DriftFound; the change log of the process then shows it. Mining 100,000 cases takes under 30 seconds on a test server.
17.2 Mine an event log (CSV or XES)
Logs from other systems can be mined the same way. In Discovery - mine an event log (CSV or XES), choose the Format and paste the log: CSV with one event per line (case, activity, time, with a header line), or an XES file. Click Mine the log. Activities are matched to the documented steps by title; unknown activities are listed in the findings.
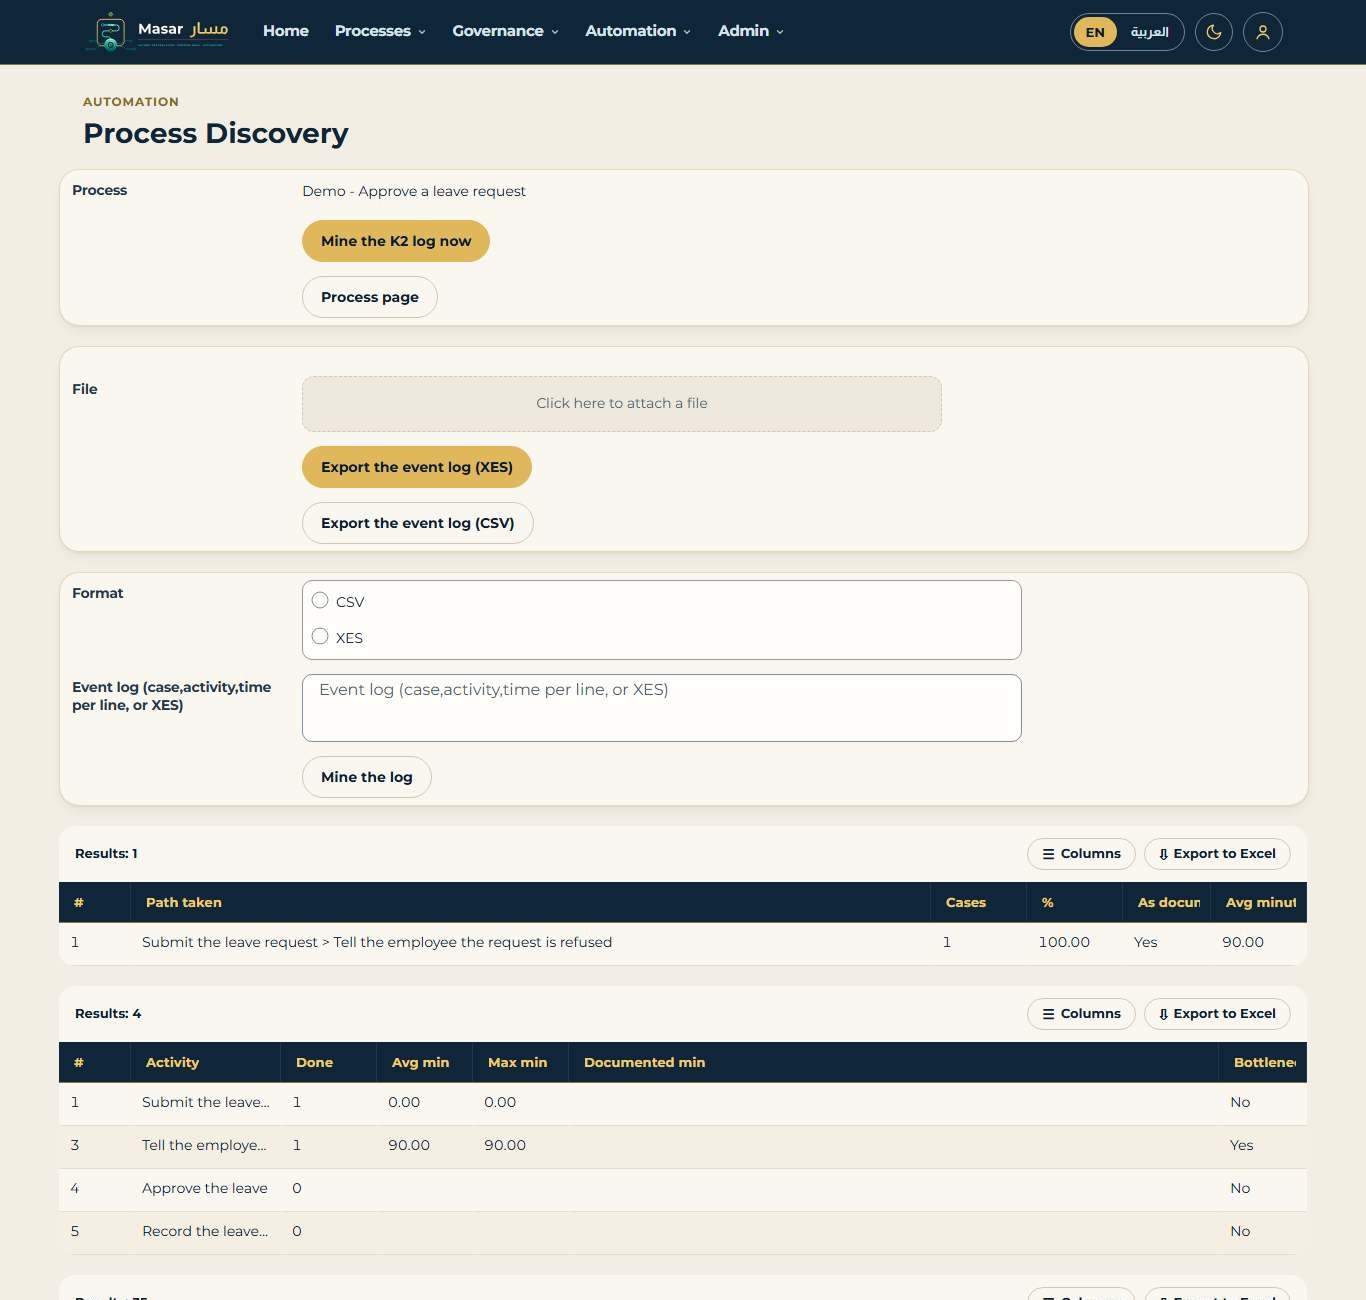
Figure 28 - Discovery from a pasted event log
17.3 Discovery runs
Every run is kept. The list Discovery runs (on the Discovery page and the governance page) shows the process, cases, variants, conformance %, average minutes, findings and when it was mined.
18 Variations, the mini page and embedding
18.1 Variations
A variation is a named copy of a process for a branch, region or product that works slightly differently, linked to the standard process. On the process page, type a Variation name (e.g. Riyadh branch) and click Add variation: a new process is created from the current content, with its own versions and approval. Variations lists the standard process and all its variations; type a number in Open variation # and click Switch to open one.
18.2 The mini page and embedding
The mini page shows only the map, the procedure and the tasks of a process, for reading on a small screen or inside another site. On the process page, Mini page opens it; Embed code gives the HTML to paste into a SharePoint or Teams page (signed-in users).
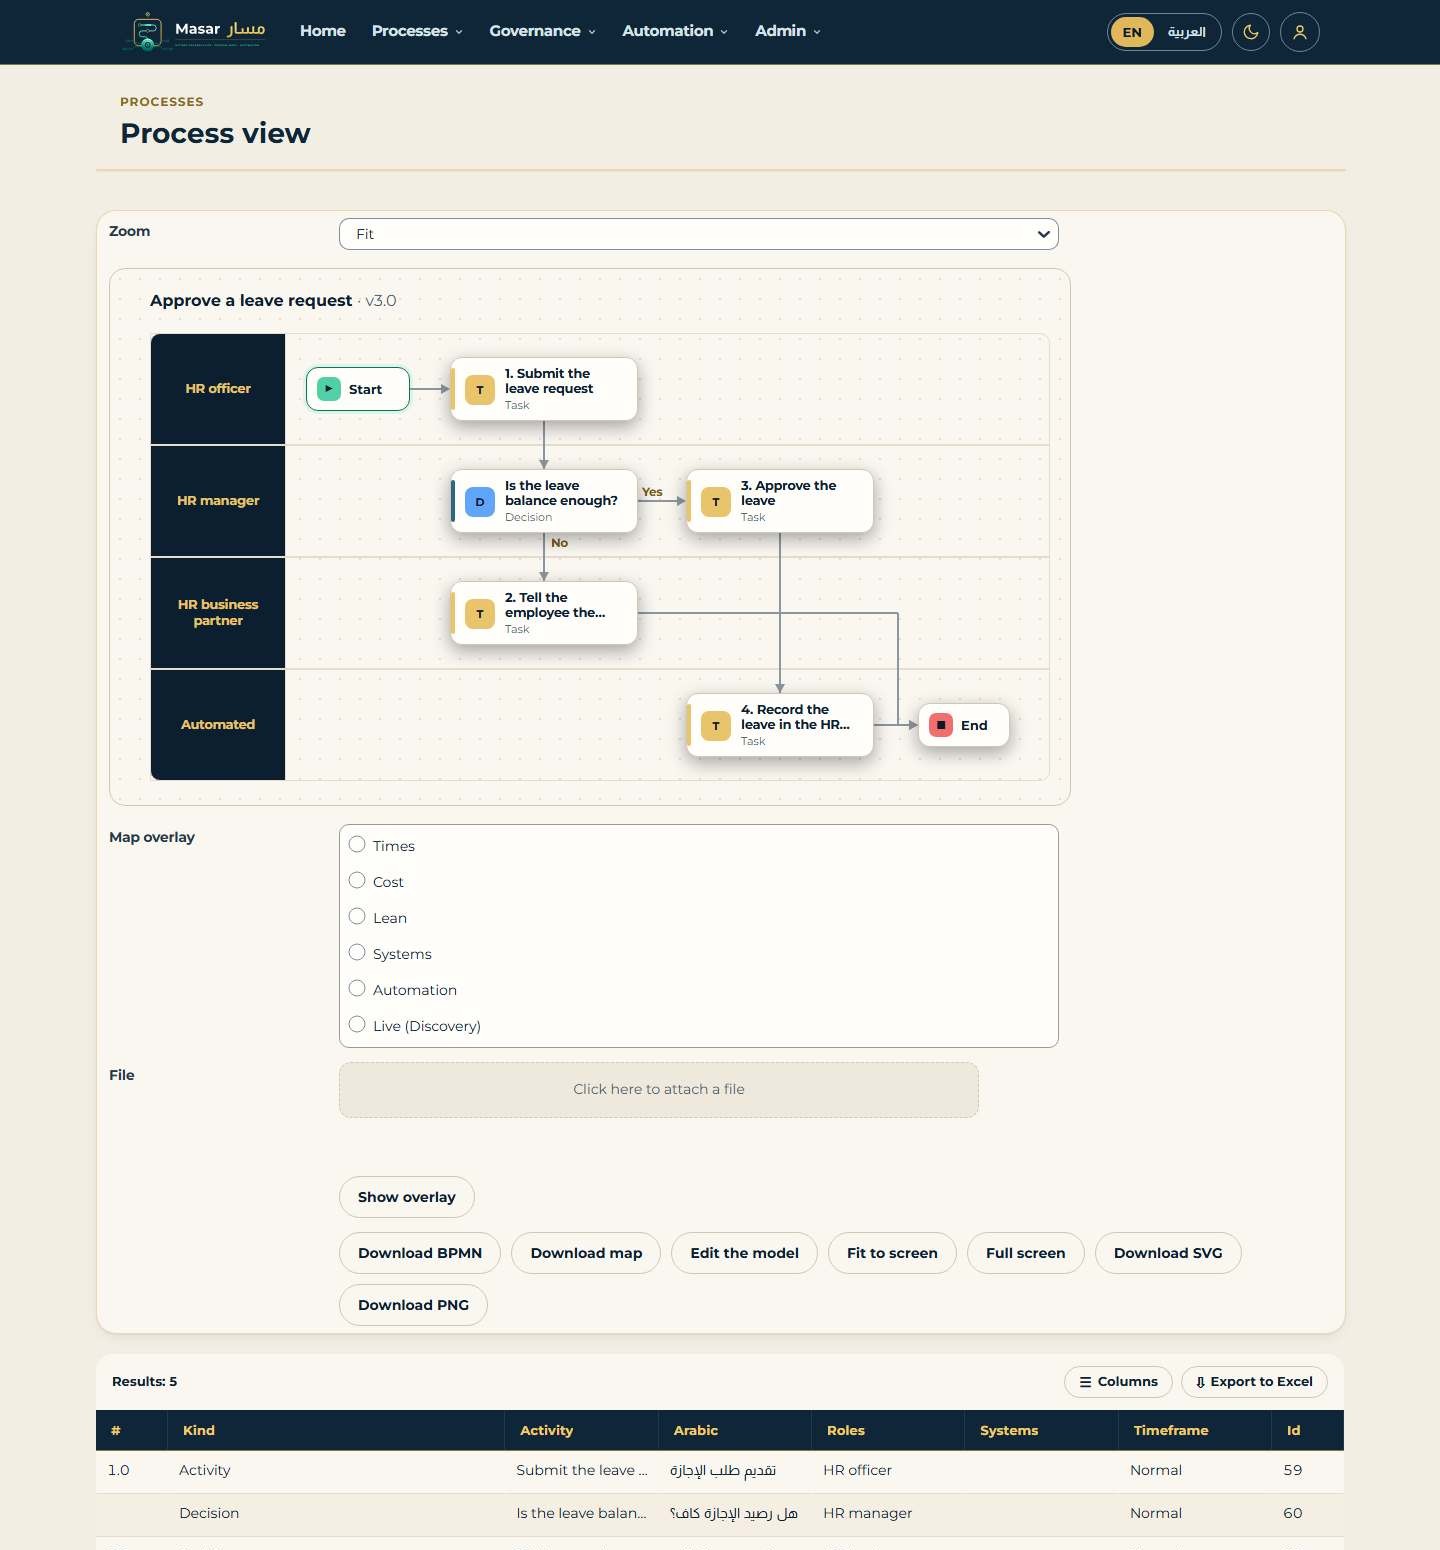
Figure 29 - Mini page of a process (Process view)
19 Governance
Click Governance on the Home page. The page gives champions and the process office one place to see and act on the health of the library.
Table 18 - The governance page
| Panel | What it shows or does |
|---|---|
| Actions | Process list to Excel; Process events now (runs the message board once, as the sweeper workflow does every few minutes: a newer published version of an automated process gets the change-log note AutomationOutOfDate, a Process Discovery DriftFound becomes a change-log note; shows Events processed); Find undocumented K2 processes (adds a suggestion for every process key that runs in the K2 workflow log but has no process in the library; shows New suggestions); Associate workflow (links a Process key to a K2 workflow (category\name)) |
| Automation out of date | Automated processes whose published version is newer than the version that was automated, with the K2 workflow |
| K2 workflows | Every K2 workflow of the watched folders, its process and key, and how it was linked (ActiBot, documented, associated) |
| Checklists | Per process: open, overdue and done checklists, average hours to done |
| Most viewed | Views and viewers in the last 30 days, and the last view |
| Suggestions | All suggested processes and their state |
| Discovery runs | All Process Discovery runs |
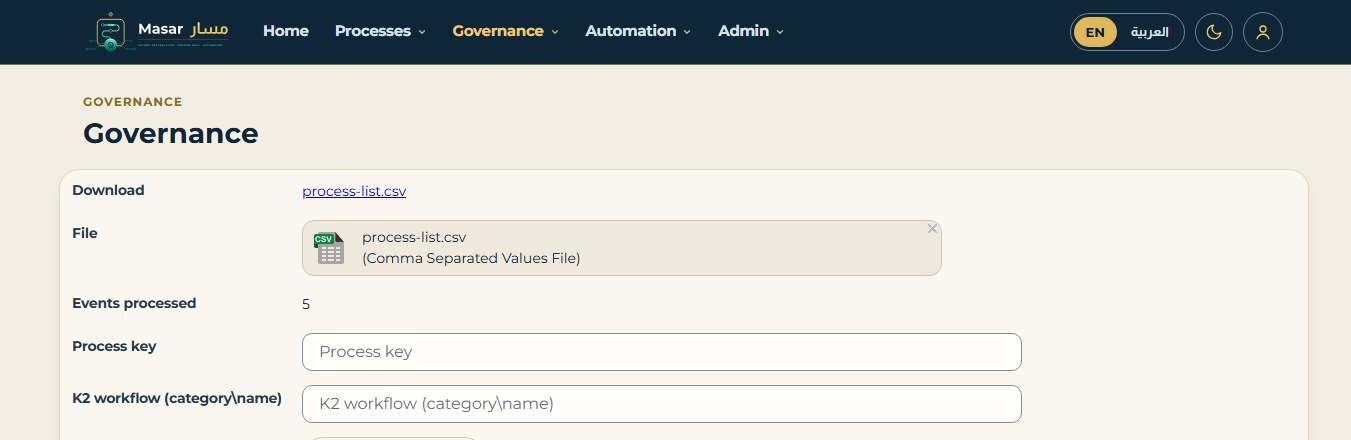
Figure 30 - Governance page: the download and the actions
The Power BI dashboard ProMap_K2_Governance shows the same figures over time (chapter 12).
Part B - Administrator guide
Chapters 20 to 26: settings, master data, the library, workflows, security, installation and troubleshooting.
20 Company settings
Open Admin > Company settings. The form Masar - company settings has panels for settings and theme, departments, roles, systems, groups (chapter 22) and restoring archived processes (section 9.2).
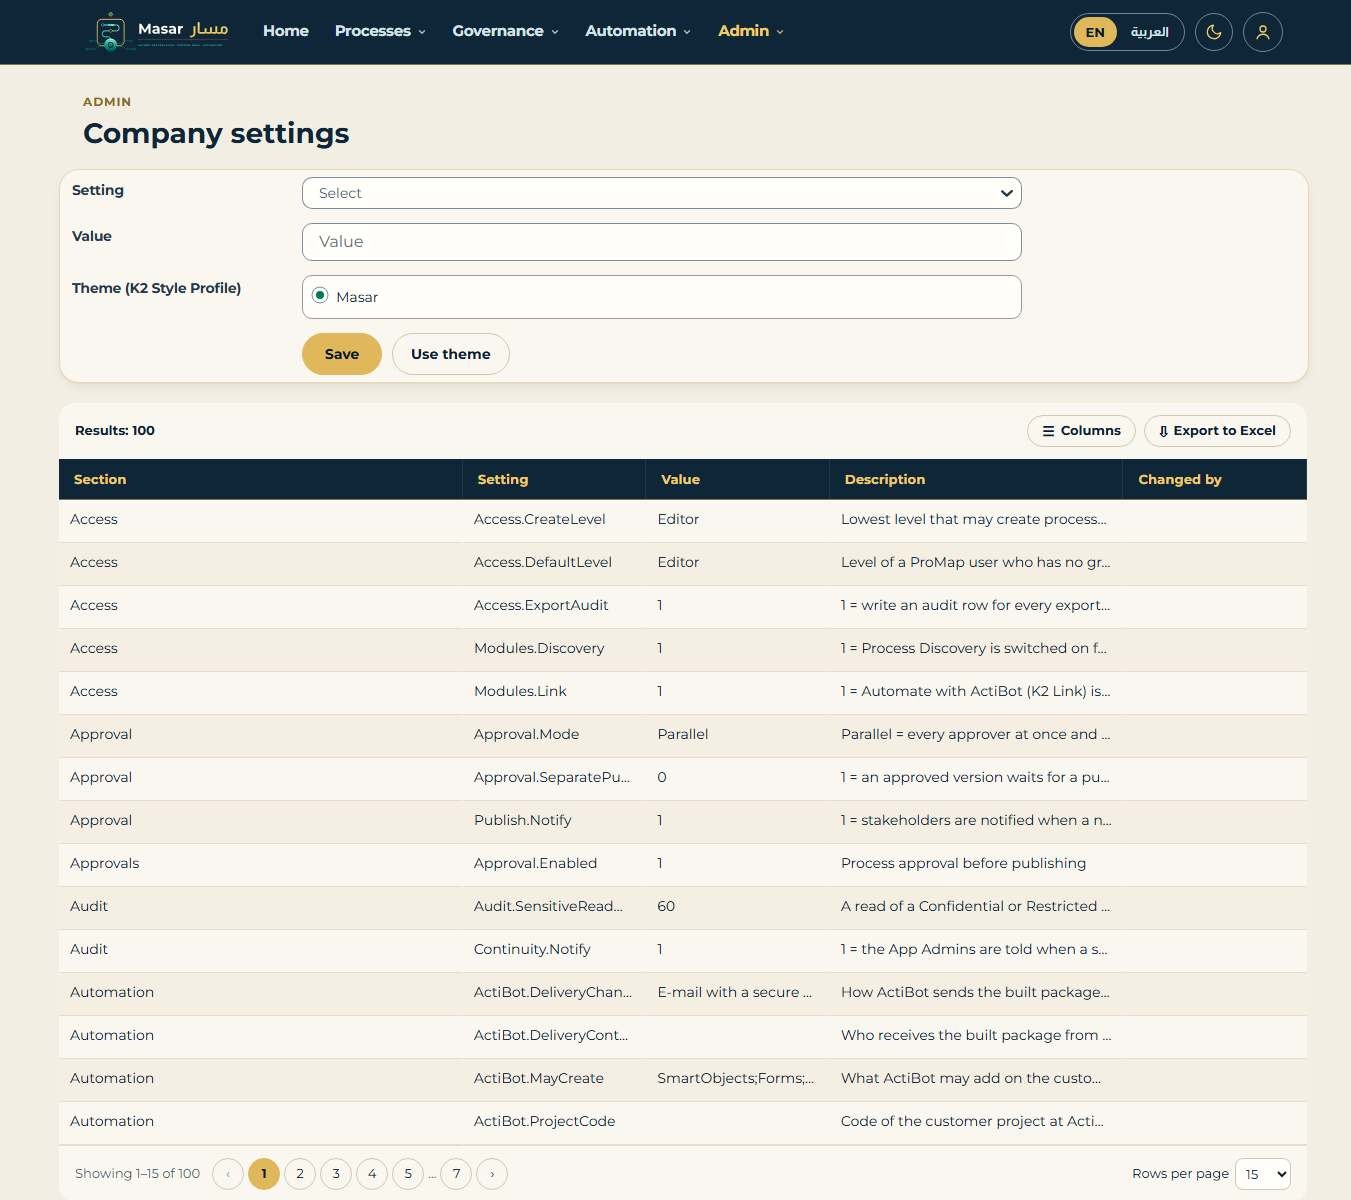
Figure 31 - Company settings: change a setting, theme picker and the settings list
20.1 Change a setting
- Pick the key in Setting.
- Type the new Value.
- Click Save. The message "Setting saved" appears and the list shows the new value with your user name under Changed by.
The list shows Section, Setting, Value, Description and Changed by. Settings cannot be added from the form; an unknown key gives "Unknown setting". User values are K2 user names (label:name, for example K2SQL:user1); days and months are whole numbers; switches are 1 (on) or 0 (off).
Table 19 - Company settings
| Setting key | Section | Default | Meaning and where it is used |
|---|---|---|---|
| Company.Name | System | Masar | Company name shown in headers and prints |
| Company.DefaultLanguage | System | ar | Default language, ar or en |
| Company.TimeZone | System | Arab Standard Time | Windows time zone id of the company |
| Appearance.Theme | Branding | Masar theme | K2 Style Profile used by every form; applied at the next deploy (see 20.2) |
| Appearance.Mode | Branding | light | Default look for users who have not chosen one: light (ivory) or dark (navy); set by the App Admin (chapter 45) |
| Editing.RequireCommentOnPublished | Editing | 1 | Require a change comment when a published process changes; checked by Save version |
| Editing.EnableDecisions | Editing | 1 | Decision boxes in the procedure |
| Review.DefaultMonths | Dashboard | 12 | Review frequency in months; sets Review due on publish (when empty) and on Reviewed |
| Review.EscalateDays | Dashboard | 14 | Days the owner has to answer a review before it is escalated as overdue |
| Feedback.ResponseDays | Feedback | 5 | Days the owner has to answer feedback that needs a response |
| Approval.Enabled | Approvals | 1 | Process approval before publishing |
| Print.UncontrolledFooter | 1 | Uncontrolled copy footer on prints | |
| Timeframes.HoursPerDay | Timeframes | 8 | Working hours per day |
| Timeframes.DaysPerWeek | Timeframes | 5 | Working days per week |
| Timeframes.Currency | Timeframes | SAR | Currency of role costs |
| Admin.RoleApprover | Users | (empty) | K2 user or group that decides role change requests; receives Approve role change |
| Link.Specialist | Automation | (empty) | Automation specialist of the R1 request flow; not used by Automate with ActiBot |
| ActiBot.RequestEmail | Automation | ActiBot's request address | Where Send to ActiBot e-mails the request (PDF, JSON, BPMN) |
| Env.Environments | Environment | (empty) | Where the workflow goes: DEV, TEST, PROD (names only, no addresses); goes into every ActiBot request |
| Env.UserStore | Environment | (empty) | User store K2 uses: Active Directory domain label or K2 SQL |
| Env.WorkingHours | Environment | (empty) | Working-hours zone for deadlines, for example Sunday-Thursday 08:00-16:00 |
| Env.MailServer | Environment | (empty) | Can K2 send e-mail (yes / no, and the sending address) |
| Env.ConnectionMethod | Environment | (empty) | How ActiBot reaches the K2 server: on-site, customer VPN or a remote connection |
| Env.DataResidency | Environment | In-Kingdom only | Data residency constraints for the delivered workflow and its data |
| Env.Notes | Environment | (empty) | Anything else ActiBot must know about the servers (never passwords) |
| Company.SiteUrl | System | (empty) | Address of the K2 site users open, for links, e-mails and QR codes |
| Presence.Minutes | Editing | 10 | Minutes a viewer or editor stays shown on a process |
| Discovery.WorkflowFolders | Discovery | ProMap_K2 | K2 workflow folders Process Discovery and Document a K2 workflow list and read, separated by ; |
| Discovery.BottleneckFactor | Discovery | 1.5 | A step is a bottleneck when its average time is this many times its documented time |
| Outbox.KeepRunning | System | true | The message board sweeper keeps running (true) or stops after its next round (false) |
| Link.WorkflowCategory | Automation | ProMap_K2 | K2 category the automated workflows are built in; written into every package |
| Feedback.ResponseRequiredMandatory | Feedback | 0 | 1 = every new feedback asks the process owner for a response; the box is ticked and locked (chapter 55) |
| Access.GroupSync | Access | 1 | 1 = read the K2 / AD groups of a person at every sign-in (access levels by group, chapter 59) |
| Access.GroupSyncMinutes | Access | 0 | 0 = read the groups on every sign-in page; n = not again within n minutes |
| Risk.AutoStart | Risk | 1 | 1 = the control sweeper keeps running (scheduled and change-driven sign-offs, chapter 60) |
| Risk.SweepMinutes | Risk | 1440 | Minutes between two rounds of the control sweeper |
| Risk.SignoffDays | Risk | 10 | Days the control owner has to sign off before the sign-off is overdue |
| Risk.HighScore | Risk | 15 | A score (likelihood x severity, 1 to 25) at or above this is High |
| Risk.MediumScore | Risk | 8 | A score at or above this (and below High) is Medium |
| Risk.RunEvidenceDays | Risk | 90 | Days of K2 run records read for the findings of a control |
| Incident.DefaultManager | Incident | (empty) | Who assigns incidents and approves action plans when the type names nobody; empty = the process owner, else the reporter (chapter 61) |
| Incident.FromFindings | Incident | 1 | 1 = a High control finding opens an incident |
| Incident.WorkDays | Incident | Sun,Mon,Tue,Wed,Thu | Working days for the incident deadlines |
| Incident.WorkStart / Incident.WorkEnd | Incident | 8 / 16 | Working day starts and ends at these hours (server time) |
| Incident.CloseHours | Incident | 80 | Working hours from the report to the deadline of the incident |
| Training.DueDays | Training | 30 | Days a person has to complete a unit given to them (chapter 62) |
| Training.RefresherDays | Training | 30 | Days before a completed unit expires when its refresher is given |
| Training.DefaultTrainer | Training | (empty) | Who signs off when the unit names nobody (K2SQL:name); empty = the App Admin |
| Training.RetrainOnPublish | Training | 1 | 1 = a published change re-trains the people of the roles it affects |
| Ai.Gateway | Ai | None | None = no model, the rule-based import only; Endpoint = drafts come from ActiBot AI, included with Masar, through the model gateway (set by the install step, chapters 66 and 67) |
| Ai.Model | Ai | (set by the install step) | The model the gateway asks for: ActiBot AI, included with Masar (set by the install step) |
| Ai.MaxTokens | Ai | 1500 | Longest answer of the model |
| Ai.Temperature | Ai | 0.2 | 0 = the same answer each time; higher = more varied |
| Ai.PromptFormat | Ai | ChatML | How the request is written for the model server: ChatML or Plain |
| Mcp.Enabled | Mcp | 1 | 1 = people may make a personal MCP token and the MCP server answers; 0 = off (chapters 65 and 66) |
| Mcp.TokenDays | Mcp | 90 | Days a personal MCP token lasts (at most 366) |
20.2 Theme picker (K2 Style Profile)
The pages use a K2 Style Profile as their theme. The panel shows Theme (K2 Style Profile) with the themes available to the product (Masar). The Style Profile is a property of every form, so a new theme applies when ActiBot deploys the theme and the forms again. The theme also carries the start-up code of the model editor (chapter 14). The light and dark looks are part of the Masar theme: each user switches the look in the header, and the App Admin sets the default look with Appearance.Mode (chapter 45).
- Choose the theme.
- Click Use theme. The message "Theme saved; the forms use it from the next deploy" appears.
- Ask for the forms to be redeployed with ActiBot (chapter 25); the new theme shows after that deploy.
21 Departments, roles and systems
21.1 Departments
- In Add or change a department, leave Id (empty = new) empty for a new department, or type the Id from the list to change one.
- Fill Code (unique), Name, Arabic name and Head (K2 user).
- Click Save. The message "Department saved" appears.
The departments list shows Id, Code, Department, Arabic, Head and Active. Departments are used by roles, groups and the reports.
21.2 Roles

Figure 32 - Add or change a role
- In Add or change a role, leave Id (empty = new) empty for a new role, or type the Id to change one.
- Fill Name (unique) and Arabic name.
- Choose the Type: Role or Responsibility.
- Pick the Department, type the Annual cost and the K2 recipient (role, group or user).
- Click Save. The message "Role saved" appears.
Table 20 - Role fields
| Field | Meaning |
|---|---|
| Type: Role | A position people hold, for example "Claims clerk" or "Finance officer". |
| Type: Responsibility | A duty that people in different positions can carry, for example "Fire warden" or "Data protection contact". |
| Annual cost | Yearly cost of the role in the company currency (Timeframes.Currency), for cost reporting. |
| K2 recipient | Who gets the K2 task when an activity of this role is automated: a K2 user, group or role in label:name form, for example K2SQL:user1. Without it the readiness check of Automate with ActiBot reports the role as missing its recipient. |
The roles list shows Id, Role, Arabic, Type, Department, K2 recipient and System. The three system roles UNASSIGNED, All Staff and Automated cannot be changed ("System roles cannot be changed") and cannot be requested from My profile. Roles named in an import that do not exist are created automatically; complete their department and K2 recipient here afterwards.
21.3 Systems
- In Add or change a system, leave Id (empty = new) empty for a new system, or type the Id.
- Fill Name, Arabic name, Description, Owner (K2 user) and K2 SmartObject.
- Click Save. The message "System saved" appears.
K2 SmartObject is the SmartObject an automated step uses when it talks to this system. The systems list shows Id, System, Arabic, Owner and SmartObject.
21.4 Role approver and automation specialist
- Role approver - set Company setting Admin.RoleApprover to the K2 user or group that decides who joins or leaves a role; it also decides suggested processes for groups without a champion.
- Automation - no specialist is needed: the person who clicks Automate with ActiBot completes and sends the request (chapter 10).
22 Groups and library structure
The library is a tree of groups under one root. The Group list on the Home page shows the groups directly under the root; groups can have sub-groups. Each group has an English and Arabic name, a department, a champion (K2 user), an objective and a sort order.
- Every process belongs to exactly one group. A process can also appear in other groups as a shortcut; it then shows in those groups' process lists too.
- The group champion approves archiving and unarchiving of the group's processes and is shown as Accountable in their RACI.
- A group can be archived; its processes are then not offered for new processes.
22.1 Add or change a group
Groups are maintained in Company settings, panel Add or change a group, with the Groups list under it (Id, Group, Arabic, Department, Champion, Sub-groups, Processes). The list shows the top-level groups.
- Leave Id (empty = new) empty for a new group, or type the Id from the list to change one.
- In Parent group Id (empty = top) type the Id of the parent group for a sub-group, or leave it empty for a top-level group.
- Fill Name, Arabic name, Champion (K2 user) and Objective.
- Click Save. The message "Group saved" appears. Without a name the form shows "The name is required".
The group form does not set a department; a group keeps the department it has. Process shortcuts in other groups are kept by the product but have no form yet.
Plan the library before go-live: usually one top-level group per department, with sub-groups per function, and a champion for each group.
22.2 Group versions
A group can be saved as a version, like a process: the panel Company settings - group versions takes the Group (for versions) and What changed, and Save group version records the group with the list and versions of its processes as the next Group version. The list shows each version, when and by whom it was saved and what changed, so an auditor can see what the library of a department looked like at any date.
23 Workflows and tasks the product runs
All workflows are in the K2 category ProMap_K2, and every one was tested on the K2 server, path by path.
Table 21 - Workflows
| Workflow | Started by | Task and who gets it | Actions | Deadline / escalation |
|---|---|---|---|---|
| ProMap_K2_ProcessApproval | Submit for approval | Approve process version - process owner | Approve (publish), Decline (comment required) | None |
| ProMap_K2_Review | Start review | Review the process - process owner | Reviewed, Edit | Review.EscalateDays (14): ReviewOverdue |
| ProMap_K2_FeedbackResponse | Send and ask for a response | Answer the feedback - process owner | Resolved, Not applicable | Feedback.ResponseDays (5): FeedbackOverdue |
| ProMap_K2_Archival | Archive; Request restore | Approve archival - group champion, or owner if none | Approve, Decline | None |
| ProMap_K2_RoleChange | My profile, Send request | Approve role change - Admin.RoleApprover | Approve, Decline | None |
| ProMap_K2_AutomationRequest | Automate with ActiBot | Complete the automation request - the requester | Send to ActiBot (readiness check, then e-mail with PDF, JSON and BPMN), Cancel | None |
| ProMap_K2_Share | Share by e-mail | None (e-mails the link) | - | - |
| ProMap_K2_Suggestion | Suggest, Import list | Decide on a suggested process - group champion (or role approver) | Approve and create the process, Decline | None |
| ProMap_K2_Checklist | Start checklist | Work through the checklist - the assignee | Checklist done (back while items are open), Cancel | Due date: overdue |
| ProMap_K2_OutboxSweeper | Administrator, once after installation | None (processes the message board every few minutes) | - | Stops when Outbox.KeepRunning is false |
| PM_xxxxxxxx (automated process) | Your business users | Tasks to the K2 recipients of the roles | As in the request (Done; Yes/No) | As in the request |
| PM_xxxxxxxx_Schedule (schedule) | ActiBot, for a scheduled process | None (starts the process at the scheduled times) | - | Until the schedule is switched off |
| ProMap_K2_Hello, ProMap_K2_Probe | Administrator | None (smoke tests of the server) | - | - |
| ProMap_K2_ControlSweeper | App Admin or risk manager (Start the control sweeper); keeps running | None (starts the sign-off workflows, the incident workflows Masar opened and the training expiry round) | - | Risk.SweepMinutes (1440) |
| ProMap_K2_ControlSignoff | The control sweeper | Sign off the control - control owner | Effective, Not effective | Risk.SignoffDays (10): overdue, a finding |
| ProMap_K2_Incident | Report on the incidents page, or Masar (feedback, finding, bottleneck) | Assign, Investigate, Approve the action plan, Carry out, Close or reopen - manager, investigator, action owner | Assign / Not an incident, Submit the action plan, Approve / Rework, Done, Close / Reopen | Working hours per task (type); overdue and given again |
| ProMap_K2_TrainingSignoff | Done - send it for sign-off (trainee) | Sign off the training - trainer | Signed off, Not passed | Training.DueDays (30) |
| ProMap_K2_AiDraft | Ask the model for a draft | None (asks the model gateway and stores the draft) | - | - |
The message board (outbox) carries events between the parts: Published, ReviewOverdue, Archived, Unarchived, FeedbackOverdue (Process Suite); AutomationRequested, Built, Deployed, BuildFailed (K2 Link); Discovered, DriftFound (Process Discovery). The sweeper workflow processes them every few minutes; Process events now on the governance page does one round at once.
23.1 Start the sweeper after installation
- Make sure Company setting Outbox.KeepRunning is true.
- Start the workflow ProMap_K2_OutboxSweeper once (for example from K2 Workspace or with ActiBot). It keeps running in the background.
- To stop it, set Outbox.KeepRunning to false; it ends after its next round.
24 Security and access
24.1 Sign-in and identity
Masar has no user store of its own. Users sign in to K2 with the identity your K2 server uses (for example Active Directory). Every change is recorded with the signed-in K2 user name: change log, versions, settings, audit and feedback.
24.2 Workflow start rights
Each workflow lists who may start and view it. After installation, grant Start and View on the ProMap_K2 workflows to the K2 groups that need them: all staff for feedback with response and role change; process authors for approval, review, archival and automation requests. Without the right, the button on the form fails when it starts the workflow.
24.3 Only the product's users reach its forms
The K2 category ProMap_K2 (forms, views, SmartObjects and workflows) is closed to everyone except the K2 role ProMap_K2_Users and the deploying administrator: the role has View and Execute, Everyone is no longer inherited. The installation sets this up. Add your users (or an Active Directory group) to the role. Tested: a user outside the role who opens the Home page is refused; a member opens it.
24.4 Forms are not security
Hiding or showing a button on a form does not protect data. Protect data with K2 rights:
- SmartObject rights - limit the methods that change data (for example Setting Set, Role Save, Department Save, System Save, Group Save, Process Restore, LinkStep Save) to administrators or the right groups.
- Form rights - limit the Company settings and Automation forms to administrators and automation specialists.
- Workflow rights - as above, and task rights follow the recipients.
24.5 Where the data lives
- All data stays on-premises in your SQL Server database (ProMap_K2_App), reached through the K2 SQL Server service instance of the product.
- Reports run on your own Power BI Report Server and read the same database.
- No process data is sent to Nintex cloud or any other cloud service; automation goes to your own K2 server through ActiBot.
- Since release 2.6 the AI Process Generator uses ActiBot AI, included with Masar. It is installed on your own server and runs on its CPU, and Masar reaches it through the model gateway with its own key. No call leaves your network. Without ActiBot AI, Ai.Gateway stays None and an SOP is read by rules (chapters 66 and 67).
- Since release 2.5 an AI assistant inside your network can read processes through the Masar MCP server, with a personal token of the person it works for; it sees only what that person may read, and every call is audited (chapters 65 and 66).
- No passwords are stored in the product, its forms or its packages. Service accounts are held by K2.
- The pages make no call to the internet: fonts, icons and the model editor come from the theme or the product database. Tested on every page with all outbound internet blocked: the only other address used is your own Power BI Report Server on the Reports page.
- Process Discovery and Document a K2 workflow read K2's own log and design tables read-only, from the product database's connection.
25 Installation and deployment overview
Masar is delivered as one installation package. The package installs only Masar's own items on your K2 server: they are in the category ProMap_K2, carry the prefix ProMap_K2 and use their own database and service instance; nothing else on the K2 server is changed. ActiBot installs the package together with your administrator.
Release 2.5 was built and tested on Nintex Automation K2 5.9.1 from 17 to 19 Oct 2026 (the test state of each part is in Part G). Release 2.6 adds ActiBot AI, included with Masar (Part H, chapter 67), tested on 22 Oct 2026. The 2.6 installation package carries ActiBot AI in the folder ai/runtime.
Table 22 - Installation steps
| Step | What happens |
|---|---|
| 1 Check the K2 server | Checks the connection to the K2 server and the prerequisites. |
| 2 Database | Creates the Masar database with its tables and procedures. |
| 3 Service instance | Creates the SQL Server service instance that connects K2 to the Masar database. |
| 4 SmartObjects | Publishes the SmartObjects of Masar and checks them. |
| 5 Theme and pages | Deploys the Masar theme (fonts, logo, the light and dark looks and the model editor) and the pages with their English and Arabic labels. |
| 6 Workflows | Deploys each workflow and checks every path. |
| 7 Reports | Deploys the paginated reports and the Power BI dashboards to your Power BI Report Server. |
| 8 Checks | Opens every page in English and Arabic and runs the installation checks. |
| 9 TEST first | The same package goes to TEST first and, after the key users have tested it, to PROD. |
25.1 Deploy to TEST and PROD
- Deploy the package to the TEST environment and let the key users test it with your own data.
- If something must change, ask ActiBot for a corrected package; do not change Masar's items by hand in the K2 Designers.
- Deploy the same package to PROD.
25.2 After installation
- Set Company.Name, Company.SiteUrl, Admin.RoleApprover, ActiBot.RequestEmail and the Env settings in Company settings.
- Add the users to the K2 role ProMap_K2_Users and start the sweeper workflow (section 23.1).
- Enter departments, roles (with K2 recipients and costs) and systems.
- Create the group tree with champions (chapter 22).
- Grant workflow start rights and SmartObject and form rights (chapter 24).
- Import or create the first processes and publish them.
- Decide on the release 2.5 and 2.6 options: install ActiBot AI and run its install step for AI drafts (chapter 67; without it Ai.Gateway stays None), MCP access (Mcp.Enabled), and give the new access levels RiskManager and TrainingManager, or map K2 / AD groups to levels (chapters 59 and 66).
26 Troubleshooting
Table 23 - Messages and what to do
| Message | Why | What to do |
|---|---|---|
| The process is awaiting approval and cannot be edited | The process was submitted; it is locked until the owner decides. | Ask the owner to approve or decline. After a decline you can edit again. |
| A change comment is required for a process that has been published | Save version without a comment on a process that was published before. | Type a Change comment and click Save version again. |
| A process needs at least one activity before approval | Submit for approval on an empty process. | Add at least one activity. |
| Only a process in progress can be submitted | The process is Published, AwaitingApproval or Archived. | Edit and save a version first (state becomes InProgress). |
| Only a published process can be automated | Automate with ActiBot on a process that is not Published. | Get the process approved first. |
| Only a published process can run as a checklist | Start checklist on a process never published. | Publish it first. |
| Assign the checklist to a K2 user (label:name) | Start checklist without a K2 user name. | Type the user as label:name, for example K2SQL:user1. |
| Only a published process is acknowledged | I have read this version on a process that is not published. | No action needed. |
| Not a BPMN 2.0 file / Not a BPMN 2.0 model (no definitions/process) | Import BPMN or Save model with text that is not a BPMN 2.0 model. | Paste the whole .bpmn file; save the model again from the editor. |
| The K2 workflow was not found (category\name) | Document a K2 workflow with a name that is not deployed. | Pick the workflow from the list. |
| Overlay must be Times, Cost, Lean, Systems, Automation or Live | Show overlay without a choice. | Choose an overlay first. |
| Only a published process is reviewed | Start review on a process that is not Published. | Publish it first. |
| This process cannot be archived now | The process is awaiting approval or already archived. | Wait for the approval decision. |
| Only an archived process can be restored | A restore was requested for a process that is not archived. | No action needed. |
| A web link needs an https:// address | Type WebLink with an empty or http address. | Enter the full address starting with https://. |
| Group, title and objective are required | New process without one of them. | Fill all three. |
| Group, title, objective and text are required / The procedure text is empty | Import without one of them. | Pick the group, fill title and objective and paste the text. |
| Type a version number from the versions list / Version not found | Restore version with an empty or unknown number. | Copy the number from the versions list on the process page. |
| Enter the activity Id and its title (current or new) | Update activity without Id or title. | Type the Id and the current or new title. |
| The name is required | Saving a group without a name. | Type the group name. |
| Pick a process first | Open without a process selected. | Pick a group, then a process. |
| Write why you decline / A reason is required to decline | Decline without a comment. | Type the reason in Comment. |
| Pick a role and join or leave | Role request without role or request type. | Pick both. |
| Role not found (system roles cannot be requested) | A system role was requested. | Pick another role. |
| Activity not found | Wrong Activity Id on the edit page. | Copy the Id from the last column of the procedure list. |
| The task Complete the automation request came back | Send to ActiBot with items still missing. | Complete what Still missing before sending lists (section 10.2), then send again. |
| No package was built for this request | Status Passed or Deployed before a package exists. | Build the package first. |
| Workflow name: letters, digits and _ only | An automation workflow name with other characters. | Use letters, digits and underscore. |
| Unknown setting | A setting key that does not exist. | Pick the key from the list. |
| System roles cannot be changed | Saving UNASSIGNED, All Staff or Automated. | Create a new role instead. |
26.1 Other symptoms
Table 24 - Other symptoms
| Symptom | What to do |
|---|---|
| A new activity or item does not show | Refresh the page (F5); the lists load when the page opens. |
| A button gives a K2 error when it starts a workflow | Check that you have Start rights on that workflow (chapter 24) and that the required settings (Admin.RoleApprover, Link.Specialist) are filled. |
| No one receives a review, feedback or approval task | Check the Owner of the process is a valid K2 user name (label:name). |
| The new theme does not show | Redeploy the forms with ActiBot; the theme applies from the next deploy. |
| Arabic search does not find a word | Try part of the word; spelling variants of hamza, ta marbuta and alef maqsura are already matched. |
| The model editor stays empty | Wait a few seconds and reload the page; the editor loads from the product database. If it still stays empty, check that the theme was deployed (section 20.2). |
| A K2 user outside the project opens a form | Ask ActiBot to apply the access isolation again; check that the user is not in ProMap_K2_Users. |
| Automation out of date is listed | The published process changed after it was automated: send a new request with Automate with ActiBot. |
Part C - Release 2.1 additions
Chapters 27 to 31 describe what release 2.1 adds. Everything in them was tested on Nintex Automation K2 5.9.1. The earlier chapters still apply.
27 Authoring tools
The edit page has a new button Attributes and checks. It opens the author page of the process with everything an author needs besides the steps themselves.
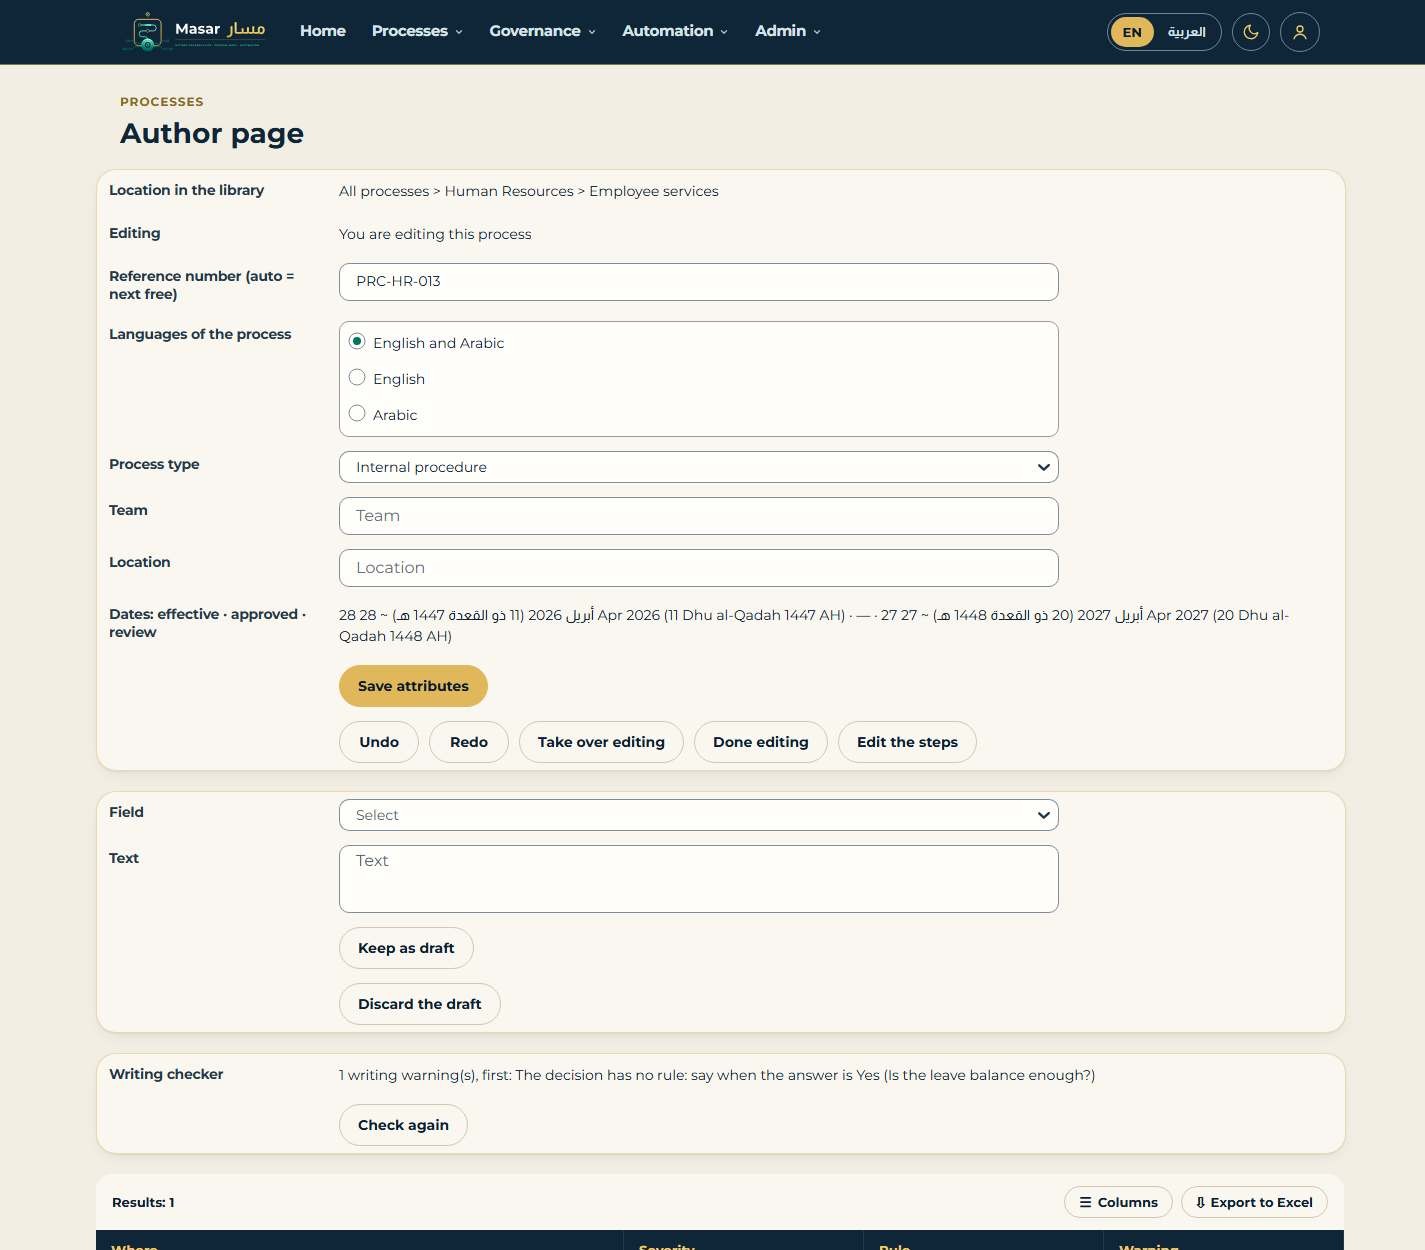
Figure 33 - Author page: attributes, edit lock, writing checker, dependencies, comments and formatted items
27.1 Attributes, reference number and dates
Fill in Reference number (type auto for the next free number, for example PRC-0007), Languages of the process (English and Arabic, English only or Arabic only), Process type, Team and Location, then Save attributes. The page shows where the process sits in the library (breadcrumb) and its dates in Gregorian and Hijri: effective, approved and review due. The process type decides which custom fields the process has (chapter 30).
27.2 Edit lock, undo and redo, unsaved draft
- When you open the author page you take the soft edit lock. Somebody who opens it while you edit sees Being edited by ... since ... and can still read; Take over editing moves the lock to them and is written to the audit trail.
- Undo brings back the version before the last save; Redo brings the undone version again. Both are change-log entries.
- Text you keep as a draft (Keep as draft) waits for you if the browser closes; the author page shows the unsaved title and objective until you save the process or press Discard the draft.
- Done editing releases the lock and opens the process page.
27.3 Writing checker, translation gaps and the to-do list
The writing checker runs every time the author page opens. It warns, without blocking, about more than 10 activities, activity names that do not start with a verb (English and Arabic word lists that the administrator extends), long names and steps without an owner. Translation gaps lists every title, objective, activity and item that misses its Arabic or English text when the process is bilingual. Before approval lists what is still missing before the process can be submitted.
27.4 Dependencies, tags and shortcuts
- Add dependency: Depends on, Feeds, Uses or Regulation, pointing to another process (its number) or to a text such as a law article.
- Tag and Untag: process tags and Lean tags (value adding, non value adding, waste ...) on the process or on one activity (its id).
- Show in group: the process is also listed in another group as a shortcut; it keeps its own group.
27.5 Comments, formatted items and copying activities
- Comments are for the editors only (readers never see them). Mention a colleague with @user; reply with the comment number; resolve it when done.
- Formatted items: type the text as simple HTML (b, i, u, lists, links, h3, tables). The server keeps only these tags and https links and removes everything else (code, events, styles); cleaned: Yes tells you it removed something. The preview shows the result.
- Copy activity copies an activity with its items to this process or to another one.
Note: K2 forms have no rich-text editor control, so formatted text is typed as simple HTML; since release 2.5 a light formatting bar (bold, italic, list, link) helps (section 55.7).
27.6 Custom fields
Choose a custom field and Save value. Each field has a type (text, number, date, list or yes/no) and is checked when it is saved. The Government service process type comes with the eight DGA inventory fields.
27.7 Arabic and English pages
Every page opens right to left in Arabic: labels sit on the right; inputs, lists and buttons are mirrored. Use EN / Arabic in the header to switch the language. The choice is kept in your browser, also after you sign in again. Since release 2.4 each page shows one language at a time (chapter 54); K2's own system texts follow the language of the browser.
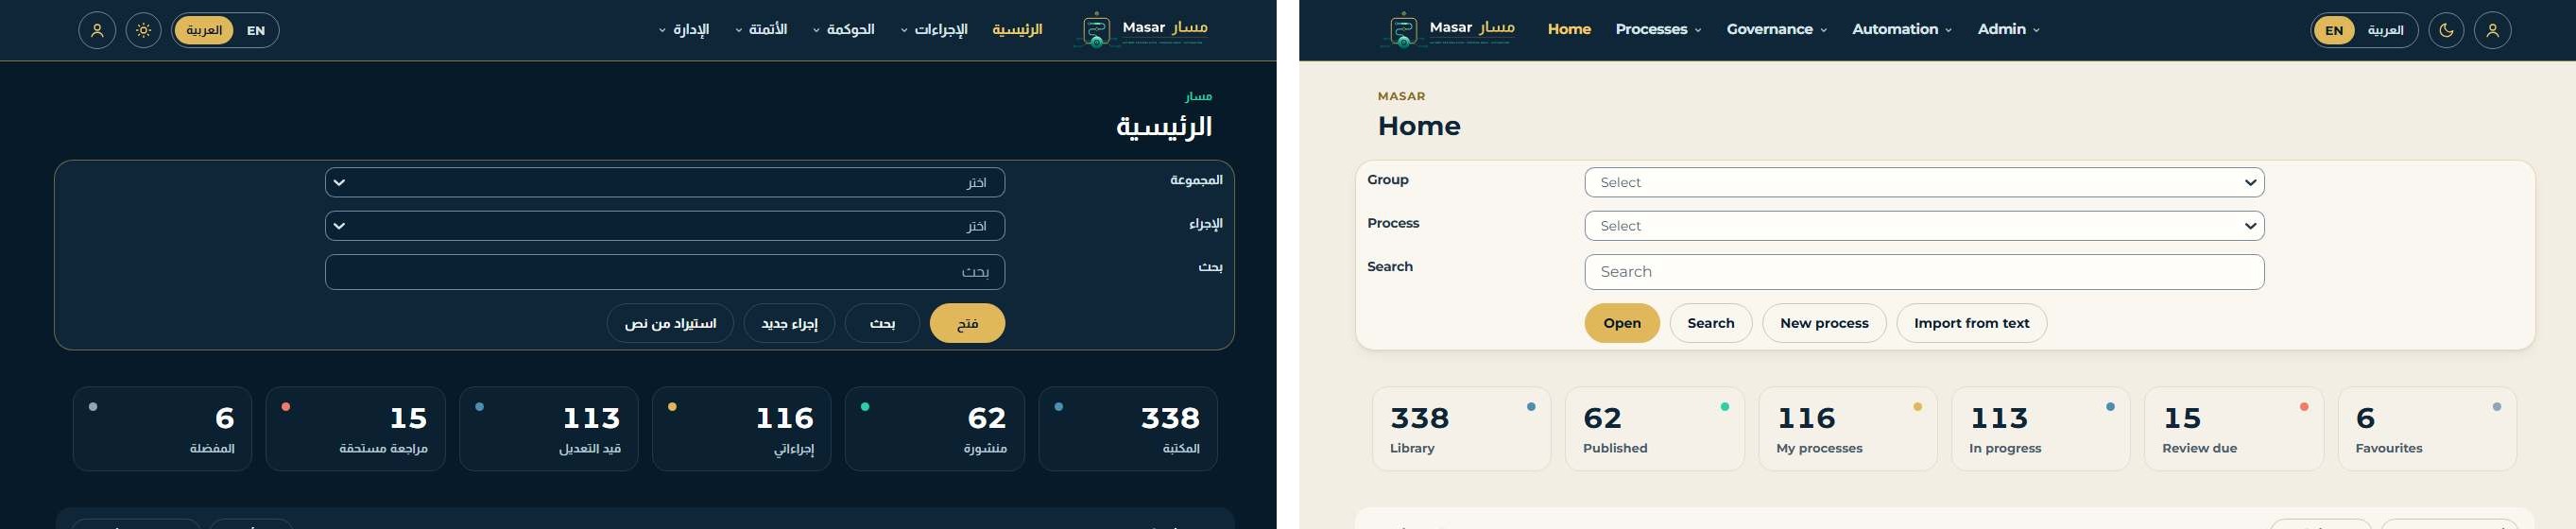
Figure 34 - Home page in Arabic (right to left) and in English (left to right)
28 Reading: the step page, the map and the library
28.1 The step page
Every activity on the map is a link. It opens the step page with the number, title (English and Arabic), roles, systems, tags, time, feedback count and the items of the step. Feedback on this step opens the feedback page.
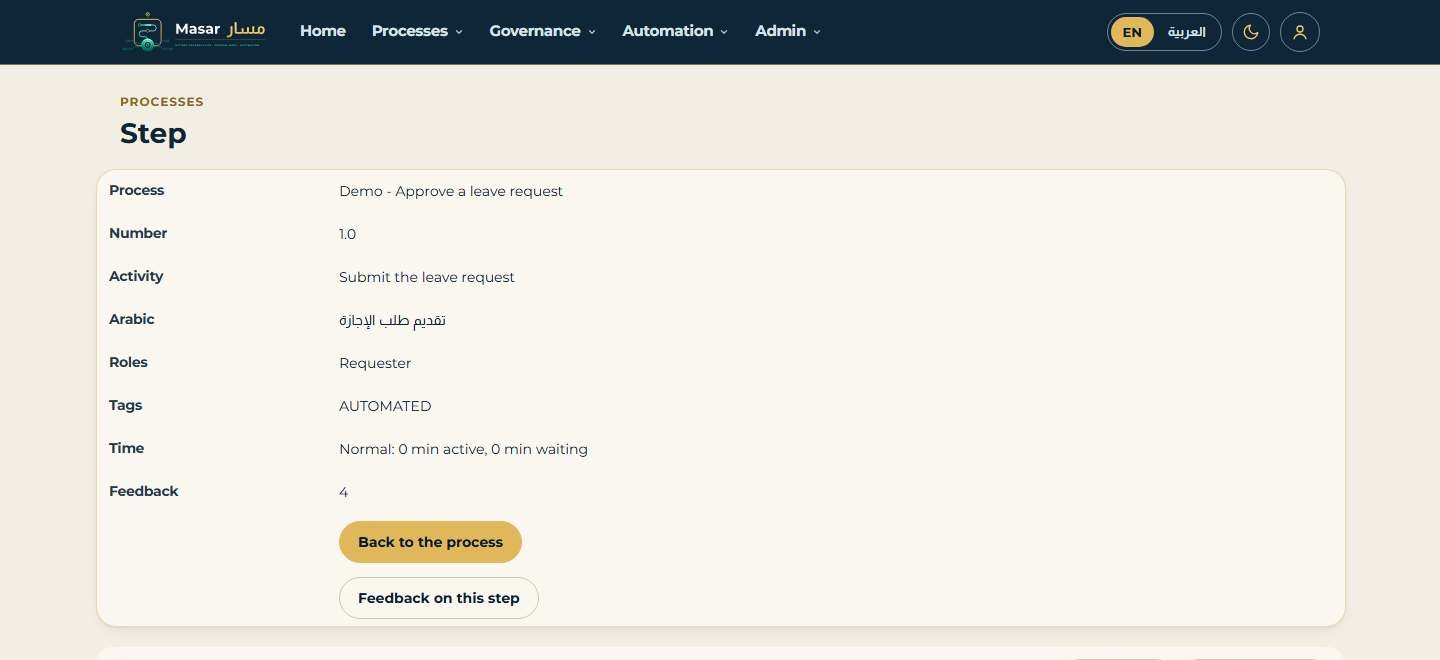
Figure 35 - Step page opened from the map
28.2 Zoom, fit, full screen, SVG and PNG
Above the map: Zoom (50 to 200 %), Fit to screen, Full screen (a page with only the map), Download SVG and Download PNG (a page that turns the map into a PNG picture in your browser). The map has a text description for screen readers, a lane for automated steps and lanes for systems; roles marked Non-Display are not drawn.
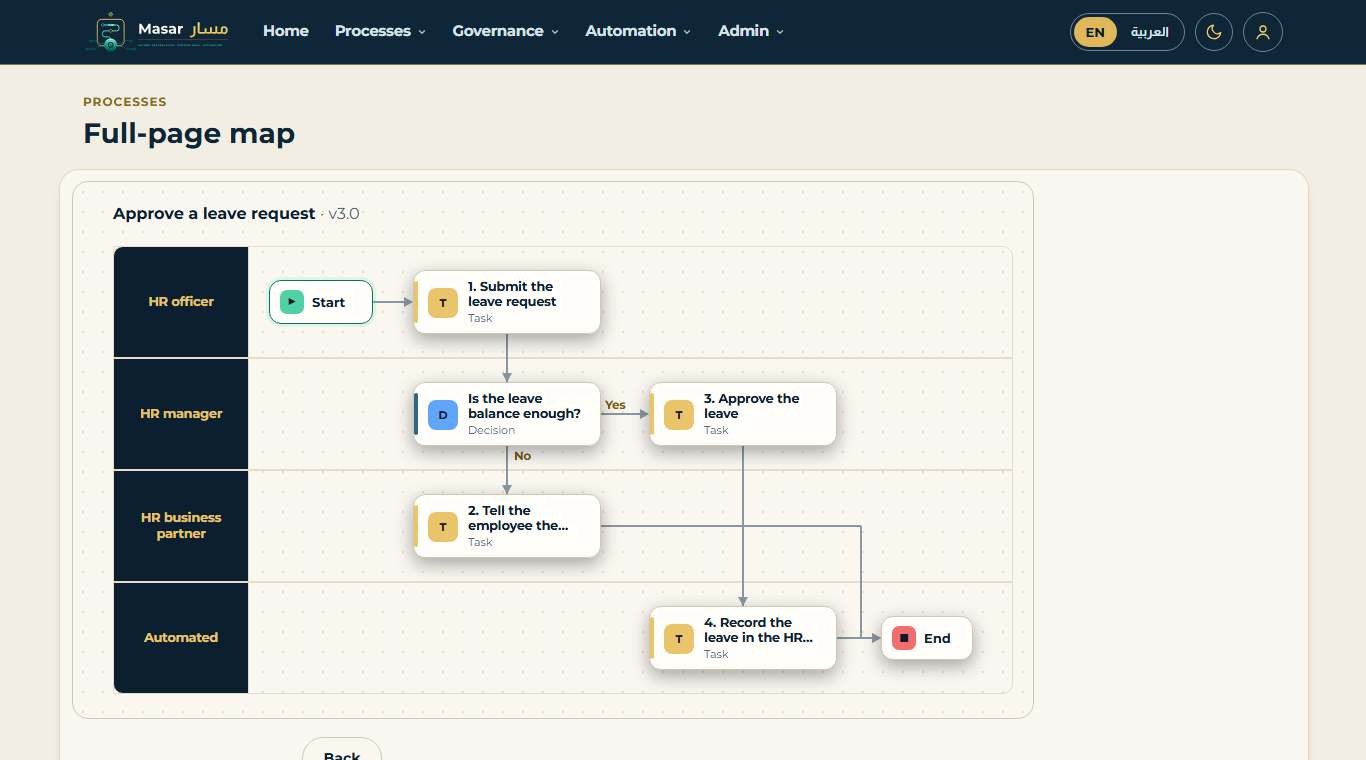
Figure 36 - The map on its full-screen page
28.3 What a reader sees
Readers always see the published version, even while an author writes the next one; the process page says which version is shown. The process page also lists Attributes (reference number, type, team, location, dates, tags, custom fields) and Where used. The home page shows My processes and their review with a colour cue (red overdue, orange within 30 days, yellow within 60 days) and Recently viewed. Browse by class lists processes by team, location, department, owner or type.
28.4 The document library
Home > Document library. Add a document by uploading a file or by giving its https link, with type, title, reference number (auto gives DOC-0001 ...), group or process, owner and review date.
- An upload is checked first: only the allowed types (company setting Upload.Allowed, by default pdf, docx, xlsx, pptx, png, jpg, gif, mp4, txt, csv and vsdx) up to Upload.MaxMB. A refused file is removed at once and the reason is shown.
- The file is then read back from the library folder. The server's antivirus scans it on access: if it removes or blocks the file, the document stays Pending and nobody can download it. When the read succeeds with the same SHA-256 fingerprint, it is Clean.
- Open a document by its number: Download the file or Open the link. Uploads and downloads are in the audit trail.
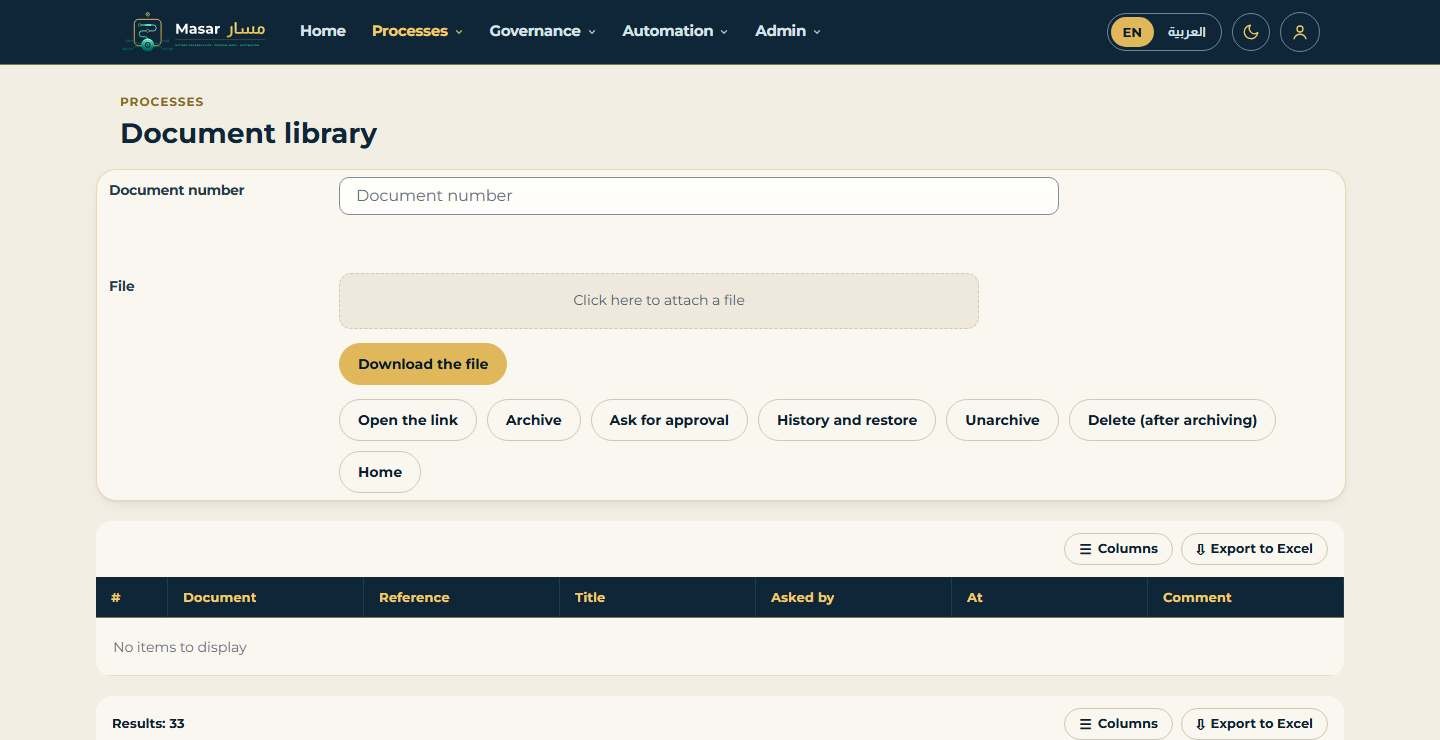
Figure 37 - Document library: add, open and review documents
29 Feedback on steps and improvements
The process page has a Feedback button. Choose what the feedback is about: the whole process, one activity or one item. Rate it, mention a colleague with @user and tick I need an answer if you want a reply.
- The owner replies (Reply or Reply and resolve).
- Delete removes resolved feedback only (it stays in the audit trail).
- Turn into an improvement request creates an improvement on the process; Close improvement records Done or Declined.
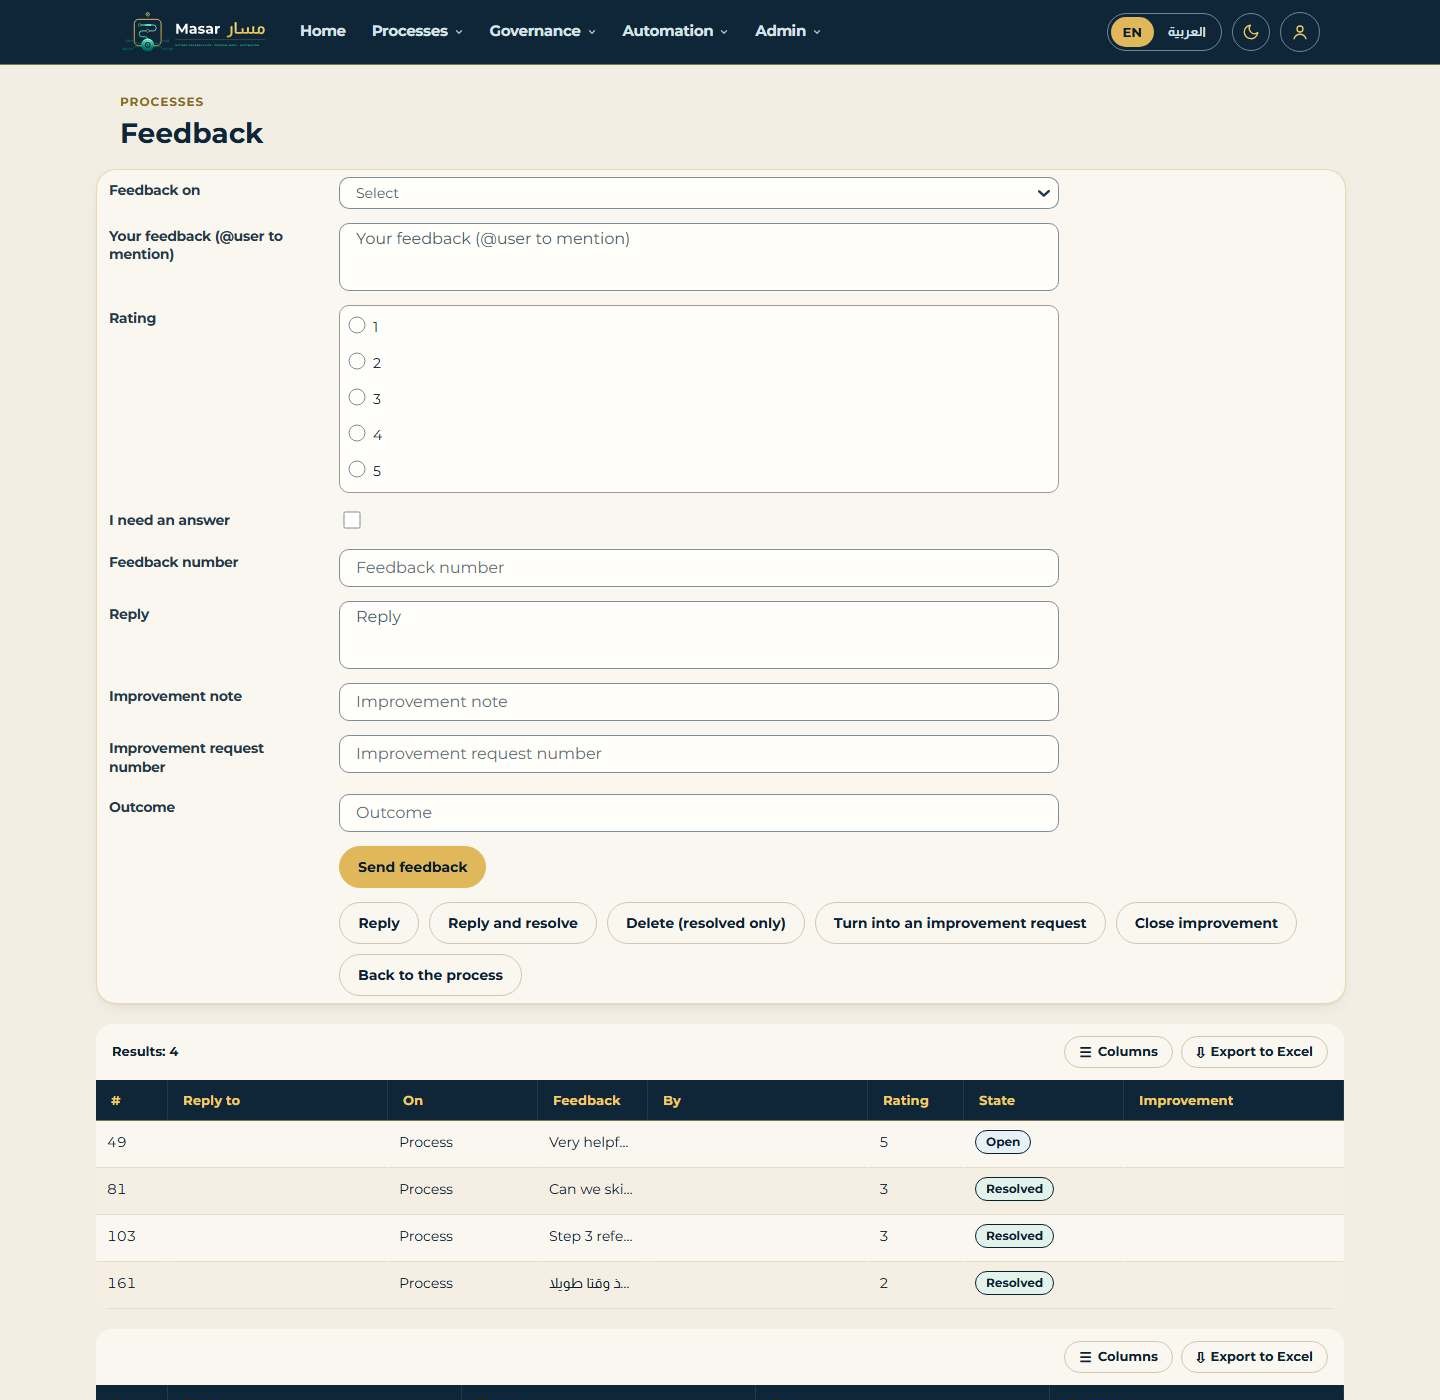
Figure 38 - Feedback on a process and the list of feedback
Every N days (setting Notify.WorkSummaryDays) each person receives one e-mail with what waits for them: approvals, reviews due, feedback to answer, open improvements and documents to review.
30 App Admin: access, audit and administration tools
30.1 Access levels
Home > Access levels (App Admin only). Grant a level (None, Reader, Editor, Approver, Publisher, Automation specialist, App Admin) to a user or a ProMap role, for every group, one group with its sub-groups, or one process. Confidential and Restricted processes are visible only to the people with a level on them; reading one is written to the audit trail. Check shows the rights of a user; the rights matrix can be exported (the export itself is audited).
Who does what: the App Admin grants these access levels; assigning the RACI roles on the steps of a process is done by any Editor of that process - its owner, its expert or an editor the App Admin granted.
30.2 Audit trail and continuity
- Home > Audit trail. The trail is append-only and hash-chained: Verify the audit trail recomputes the chain and reports Intact or the first broken entry. Record an anchor gives you a hash to keep outside the product; Export the audit trail gives CSV or JSON lines for a SIEM.
- Owner continuity: when a person leaves, name the successor and Hand over to the successor. The successor gets a task (Accept or Decline); on Accept every process they owned or were expert of moves to the successor.
30.3 Administration tools
Table 25 - Administration tools
| Tool | What it does |
| Terminology | The company's own word for Process, Group, Owner, Expert, Champion, Role, System ... in English and Arabic; empty = default |
| Custom fields and process types | Fields per process type (text, number, date, list, yes/no; required or not); new process types |
| Groups | Move a group under another one (never into its own sub-group), order Up/Down, stakeholders (users or roles) who receive the group's notifications, overview counts |
| Roles | Import from CSV (NameEn, NameAr, RoleType, DepartmentCode, AnnualCost, Members), merge two roles, where a role is used |
| People | Display names in English and Arabic, e-mail, job title, team, location; import from CSV; a picture (uploaded and scanned like a library file) |
| Quick links | Links shown on the home page (https only), with order and on/off |
| System pages | Description, owner, vendor, hosting, tags and stakeholders of a system, and the steps that use it |
| Bulk changes | Change owner or expert, move to a group, set the review date, add a tag or archive for all processes that match a filter; always try Dry run first; every changed process gets an audit and change-log row |
| Search | Synonyms (invoice = bill), "did you mean" suggestions and search analytics (what finds nothing) |
| Writing checker words | Verbs an activity name may start with, in English and Arabic |
| Data residency self-check | Eleven checks: database and files on the customer server, links to outside domains (setting Residency.AllowedDomains), mail through the customer's own server, no outside cloud services |
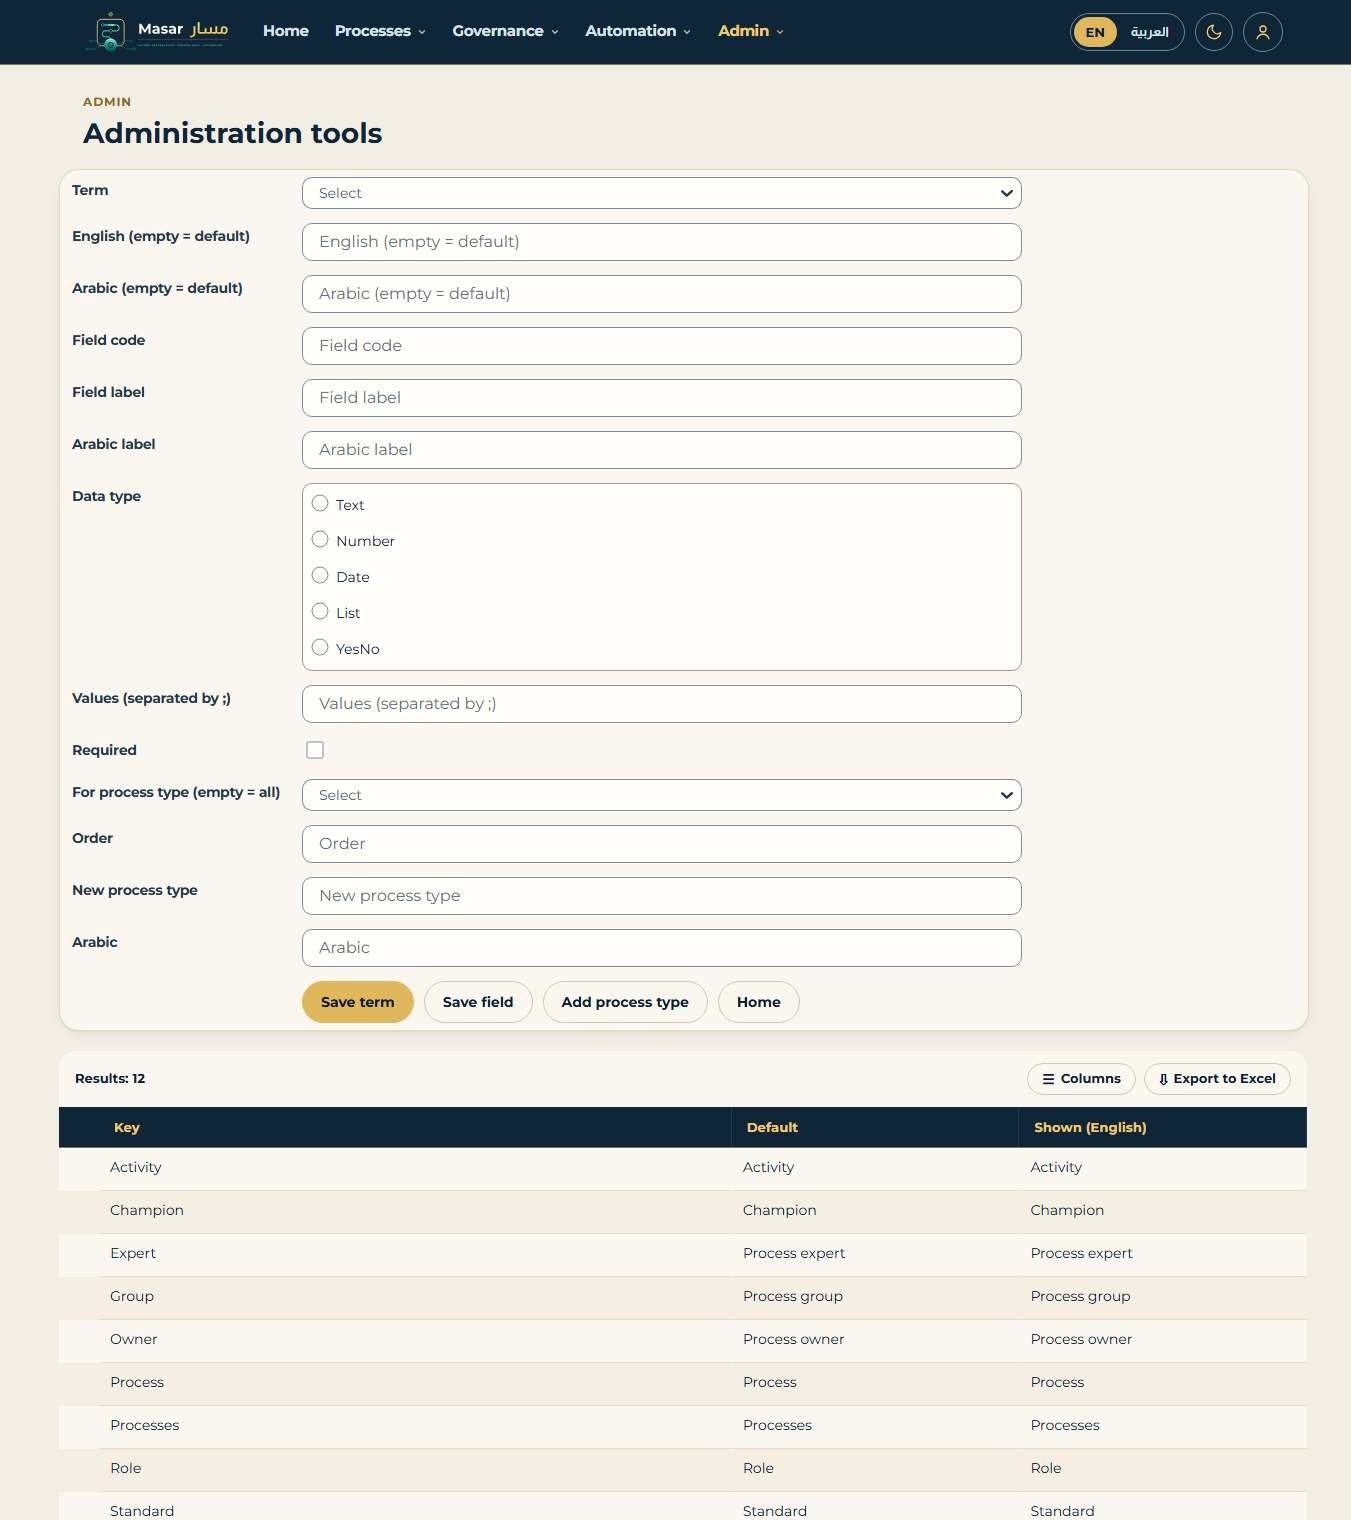
Figure 39 - Administration tools
30.4 Notifications
Home > Notifications (chapter 23 lists the Notifier workflow). Templates exist in English and Arabic; each user chooses immediate or daily digest delivery and quiet periods. The administrator can send a test e-mail; Arabic subjects and bodies are sent as UTF-8 through the customer's own K2 mail server.
31 Exports, reports and automation patterns
- Print > PDF (English and Arabic): the business requirements PDF with both languages side by side, page numbers and the sign-off block with the approver (settings Print.PageNumbers and Print.ShowSignOff).
- Process Discovery > Export the event log (XES) or (CSV): the cases of a discovery run for other process-mining tools.
- Reports: 25 new reports (activities by role, to-do, search analytics, changes not yet viewed, terminology, approvals and seals, document library and reviews, where used, Lean tag map, process tags, variations, group overview, system owners, audit trail, continuity, access levels, improvements, notifications, bulk changes, custom fields, translation gaps, dependencies, team and location, editor comments).
- Automate with ActiBot: the request now has a start event (a form, a connector or REST call, a schedule or manual) and a step pattern per step: Task, Decision, SmartObject, E-mail, Notification, Wait (a K2 timer for the waiting time), Loop (repeat until done), SubWorkflow (the linked process's workflow, started and awaited), Parallel (consecutive parallel steps run at the same time and join) or Placeholder.
- Document a K2 workflow (chapter 13) now recognises SmartObject steps, sub-workflows, parallel splits, loops, timers and e-mail steps.
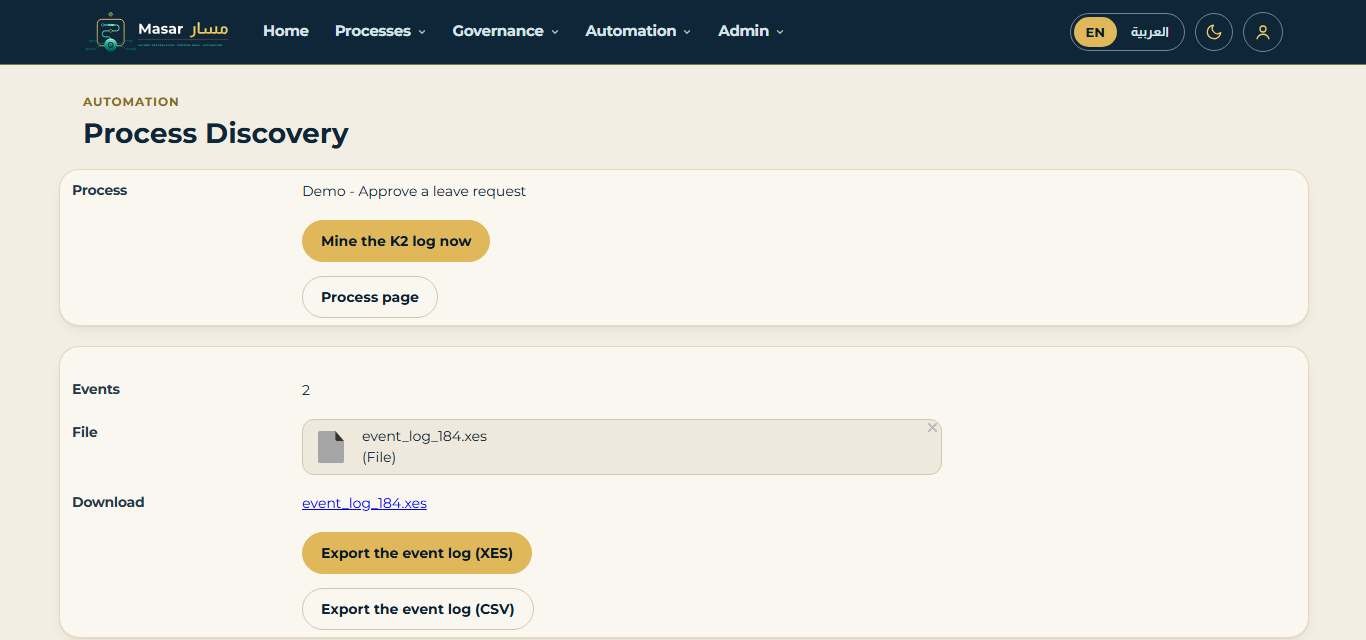
Figure 40 - Process Discovery: the event log of a run exported as XES
Part D - Release 2.2 additions
Chapters 32 to 41 describe what release 2.2 adds. Everything in them was tested on Nintex Automation K2 5.9.1. Where a part is a customer-side check, the text says so.
32 Sharing outside the library
32.1 Outside links
On a published process choose Outside links. Make a link gives the link once: copy it and send it. The token in the link is kept as a hash only; a link expires (default 30 days), has a limit of openings per hour and can be switched off at any time. The outside reader signs in with an external K2 account first; the link then opens a read session on this process only.
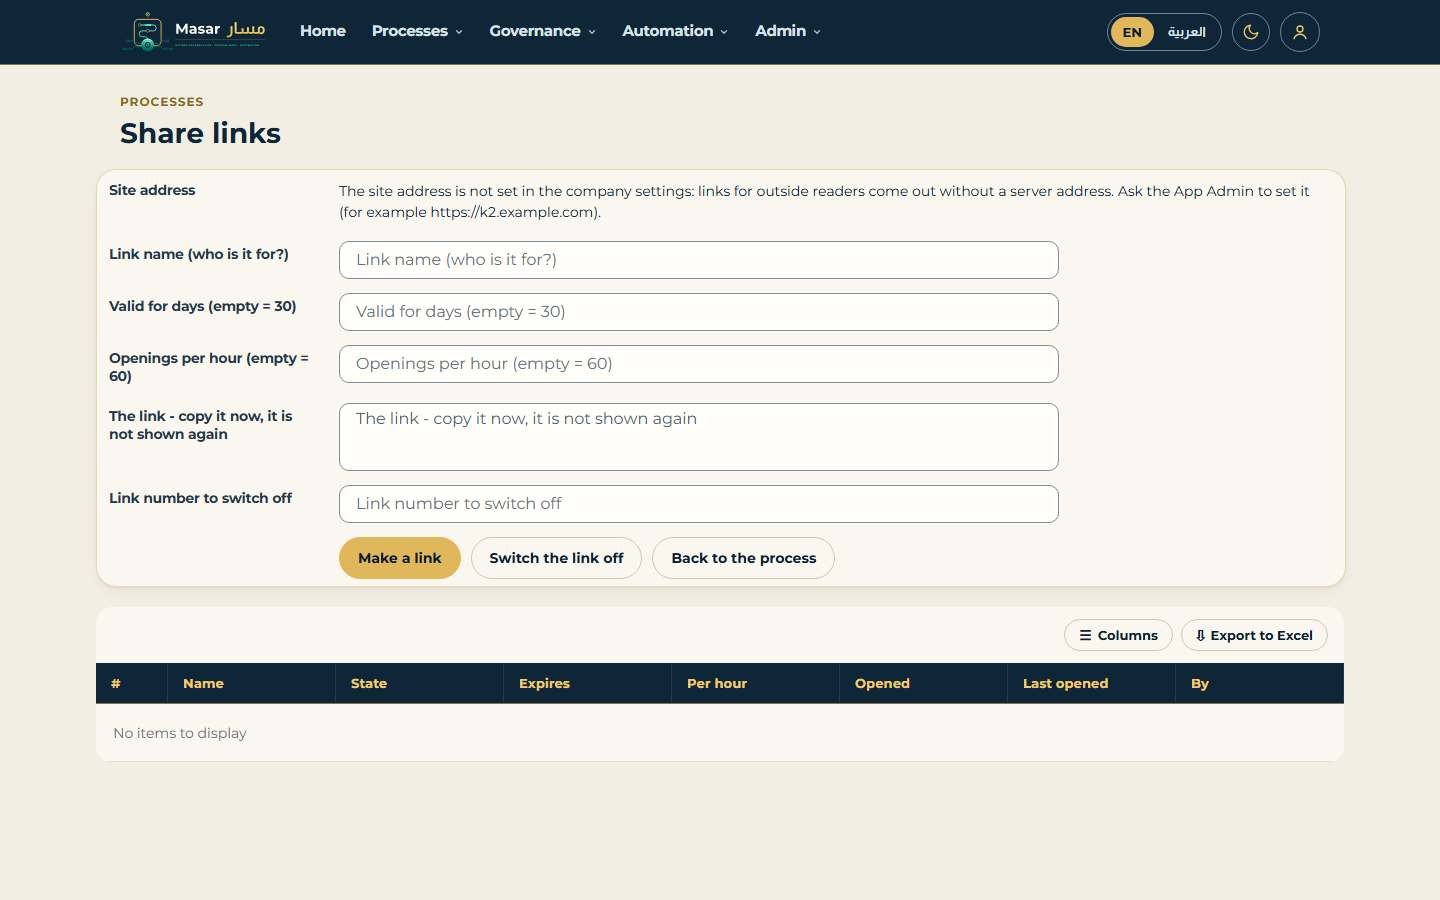
Figure 41 - Outside links: make a link and switch it off
32.2 The documented step beside a K2 task
The view "The documented step of this task" can be added to any K2 task form. Pass the task serial number (or the workflow and activity names): the form shows the step as documented in the library, its tasks and notes, and a link to the step page.
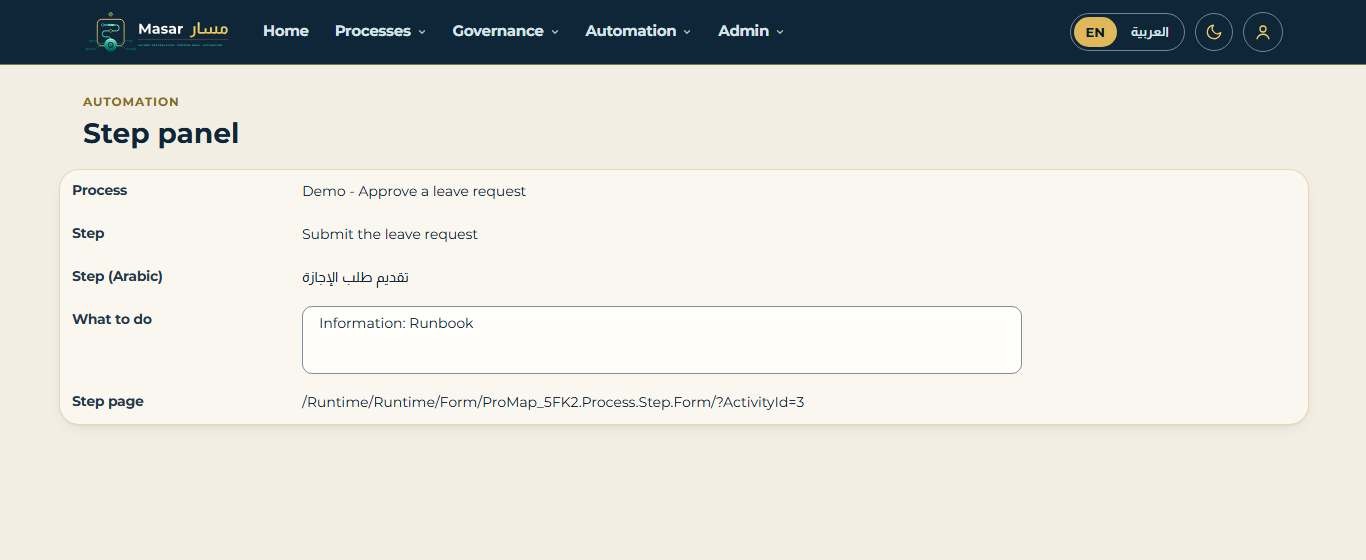
Figure 42 - The documented step beside a K2 task (Step panel)
32.3 Search feed and offline copy
The App Admin builds the search feed again from the Search feed and offline copy page: one page per published process, for an enterprise search crawler. Any reader can make an offline copy: one HTML file of the published content they may read, which opens with no server. The offline copy is not updated by itself; drafts are never in it.
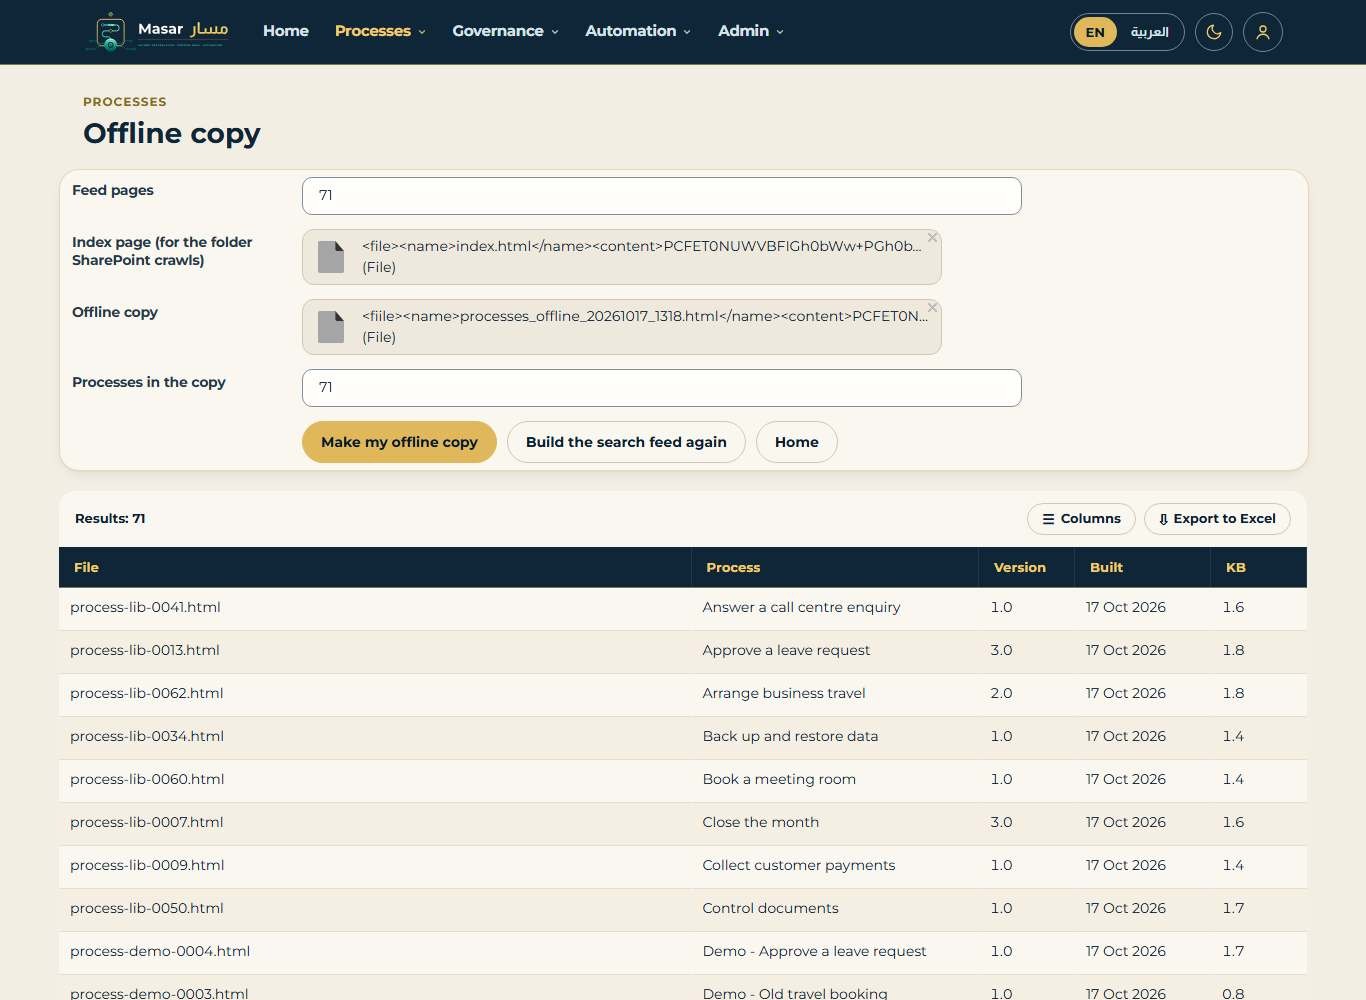
Figure 43 - The offline copy: one file, opens with no server
32.4 Short links and QR codes
Short link on the process page gives an 8-character link and a QR code for a step or the whole process (for a poster, a print-out or a task form). The link opens the step page for a person who may read the process; anybody else sees "This link is not known or not open to you".
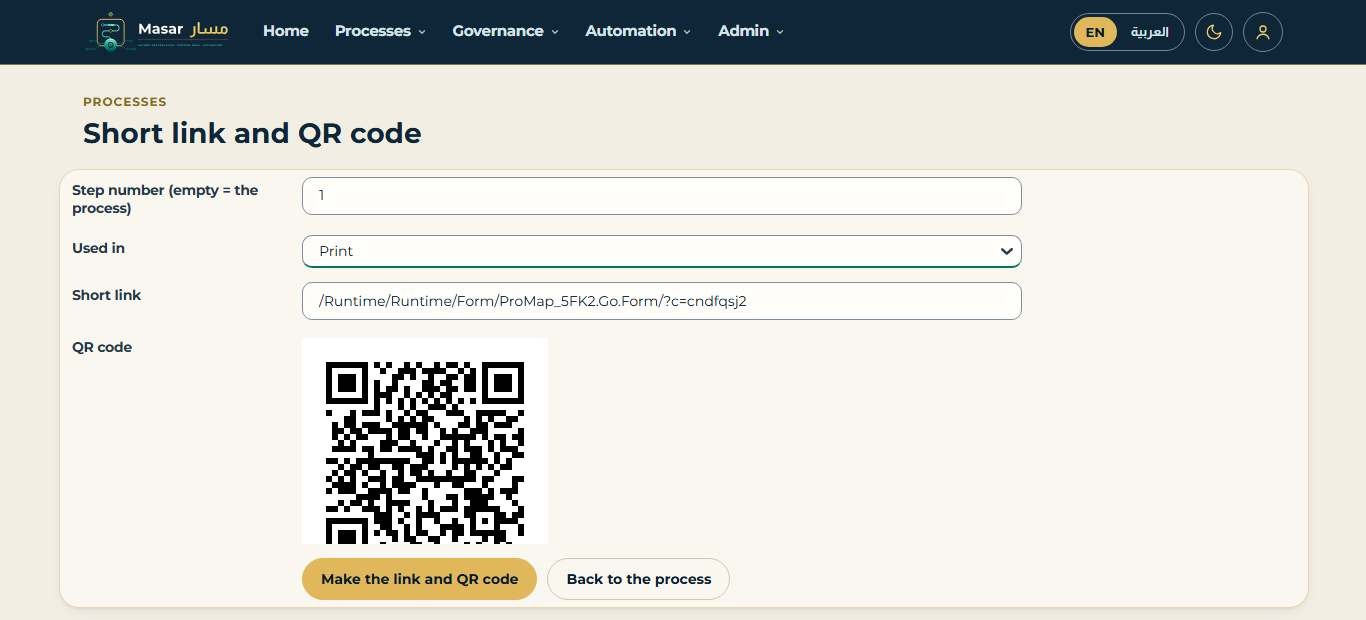
Figure 44 - A short link with its QR code for step 1
33 Modelling tools
- Timing: the process time is the longest path through the steps, branches and parallel steps, not the sum of all steps.
- Flattened view: the steps of a process with the steps of its sub-processes in place, numbered as one list.
- Process landscape: the library as levels L0 to L4 (department, group, process, step), shown as area cards (chapter 48).
- Tidy step numbers: in the model editor, removes typed numbers ("1.", "Step 3 -") from imported step titles and numbers the steps again.
- Properties panel and executable BPMN: the model editor shows the K2 step type, actions, SmartObject, colour and note of a step; Executable BPMN gives a BPMN 2.0 file with these as extension attributes. The canvas keeps these choices on save; the export stays plain BPMN 2.0.
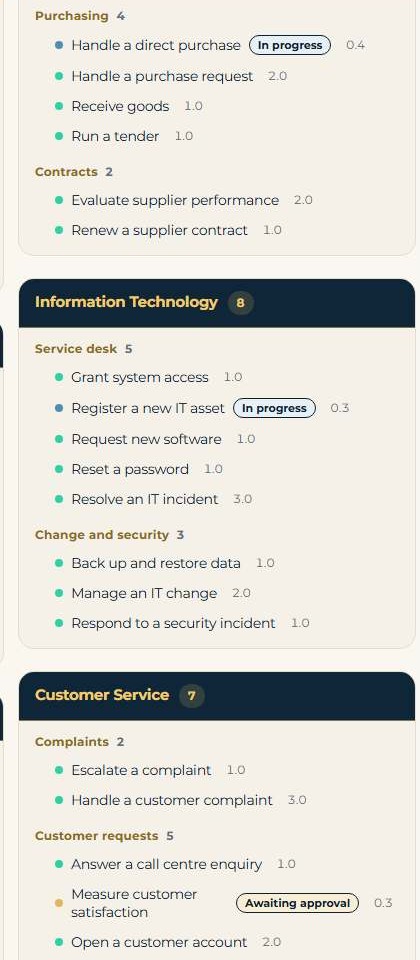
Figure 45 - Process landscape: area cards with their groups and processes
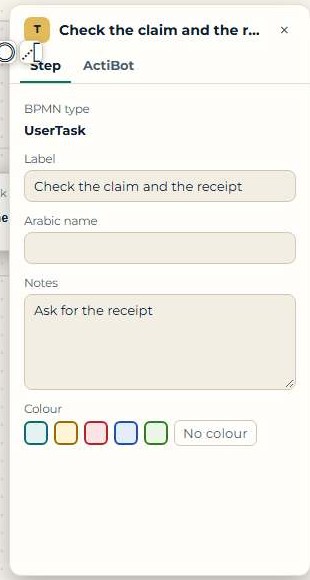
Figure 46 - Model editor: the properties panel of a step
34 Variations and process tools
The Variations page adds a variation with a category and its own expert. Steps shared with the standard process show a counter of linked variations; Unlink the step lets a variation differ, Synchronise linked steps copies the standard's linked steps to every variation, and the side-by-side view and the savings list compare them. A person, role or department can have a default variation: the process page opens it for them. A variation can be archived or made a process of its own. Process tools copies (with the variations), moves, renames and sets how the process is shown.
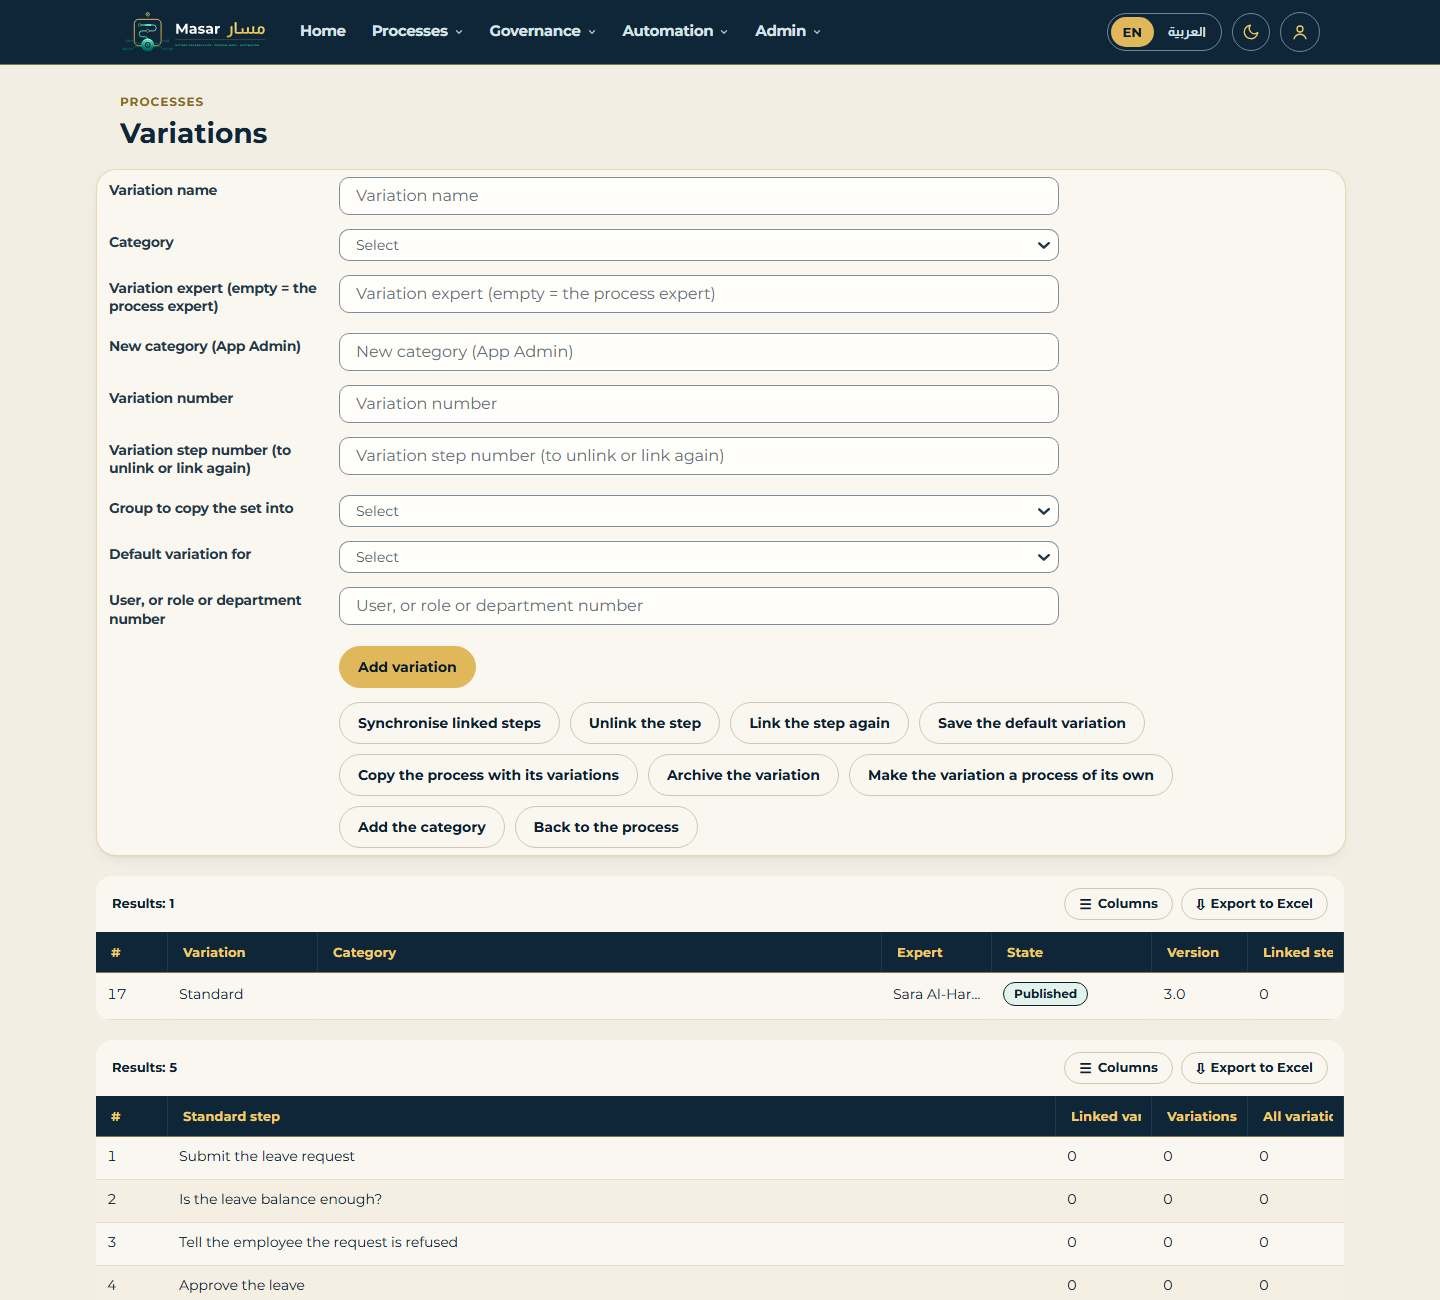
Figure 47 - Variations: the standard process, its steps and the variation tools
35 Governance, compliance and documents
35.1 Health score and change impact
The health score (0-100) of a process adds up eight named rules (owner, review date, roles on steps, feedback answered and more), each with points and the reason. Change impact, before publishing, lists what the change touches (linked processes, documents, K2 workflows) and tells their owners.
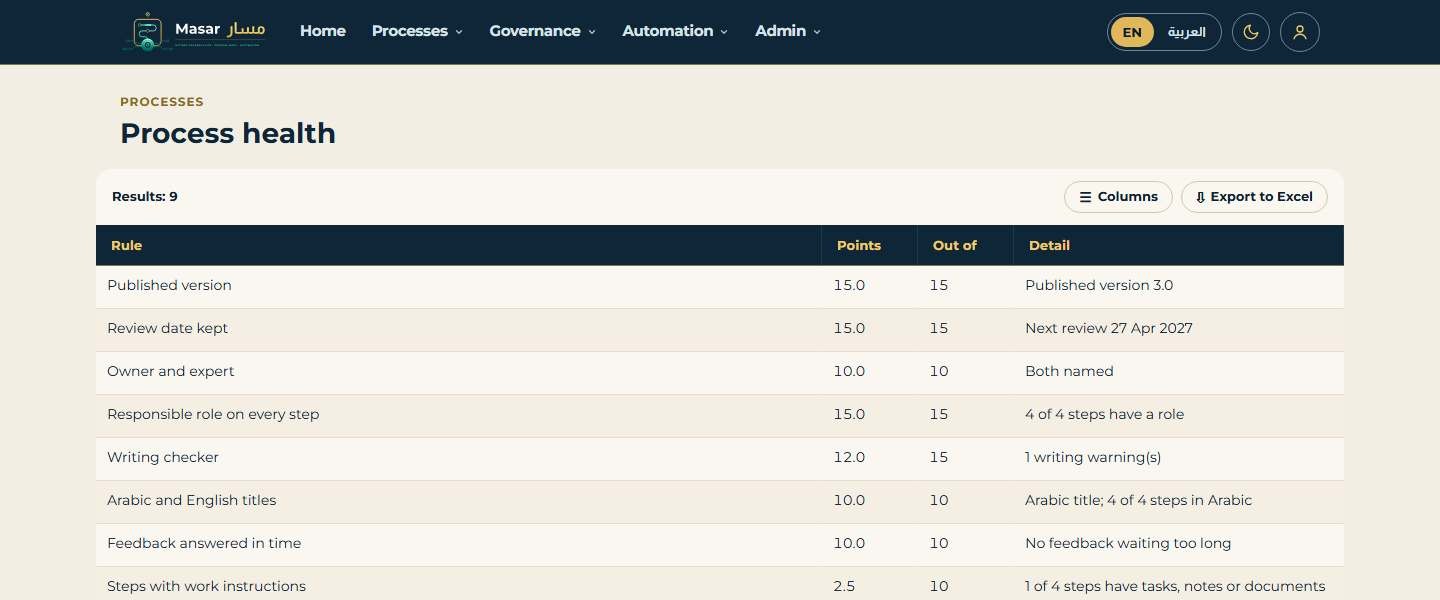
Figure 48 - Health score: the rules with their points and the detail
35.2 Process governance and the role handbook
The process governance page links the policies and standards a process carries out, its objectives and KPIs (with recorded values), the current and target maturity, and change requests on the published process with their decision. Role handbook gives a PDF of everything one role does.
35.3 Compliance
The Compliance page (from Home) holds segregation-of-duties rules (nobody holds both roles, or two steps for two different people) checked against the K2 log, the DGA readiness and service inventory, the vendor registry, the K2 step library, the glossary with term requests, re-engineering cases and my to-dos. The compliance page of one process gives the Procedure Card and the audit pack as PDFs, links vendors and library steps, and adds a re-engineering case with its saving and payback.
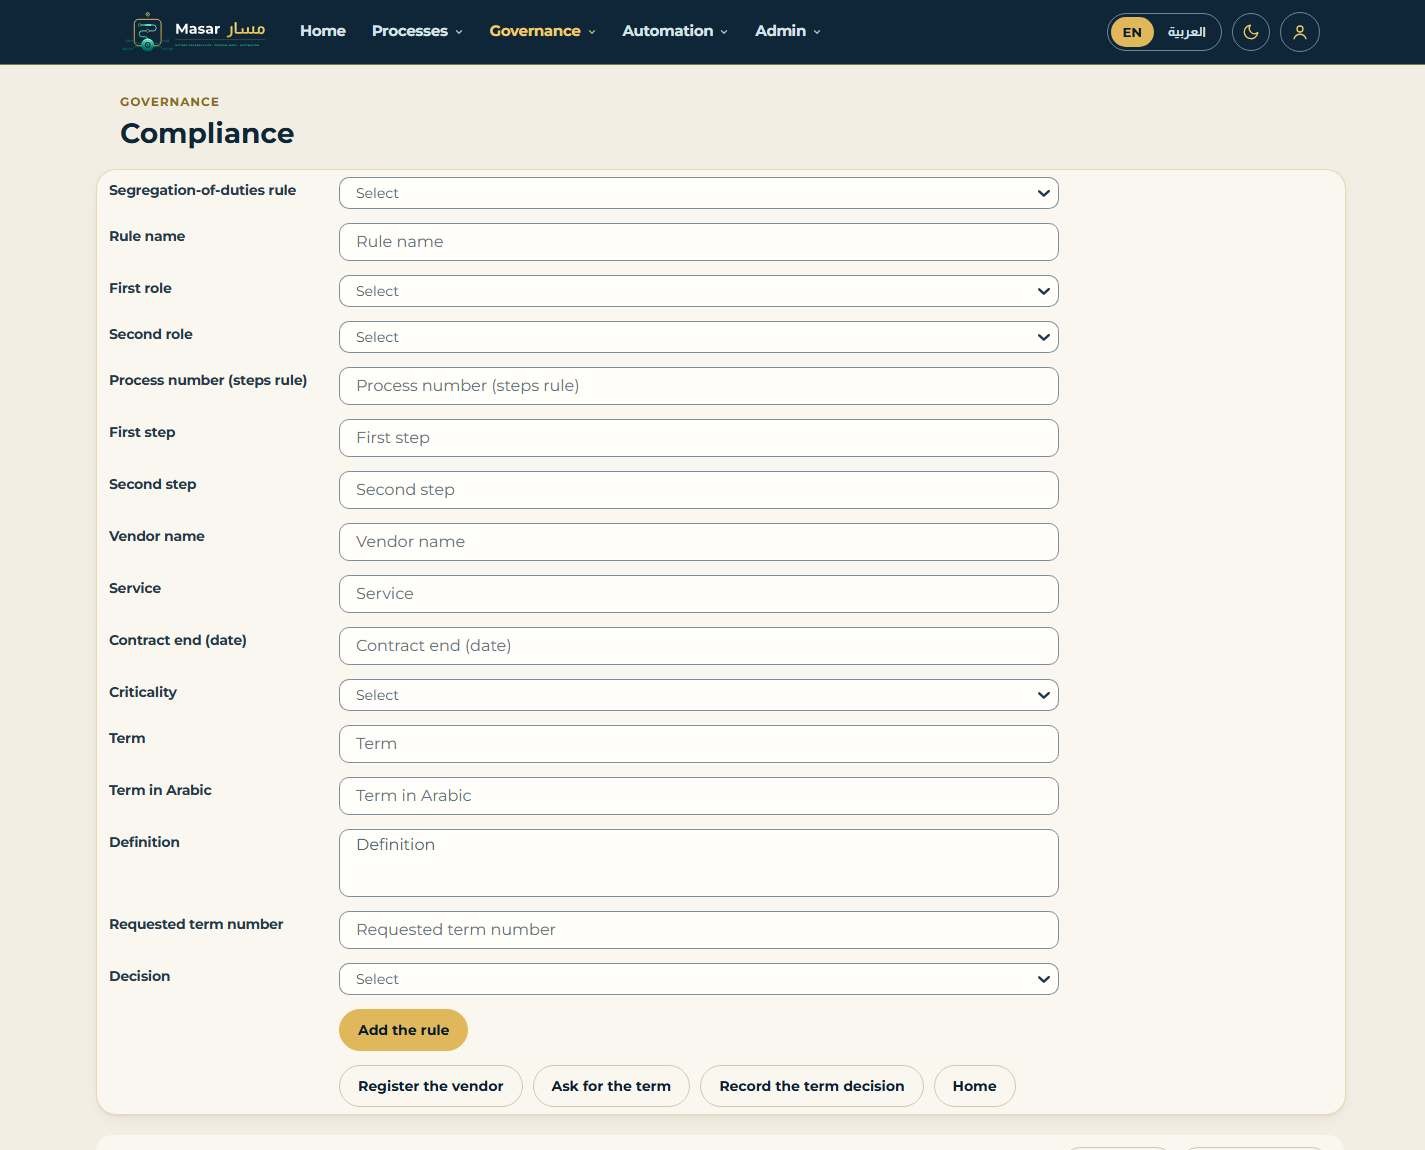
Figure 49 - The compliance page
35.4 Documents: approval, history, element documents, walk-through
- Ask for approval on a library document starts the document approval workflow; the approver approves or declines with a comment. Readers see approved documents only.
- History and restore lists every saved version of a document; restoring makes it the current one. Unarchive brings an archived document back; Delete removes it after archiving (kept in the audit trail).
- In the model editor a document can be linked to a model element (a task, a gateway); the step page shows it.
- Walk-through shows the published steps one by one and marks what changed since the reader last read the process, and steps for the reader's own roles.
- Outside feedback: a person outside the organisation can leave feedback with a name and an e-mail address through an outside link.
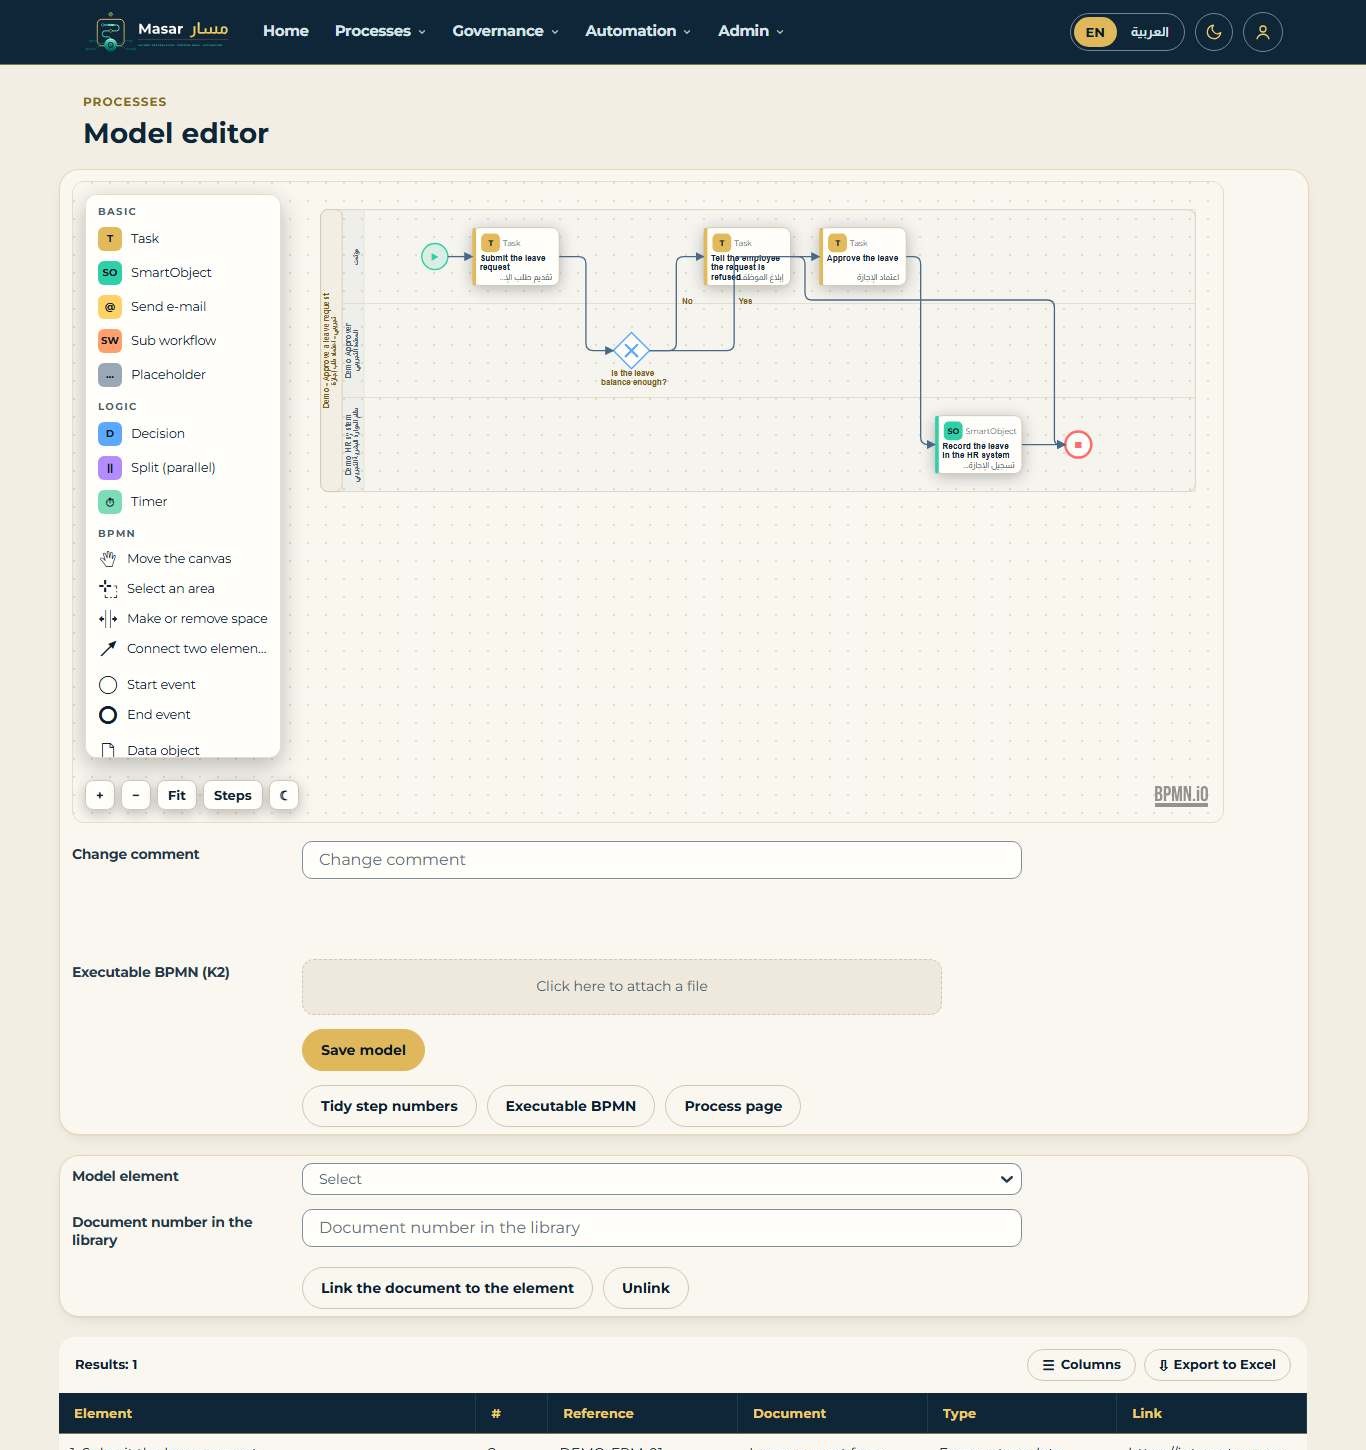
Figure 50 - Model editor with the documents of a model element
36 Process Discovery: the closed loop and automation candidates
The Process Discovery page of a process links what K2 really does with what the library says:
- Interventions: cases where somebody redirected, delegated or repaired the work; version cohorts: running and completed cases per workflow version; triage: the steps with errors.
- Runbook: what to check when a step fails, kept as an item on the step and shown on the step page.
- Improvement from a step: a bottleneck or a breach becomes an improvement request with its evidence (cases, documented and measured minutes); its benefit is measured after the change.
- Automation candidates: every process scored on volume, effort, manual steps and systems; a business case (steps to automate, saving, build and run cost, payback) and a what-if of volume and time.
- Re-import from K2: the differences between the K2 workflow and the documented steps, one change at a time, each accepted or rejected.
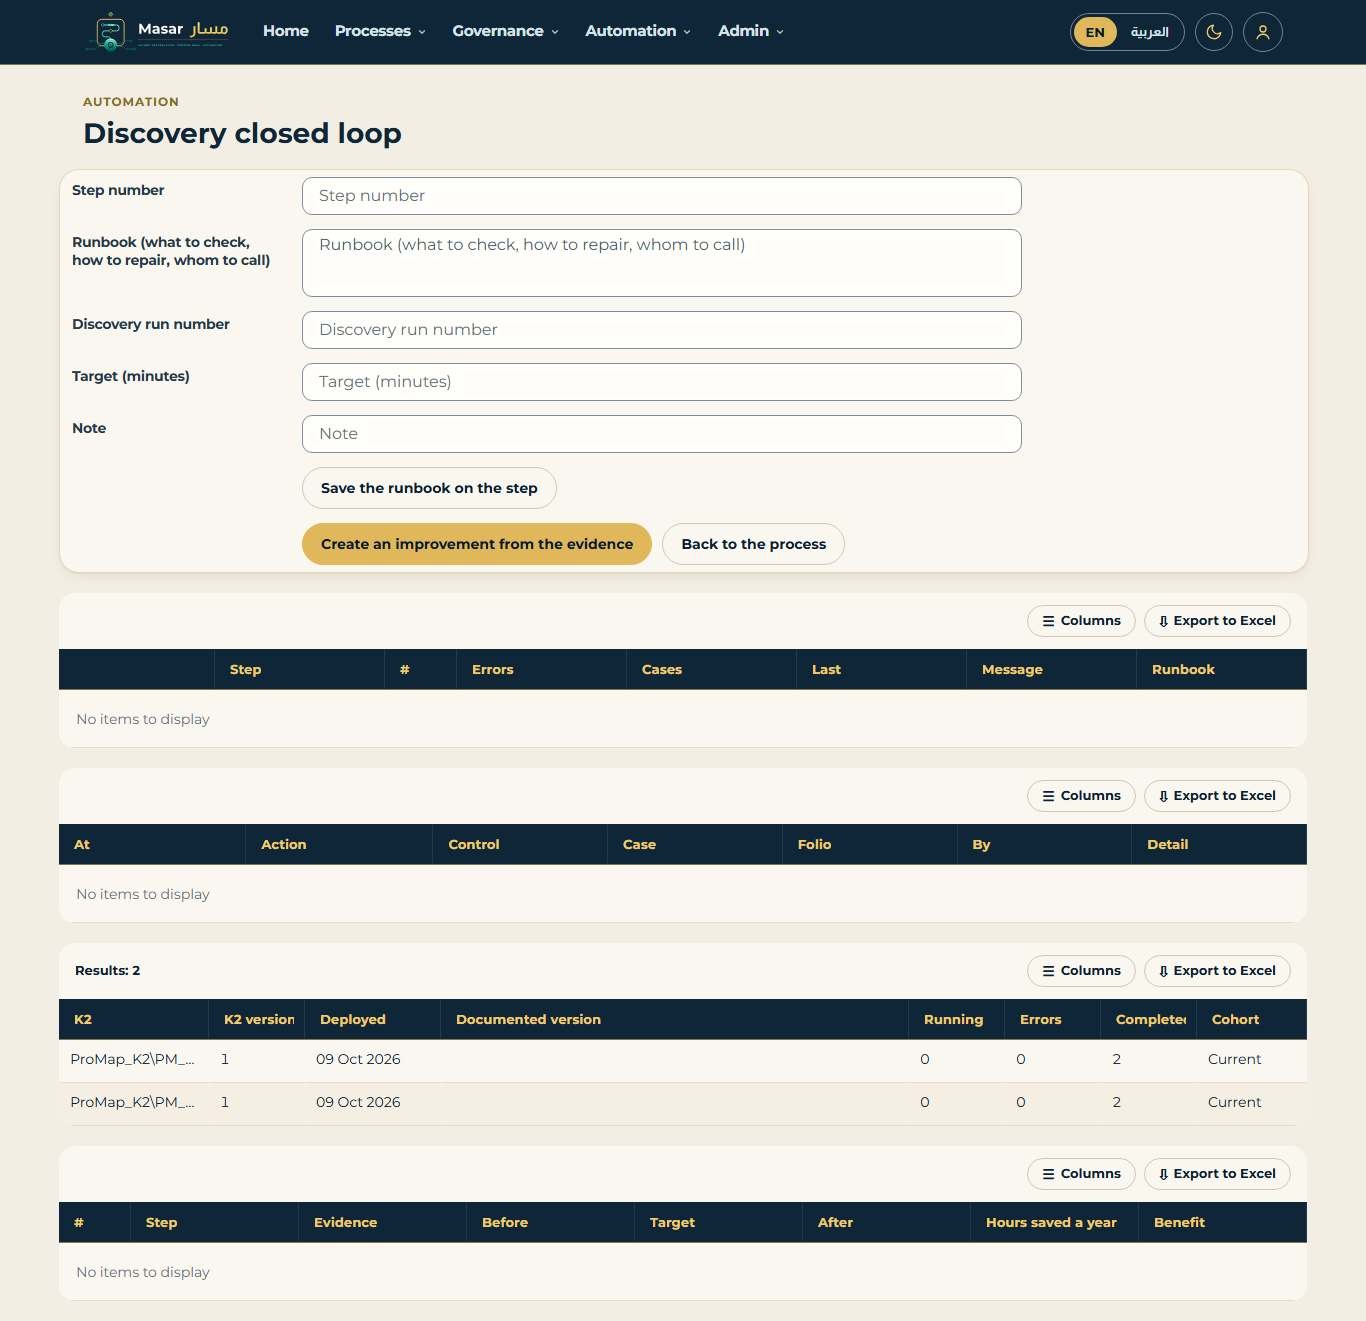
Figure 51 - The closed-loop page: interventions, cohorts, triage and the runbook
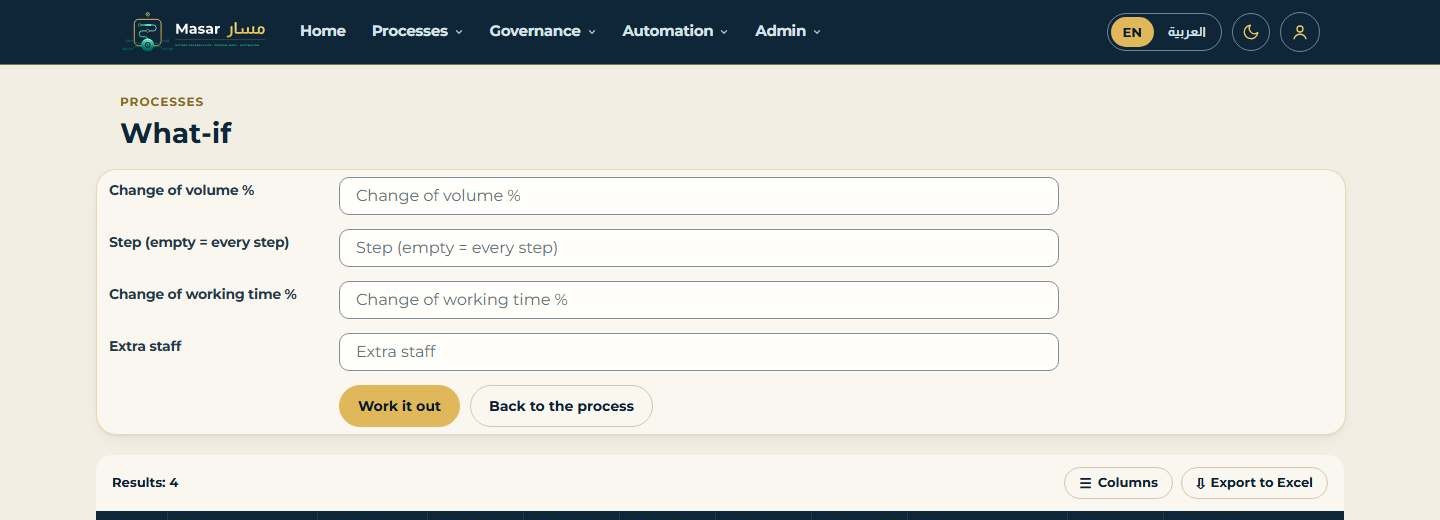
Figure 52 - What-if: a change of volume or working time and its effect on each step
37 Automate with ActiBot: the hand-off
The automation request (chapter 10) carries everything the ActiBot team needs to build, test and package the workflow without coming back with questions. The request is received by the ActiBot team, who prepare the workflow; nothing is installed on your K2 server without your approval.
- Request file ActiBot.Request/2: the process, its steps mapped to K2 (task, SmartObject call with its method, e-mail, sub-workflow), data fields, task forms, start event, test users and the acceptance rule.
- Process Builder file (ProMap_K2.Link/1): the steps in order with branches and the SmartObject and method of each SmartObject step.
- Needs and open decisions: SmartObjects to create or confirm on the customer server, task forms with their fields, and what is still to decide.
- Delivery back: the contact and channel, the K2 category and item prefix, what ActiBot may create on the customer server, the environments and the K2 version (company settings ActiBot.DeliveryContact, ActiBot.DeliveryChannel, ActiBot.ProjectCode, ActiBot.MayCreate, Env.ExistingSmartObjects).
- A cover note for the ActiBot team. The request PDF has two new sections: 9 Delivery back to the customer and 10 Open decisions.
Status back. ActiBot sends the package with a status file (ActiBot.Status/1: state, workflow and version, package name, version and SHA-256, tests passed, dry run, environment). The administrator pastes it on the Automation page under Delivery from ActiBot; it must match a request sent from this server (SHA-256), and the request's status follows it.
38 Read-only API for Power BI and Excel
The App Admin makes an API token on the API tokens page (Home): a name, a scope (All, Processes, Usage, Improvements) and up to 366 days. The token is shown once and only its hash is kept; every use is counted and a token can be revoked. The API lists - processes with cycle time, cost, views, feedback and review state; published steps; usage per month; improvements; published versions - show published, non-confidential content only. Power BI and Excel reach them through the customer's K2 OData endpoint; the Power BI and Excel templates are delivered with the product. Tested: the token and content rules. To check at go-live: the OData transport with the customer's sign-in.
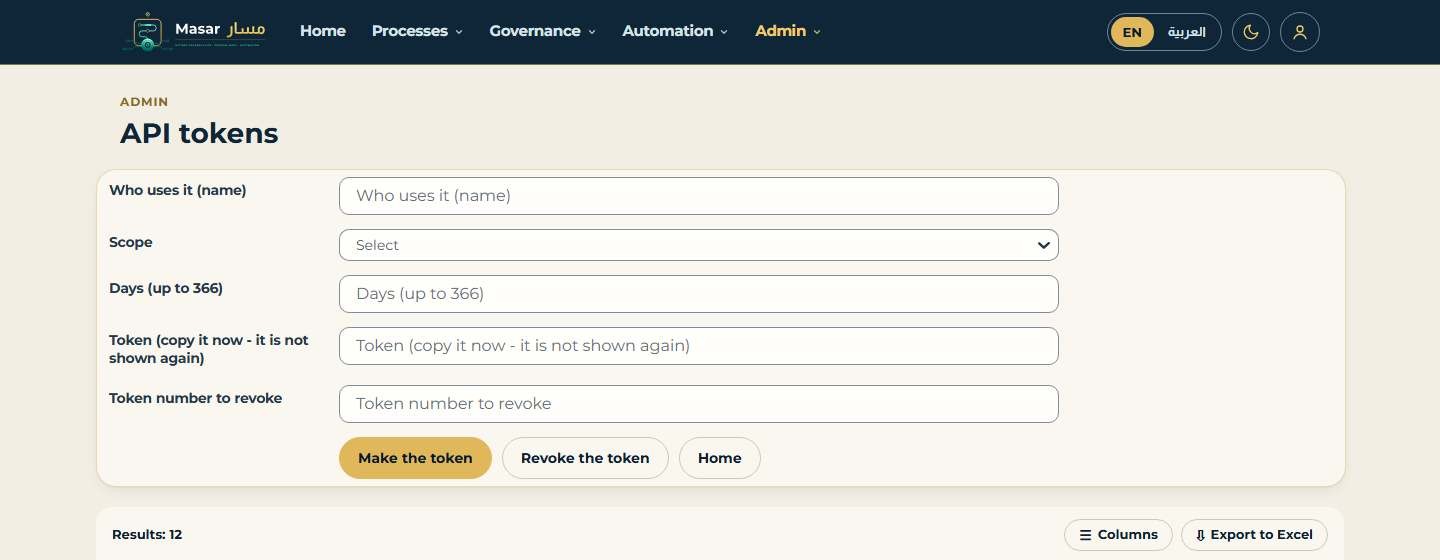
Figure 53 - API tokens: make or revoke a token
39 Platform tools
39.1 Import from Excel or a whole Visio drawing
On the Platform tools page pick the group, give a title and choose the file. An Excel sheet needs the column names in row 1 (Step, Role, Tasks, Note, System, Minutes; Arabic names work too): Preview the Excel sheet shows the steps and roles found, Import the Excel sheet makes the process (tasks separated by ";"). Import every Visio page makes one process per page with process shapes and a parent process whose steps link to them; a page without process shapes (a cover, a legend) is left out.
39.2 Signed content packs and group tools
Group tools (pick a group, then Group tools) lists the suggested processes of the group and its sub-groups, refreshes the group (missing review dates and search words, then a data check) and exports the group as a signed pack: the published, non-confidential processes as procedure text, signed with the server's seal certificate. Check the pack shows whether its content is unchanged and its publisher trusted; Import the pack into the group brings its processes in as drafts. A pack from another server is imported only after an App Admin trusts its publisher (Trust the publisher with the certificate in the pack); a changed pack is refused.
39.3 Maintenance
Run a task with a dry run first: Check the data (published without a saved version, steps without a role, reviews overdue, links to missing processes), Missing review dates (last publish plus Review.DefaultMonths) and Missing search words (roles, systems and tags). Bulk changes (owner, expert, group, review date, tag, archive) stay on the Administration tools page. The page also shows the site address warning: links for outside readers, the feed and the portal need Company.SiteUrl.
39.4 Rules library
A rule table has up to three inputs, one output and a hit policy (First match, or Exactly one). Write one rule per line: conditions separated by ";", then "=>" and the output, for example ">= 100000; Capex => CFO". A condition is a value, an operator and a value (=, <>, >, >=, <, <=) or "-" for any value; numbers compare as numbers, text without case. Test gives the answer and the rule that applied. On the Requirements, sign-off and rules page of a process the table is tied to a decision; its rules appear in the BRD as numbered requirements.
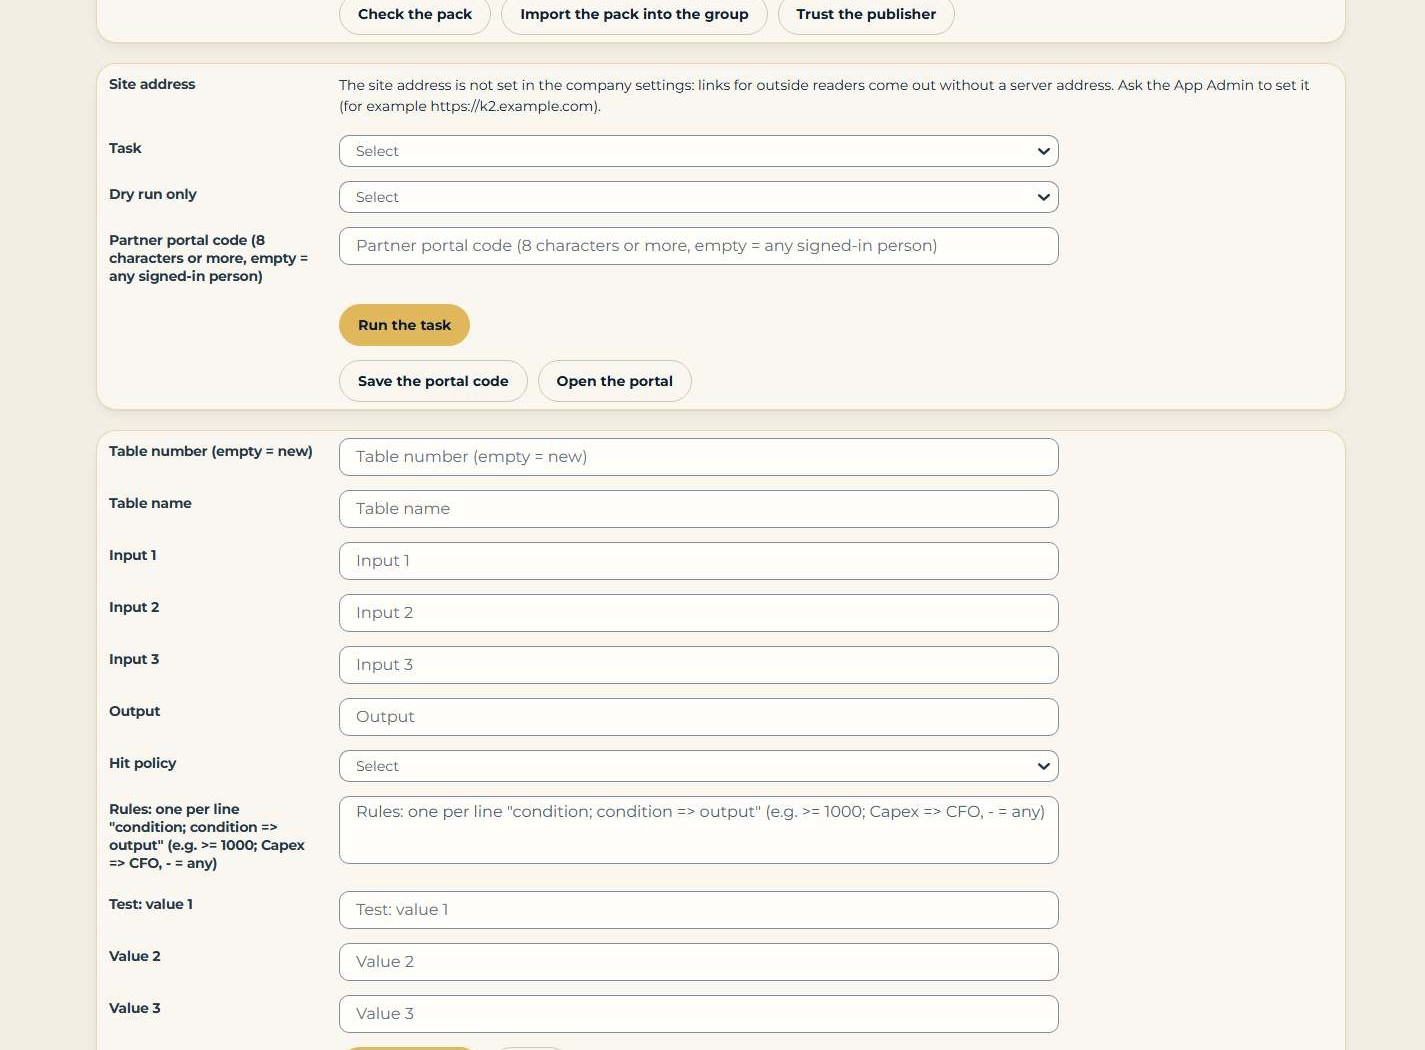
Figure 54 - Platform tools: maintenance and the rule table
39.5 Partner portal
On the Requirements, sign-off and rules page, Show on the portal puts a published, non-confidential process on the partner and citizen portal. The portal is Arabic first and shows the service title, summary, number of steps, last update and the step titles - never people, roles, systems, notes or documents. An App Admin can protect it with a portal code (8 characters or more, kept as a hash); without a code any signed-in person can open it.
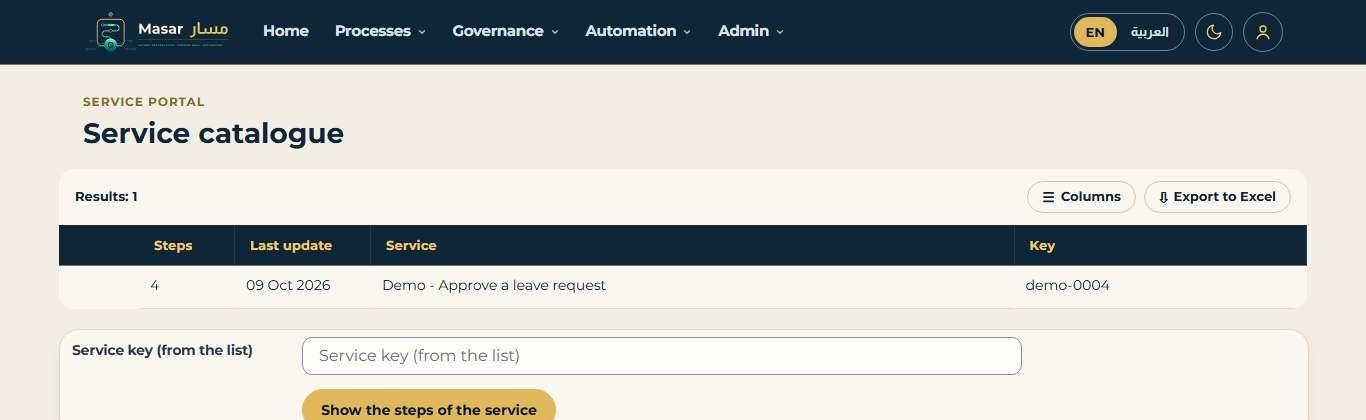
Figure 55 - The partner portal: the service catalogue
40 BRD numbered requirements and sign-off
Requirements, sign-off and rules (on the process page) lists the numbered requirements of the process: every step, task and decision rule gets a number BR-001, BR-002 and so on. A number never changes: a renamed step keeps it, a removed task is retired at that version, a new task gets the next number. Sign lets a business owner or another signer approve or reject the BRD of this version in a named role (a rejection needs a reason); the sign-off stores the hash of the requirement list, and the list shows whether the requirements changed since. The BRD document now has the company header and logo (Brd.HeaderText, Brd.LogoUrl), extra sections (Brd.ExtraSections), the numbered requirements and the recorded sign-offs. The page also shows the running-version rule: a new version changes the K2 workflow for new cases only; a case that has started stays on its version.
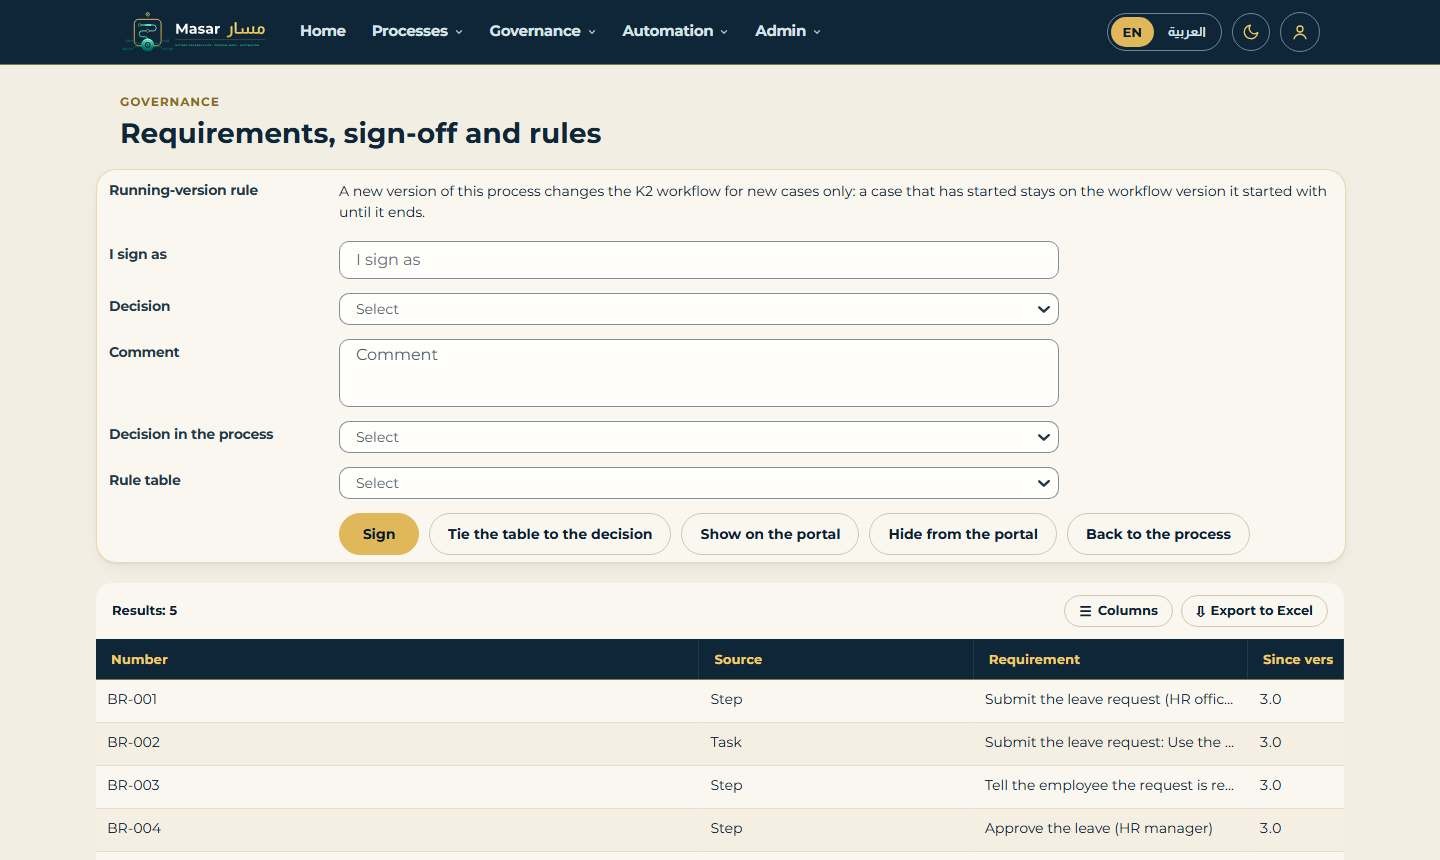
Figure 56 - Requirements, sign-off and rules: the BR numbers of the process
40.1 Accessibility
Release 2.2 was checked for accessibility (the WCAG 2.2 AA checks a browser can make): page language and title, names of images, fields, links and buttons, tab order and zoom, on the home, process, platform and portal pages. K2 draws fields without a label tied to them, icon links without text and a page that blocks zoom; the Masar theme names them from the label next to them and allows zoom, so all checks pass. Colour contrast and a screen-reader pass are manual checks.
41 Power BI dashboards
The reports page shows four Power BI dashboards from the report server: Process library (3 pages), Process performance (4 pages: time and cost, Process Discovery and automation), Use and improvement (3 pages: views, searches, feedback and improvements) and Risk and compliance (chapter 60). They read the product database through the report server.
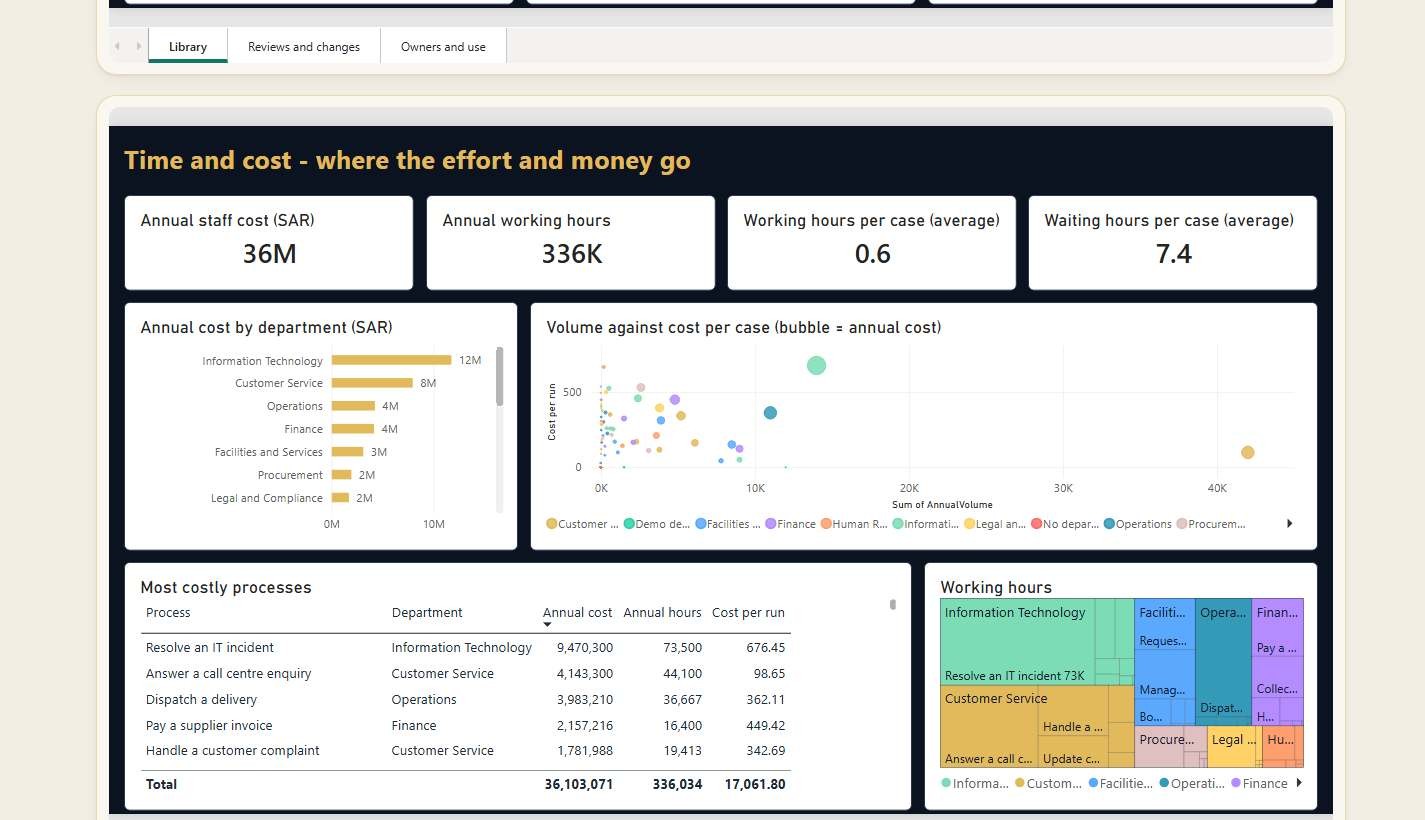
Figure 57 - The reports page: the Time and cost dashboard
Part E - Release 2.3 additions
Chapters 42 to 44 describe what release 2.3 adds: the process map in the canvas style, and the Automate with ActiBot wizard with its three kinds of request. Everything in them was tested on Nintex Automation K2 5.9.1.
42 The process map in the canvas style
The process page, the full-screen map, the mini page and the map overlays draw the map the way the model editor shows it: a dotted canvas that follows the look (ivory in the light look, navy in the dark look); one swim lane per role or system; and a card for every step. A card shows the type chip (T task, D decision, SO SmartObject, @ e-mail, SW sub-workflow or linked process, S system step), the type name and the numbered title. The bar on the card's side has the step type's colour, or the colour chosen for the step in the model editor. Release 2.4 adds the swim-lane layout of chapter 47.
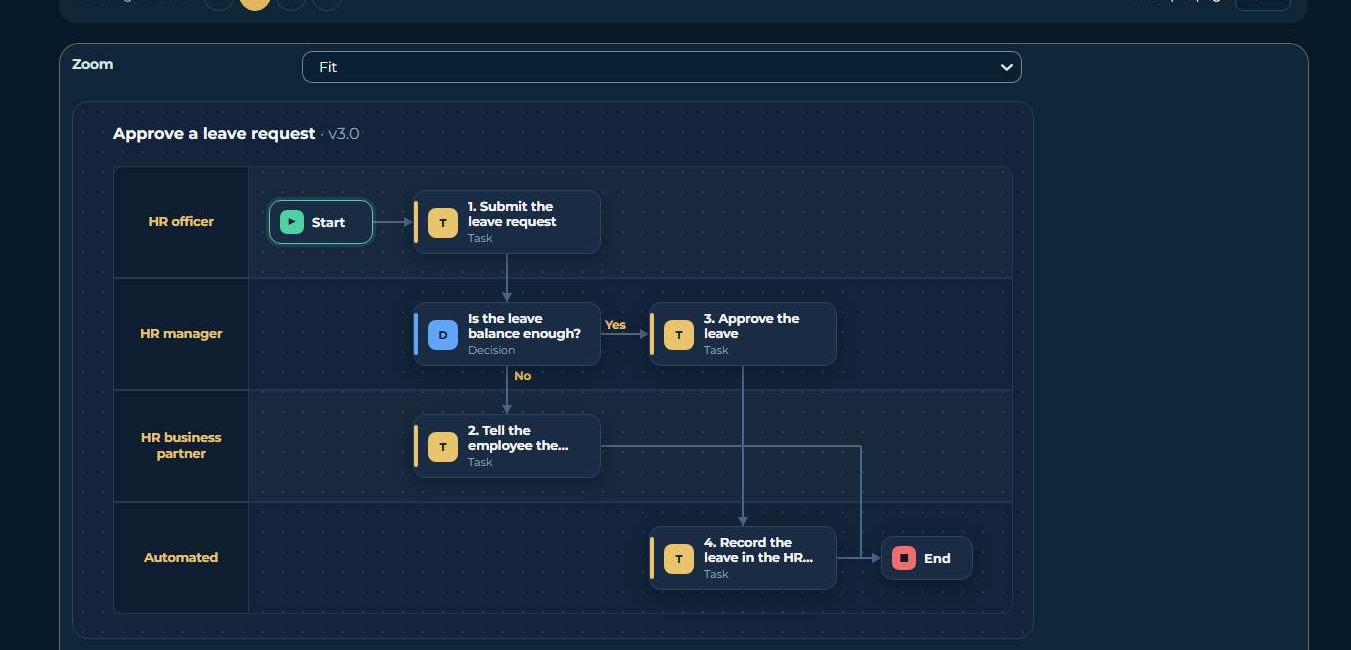
Figure 58 - The process map in the canvas style (dark look)
42.1 The steps across the departments, with their timings
Pick an overlay under the map and choose Show overlay. Each step then shows a badge: Times, Cost, Lean, Systems, Automation, or Live from Process Discovery. With Live, each lane shows how long its steps take in the running K2 workflow and how often they ran, so you see where the work waits as it moves from one role or department to the next. A step that waits much longer than it is worked on, or a bottleneck, has a red badge.
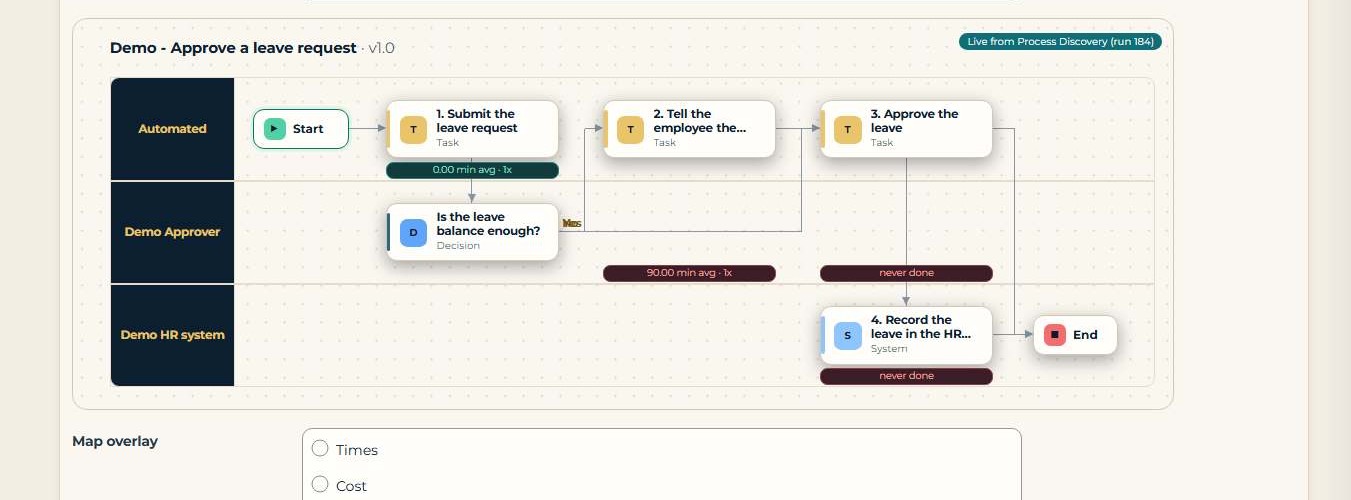
Figure 59 - The map across the lanes with the live timings from Process Discovery
42.2 Print, PDF, Word and downloads: the map on paper
The print page, the BRD PDF and Word files, the request PDF for ActiBot, the offline copy and the SVG / PNG download draw the same cards on white, so a printed map stays readable and uses little ink. In an Arabic document the map is mirrored right to left.
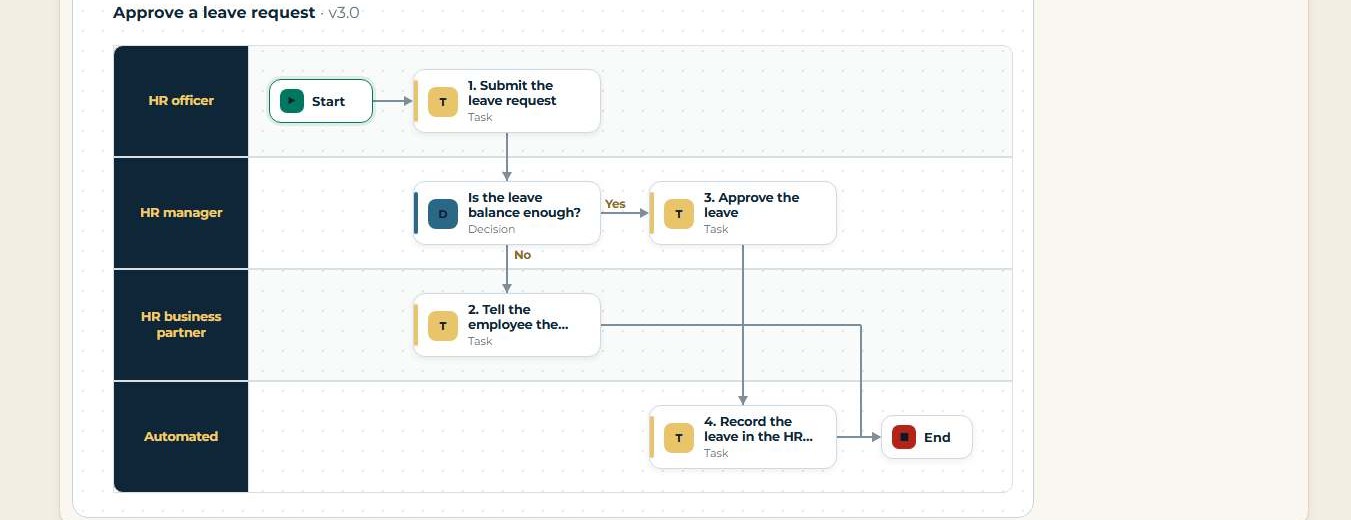
Figure 60 - The print page: the same map on paper
42.3 The setting
Map.Theme (company settings, section Map): canvas (the default) or paper, for the map on screen. The canvas follows the look (chapter 45). Print and downloads always use paper.
43 Automate with ActiBot: the wizard
Automate with ActiBot on a published process now opens a short wizard. Its first question is what ActiBot should do:
- 1 - New add-on process: your K2 already runs other processes. ActiBot re-uses your names: roles, SmartObjects, service instances, category and prefix.
- 2 - My first process on K2: K2 is installed but nothing is built on it yet; your processes are only in Masar. ActiBot also sets up the base: category, roles, a database and service instance for the process data, the theme and a working-hours zone for the process only.
- 3 - Automate multiple processes: several published processes in one request. ActiBot sends back one package and one status file, with a result for each process.
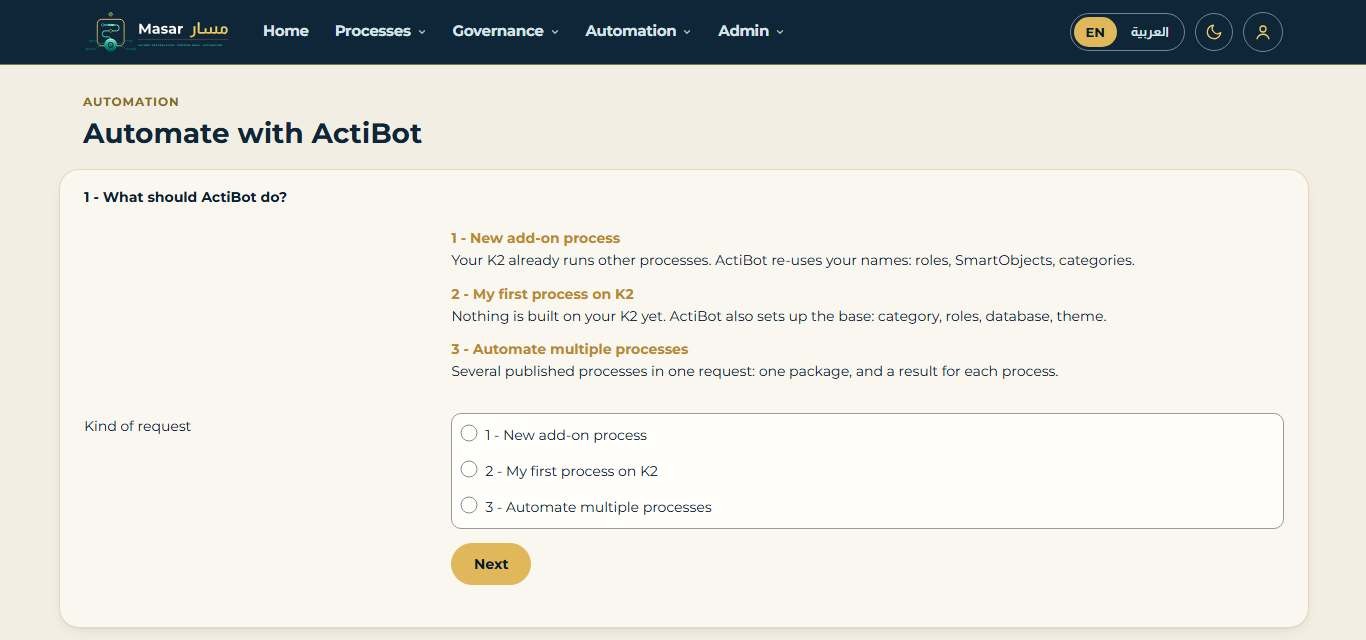
Figure 61 - Wizard step 1: what should ActiBot do
Step 2 shows the process you started from. For option 3, tick the other published processes. Step 3 asks about your K2, and only what fits the choice: the K2 version and build and the environments for every request; your category and prefix, the SmartObjects and the sub-workflows the process uses for a new add-on or several processes; and, for a first process, where users and groups come from, who installs the package, whether K2 sends e-mail and where the process data is kept. Give names only: the wizard refuses anything that looks like a password, a connection string or a key. Empty boxes are taken from the company settings; anything else can be completed later in the request task.
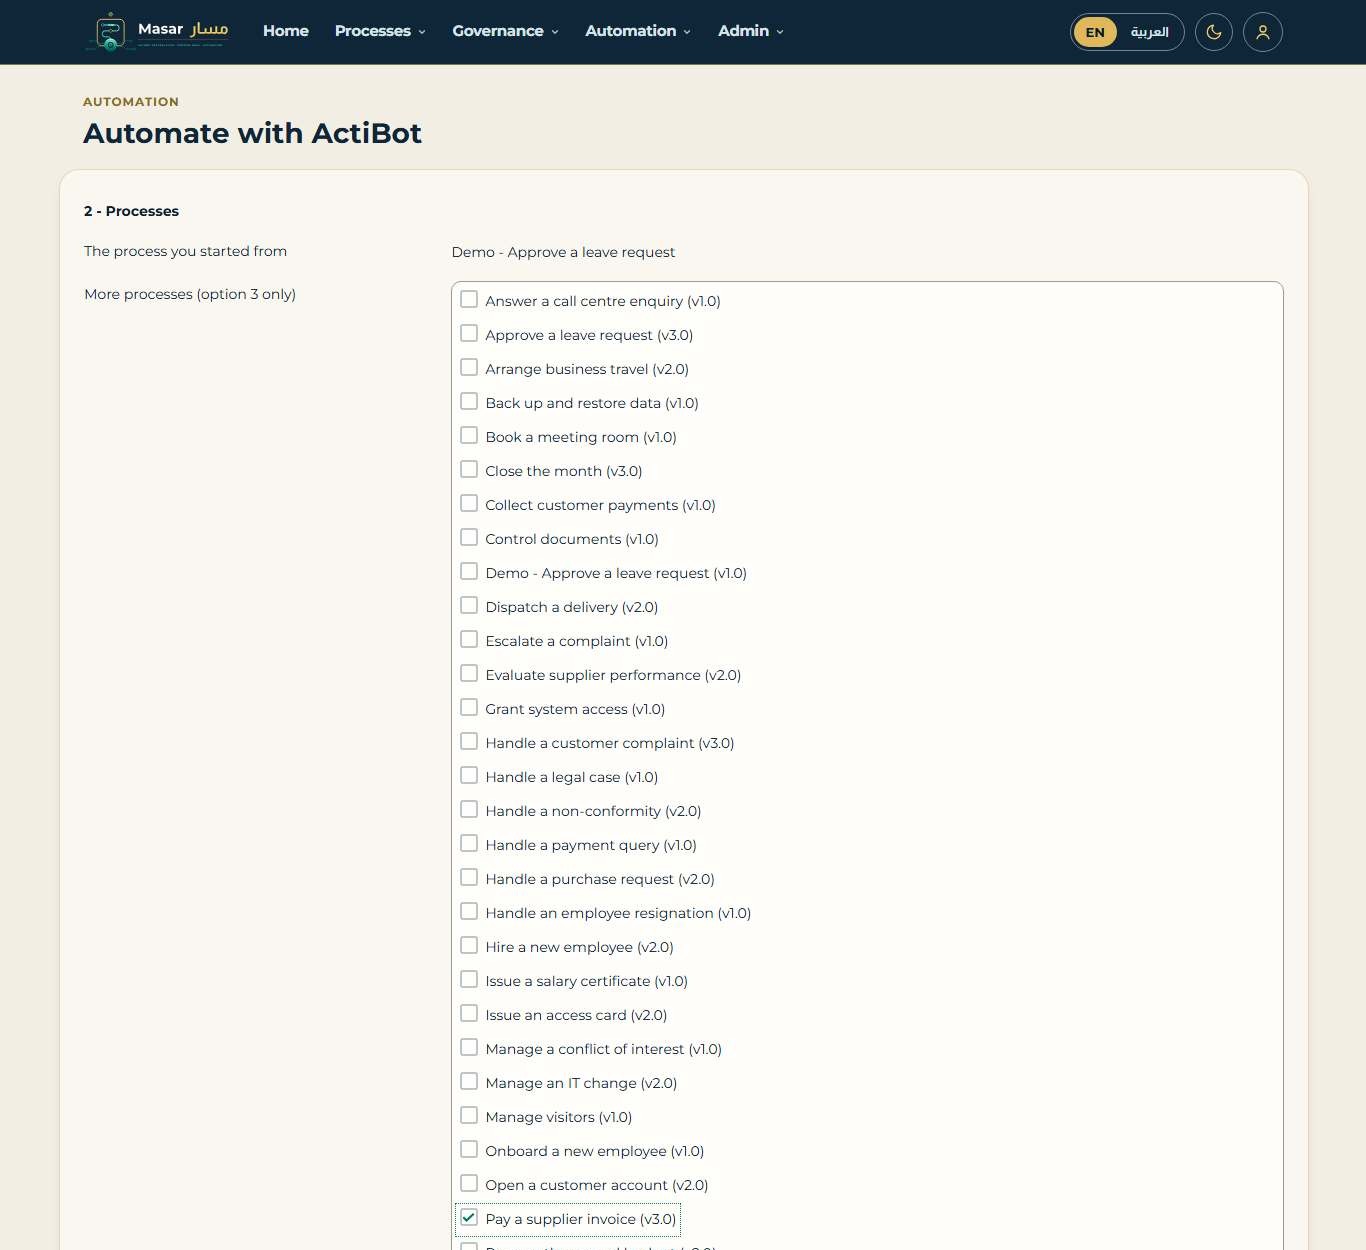
Figure 62 - Wizard step 2: the processes of the request (option 3)
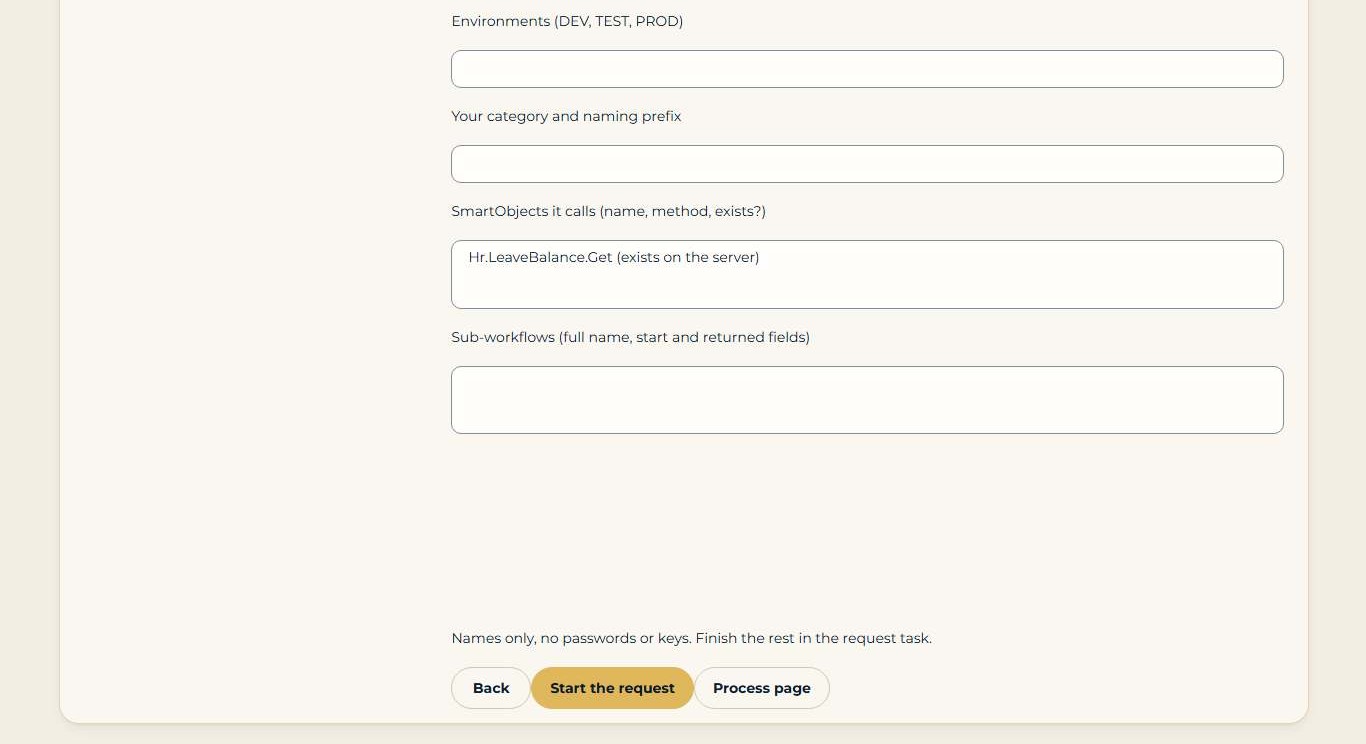
Figure 63 - Wizard step 3: your K2 (the questions for the chosen kind)
Start the request records it and starts the request task in My tasks, as before.
44 The request task and what comes back
The request task now starts with the kind of request (which you can still change), its processes and Your K2. Your K2 lists every item ActiBot needs to know about your K2 installation for this kind of request, with its level:
- Required: the request cannot be sent while it is empty (for example the K2 version, or for a first process the identity source and the administrator).
- Else ActiBot assumes: if you leave it empty, ActiBot uses the assumption shown (for example, a SmartObject stub to be completed).
- Wanted: names to re-use, so the result looks like the rest of your K2.
To set an item, type its code from the list and its value, then choose Save the item. For option 3, Add or remove changes the processes (by key or title). The readiness check lists any process without data fields, and any required item that is still missing.
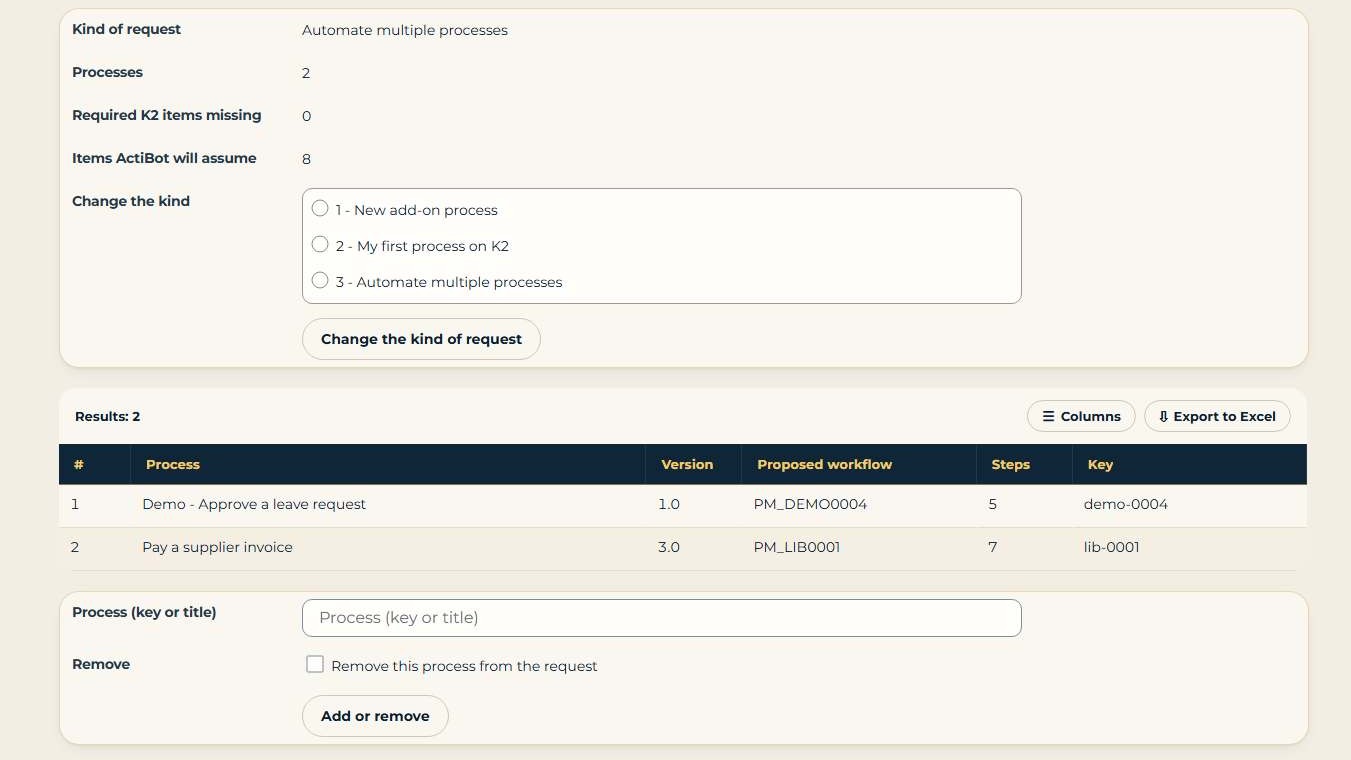
Figure 64 - The request task: the kind of request and its processes
The request is sent as ActiBot.Request/3. It carries the kind of request, every process with its own steps, test scenarios and BPMN model, and the K2 items with the assumptions. The PDF shows the same, in sections 1 and 7.
When ActiBot sends the package back, its status file can carry a result per process. Record it on the Automation page, as before. Results per process lists them. Only the processes ActiBot deployed are marked as automated, each with its own K2 workflow.
Not yet tested end to end: a round trip of an ActiBot.Request/3 request with ActiBot.
Part F - Release 2.4 additions
Chapters 45 to 54 describe what release 2.4 adds: the Masar look and header, smart tables and count cards, the process map in the swim-lane layout, the edit page with the procedure, the collaboration pane and My work, dates, the step names in the model editor, owner and expert names, pages for tablets and phones, and Arabic pages. The earlier chapters still apply; their pictures show the pages in the 2.4 look.
Release 2.4 was tested on Nintex Automation K2 5.9.1 on 17 Oct 2026, and every check passed: database self-checks 37/37; SmartObject cases 540/540; 84 UI tests with 2,170 checked steps; every page in English with the light look 135/135 and in Arabic with the dark look 135/135; pages on desktop 10/10, tablet 18/18 and phone 24/24; names and people 18/18; dates 25/25; print 66/66; PDF read-back 49/49; and no workflow instance in error (2/2).
45 The Masar look and the header
Every page has the Masar look. There are two looks: the light look (ivory, the default) and the dark look (navy). Pages, lists, buttons and the process map follow the look you choose.
The header at the top of every page has:
- The Masar logo and name.
- The menus Home, Processes, Governance, Automation and Admin. Click a menu to see its pages; for example Processes lists Process library, Search, New process, Import from text, Suggest a process, Browse by class, Process landscape, Document library and Offline copy.
- The language switch EN / Arabic. A page shows one language at a time; Arabic pages run right to left (chapter 54).
- The look switch (moon or sun icon), which changes between the light and the dark look.
- The person icon for your account (My profile).
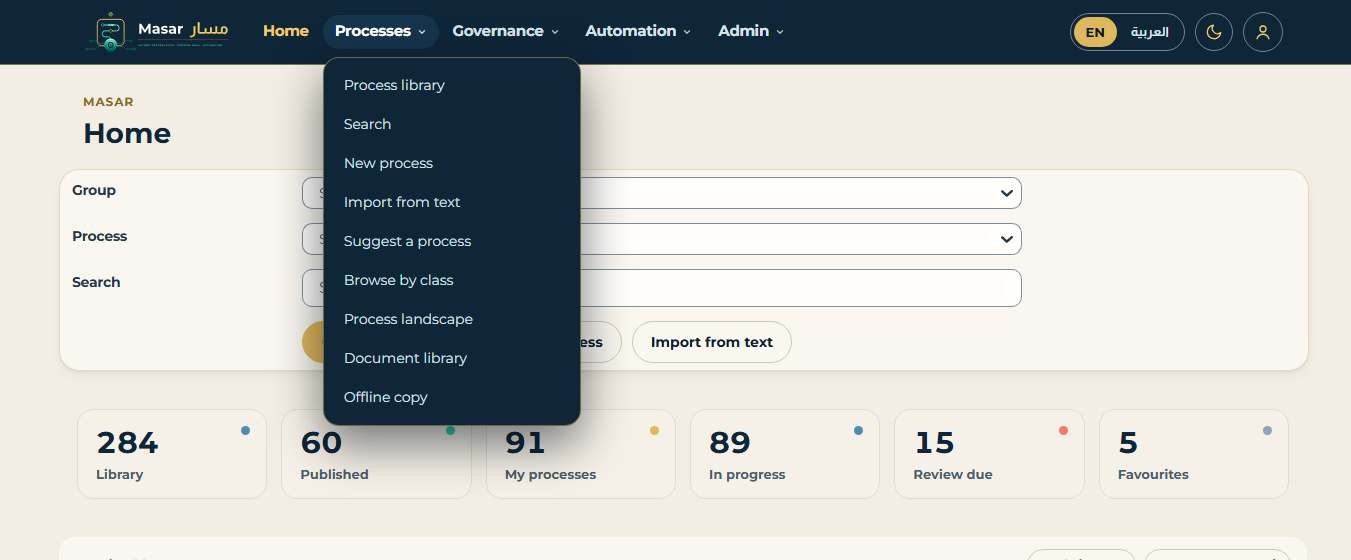
Figure 65 - The header in the light look, with the Processes menu open
45.1 Change the look or the language
- Click the look switch in the header. The page changes to the dark look; click it again for the light look.
- Click EN or Arabic in the header to change the language.
- Your choice is kept in your browser for the next pages and for your next visit.
45.2 The default look (App Admin)
The App Admin sets the look for users who have not chosen one: Admin > Company settings, setting Appearance.Mode (light or dark; light by default). A choice a user makes in the header comes first.
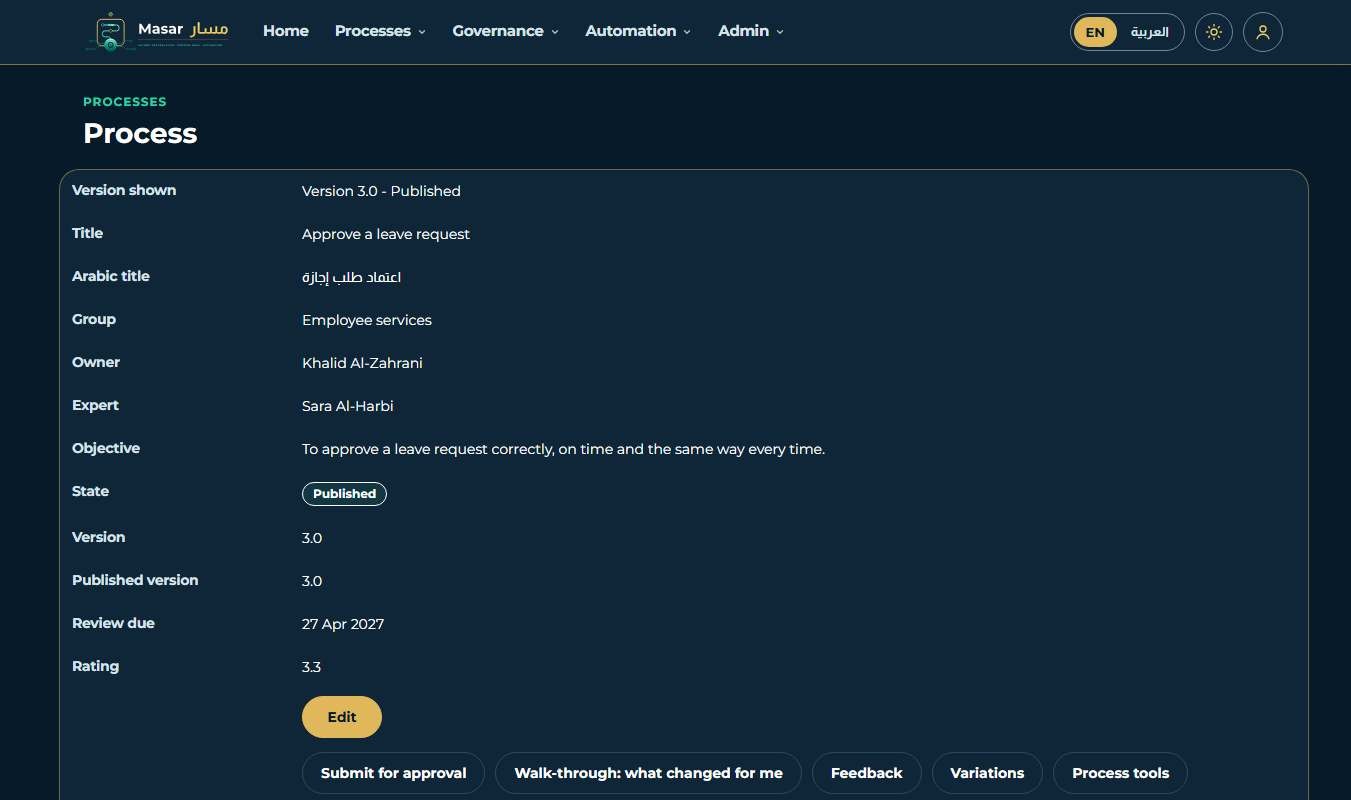
Figure 66 - The process page in the dark look
46 Smart tables and count cards
Every list in Masar is a smart table. Above the list, Results shows how many rows it has; under it, the pager shows the page number and the rows per page.
- Sort: click a column heading to sort by it; click it again to reverse the order.
- Columns: choose which columns to show and move them into the order you want.
- Pages: move between pages with the pager and choose how many rows a page shows (Rows per page).
- Export to Excel: downloads the rows of the list as an Excel file.
- On a tablet, columns of low priority step aside; on a phone, each row becomes a card (chapter 53).
46.1 Count cards on the Home page
Under the open panel, the Home page shows count cards: Library, Published, My processes, In progress, Review due and Favourites. Each card shows its number. Click a card to show only those processes in the library list under the cards; click Library to show all processes again.
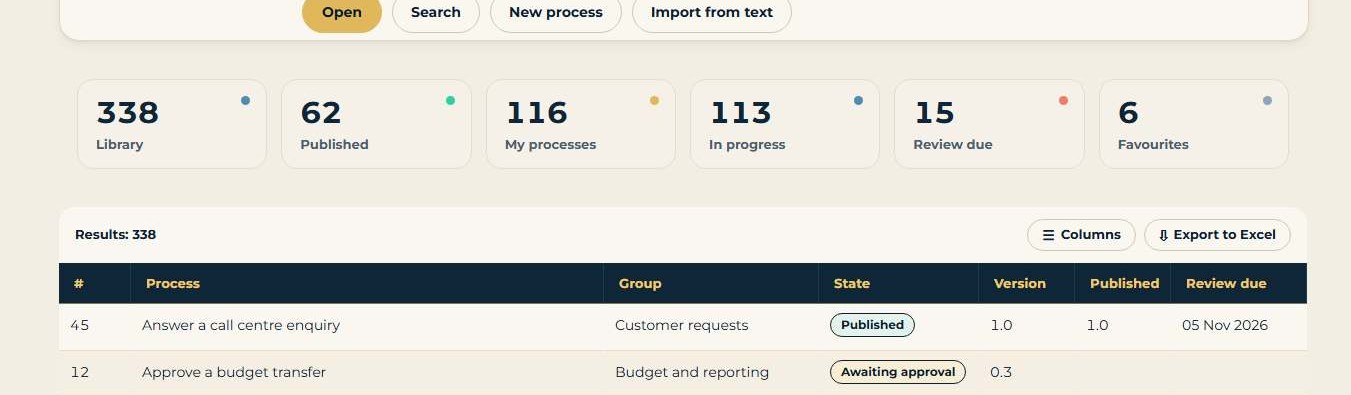
Figure 67 - Home page: the count cards and the library list as a smart table (Columns, Export to Excel, pager)
47 The process map in the swim-lane layout
The process page, the full-screen map, the mini page, the edit page and the print page draw the map in the swim-lane layout:
- Each role or system is a row, with its name in the dark band at the side.
- Each step is a card with a type chip (T task, D decision, S system), its number and its name, in both languages where both are written.
- A decision shows its question; the outcomes Yes and No are written on the lines.
- Start and End mark the two ends of the flow.
- Point at a step to see its hover card with the details of the step.
- In Arabic the map is mirrored: the role names on the right and the flow from right to left.
- The map follows the look: ivory in the light look, navy in the dark look.
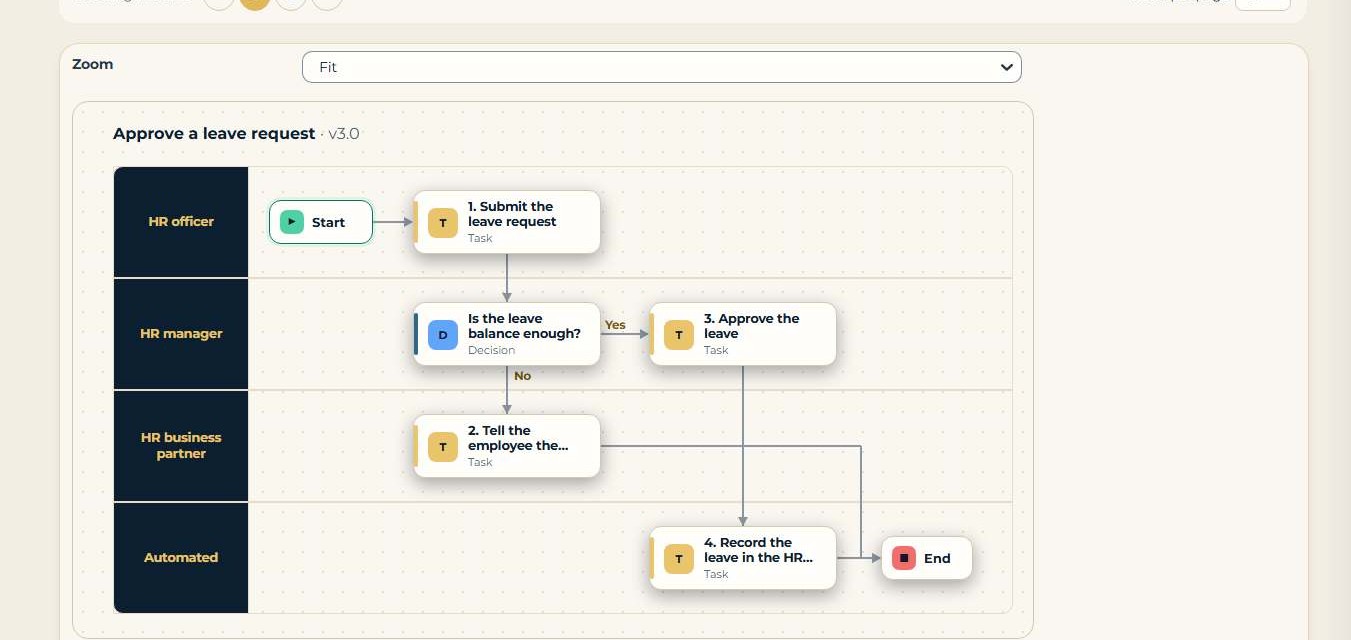
Figure 68 - The map in the light look: roles as rows and step cards with their type chips
47.1 Full screen, print and PDF
- On the process page, click Full screen to open the map on its own page; Back returns to the process.
- Click Print to open the print page with the map and the written procedure under it.
- Choose PDF (English), PDF (Arabic), Word (English), Word (Arabic) or PDF (English and Arabic) for a file, or use the browser's print (Ctrl+P) for paper. The Arabic copy has the mirrored map.
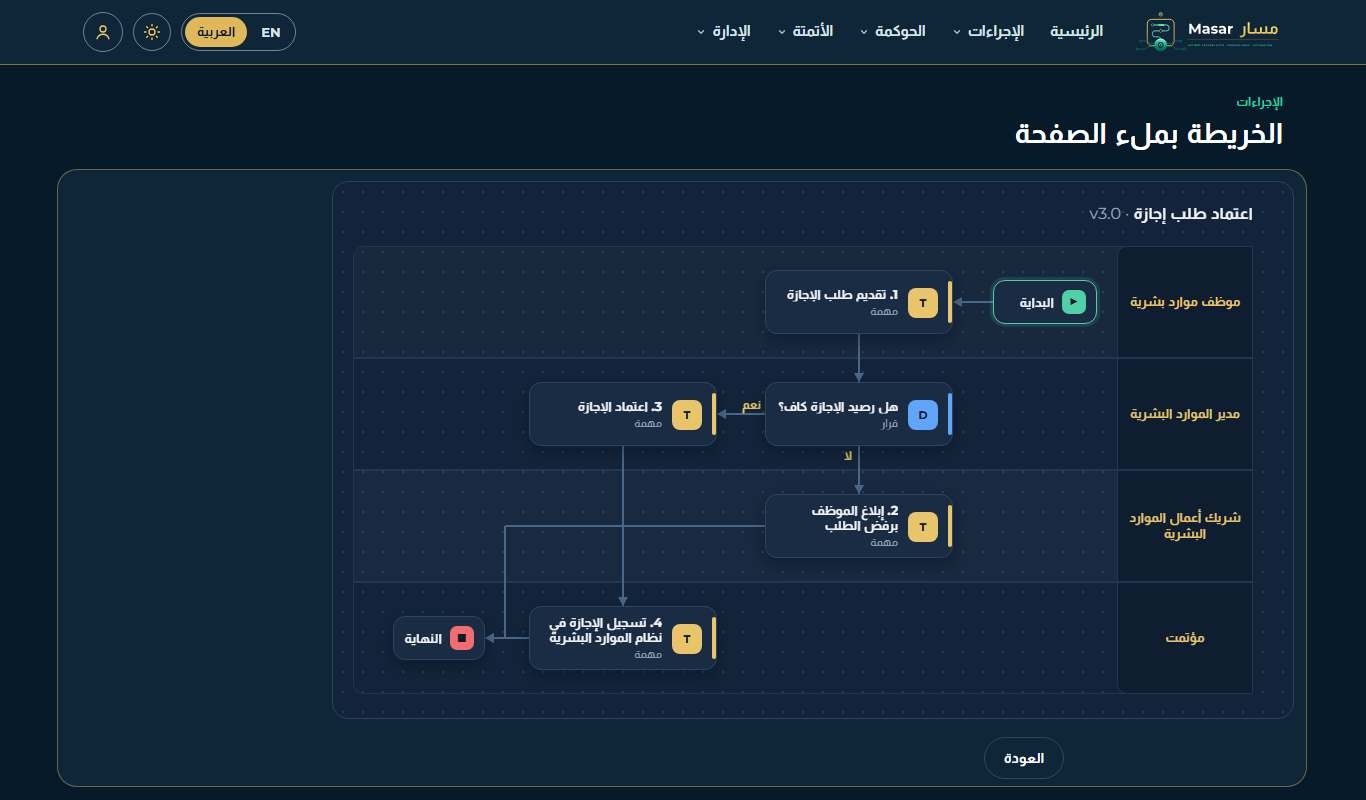
Figure 69 - The same map in Arabic and the dark look: mirrored from right to left
48 The edit page with the procedure
The edit page shows the map with the written procedure under it, so you see each change on the map. Every step of the procedure has its own tools on its row.
48.1 Work on a step
- Open the process and click Edit.
- Under the map, find the step in the procedure. Its row shows the number, the name, the role and the items of the step.
- Use the tools on the row: comment on the step, edit it, move it up or down, or delete it.
- Under the step, + Task, + Note, + Web link, + Other item and + Activity after add an item to the step or a new step after it.
- Above the procedure, + Add activity and + Add decision add a step or a decision; Comment on the process opens the collaboration pane (chapter 49).
The panels of chapter 5 stay on the page for changes by activity Id.
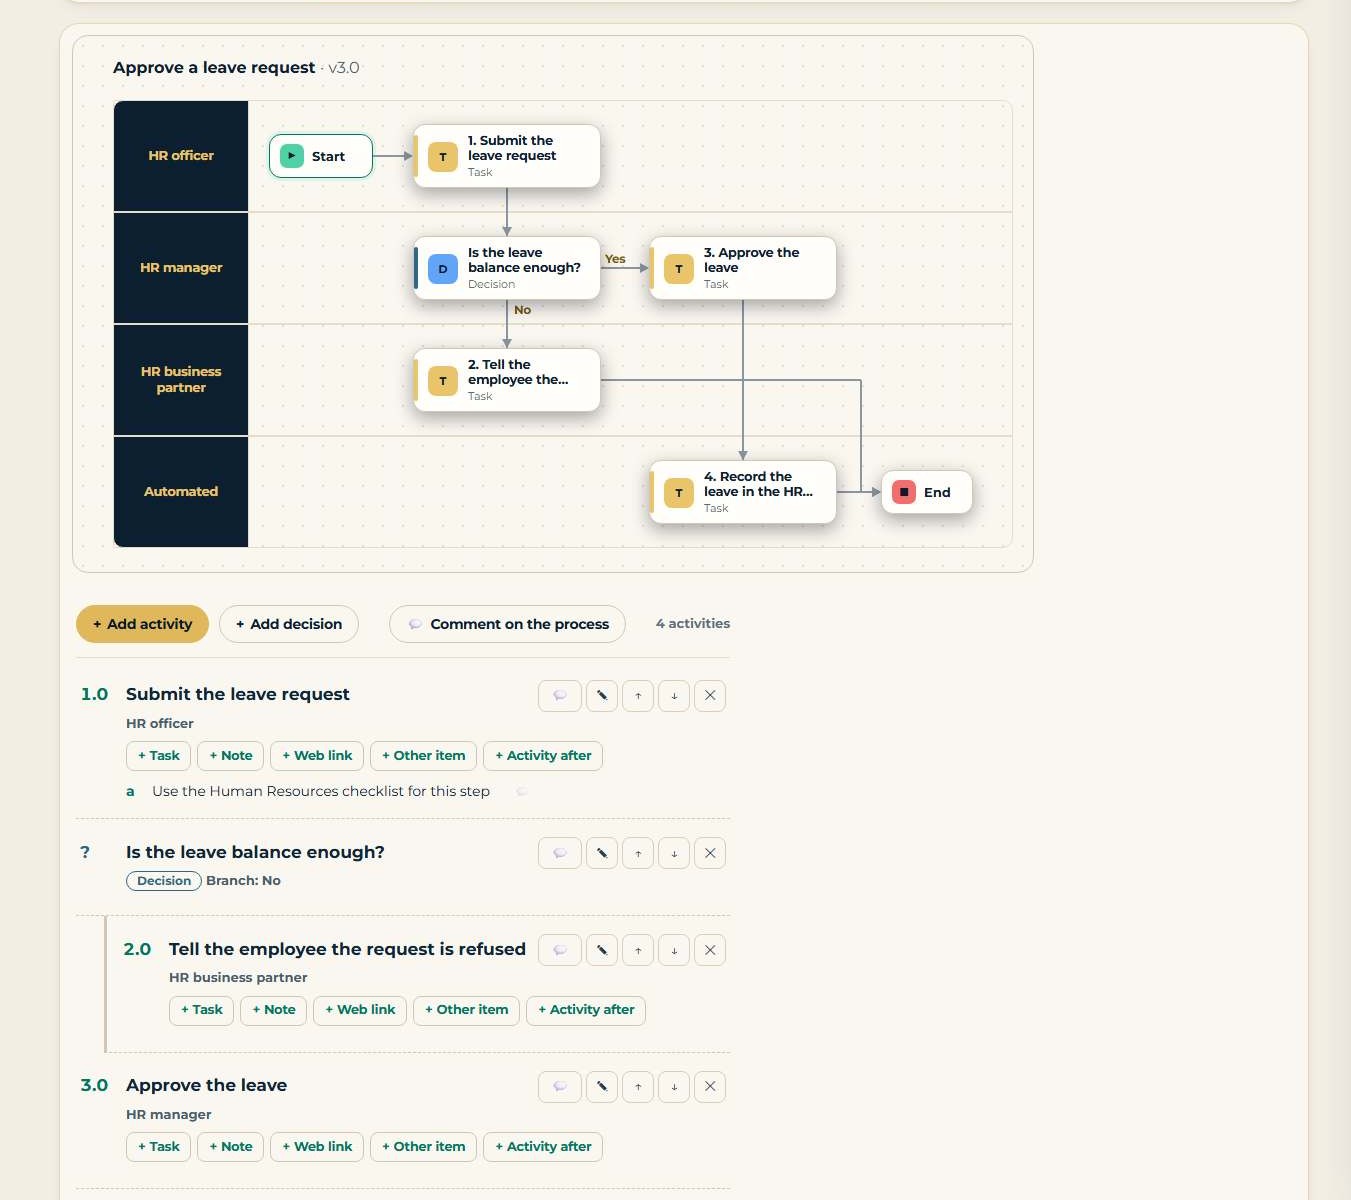
Figure 70 - Edit page: the map, and under it the procedure with the tools of each step
48.2 The process landscape
Processes > Process landscape shows the library as area cards: one card per group with its sub-groups and processes, each process with its state and version (see the figure in chapter 33).
49 Working together: the collaboration pane and My work
The edit page and the process page have a collaboration pane at the side. Open it with the Comments tab at the edge of the page, or with Comment on the process on the edit page.
49.1 Write a comment or give a task
- Open the pane. Under On, choose what the comment is about: the whole process, a step, or a single item of a step (On a part of the procedure).
- Write the comment in Your comment. Type @ and a name to mention a colleague.
- To give someone work, pick the person in Task for (optional) and set a Due date.
- Click Post.
The list under the form shows the comments, with Open, My tasks and All. Every comment has Reply; a comment with a task shows the person, the due date and its state (Open or Done), with Start, Done, Reassign and Resolve.
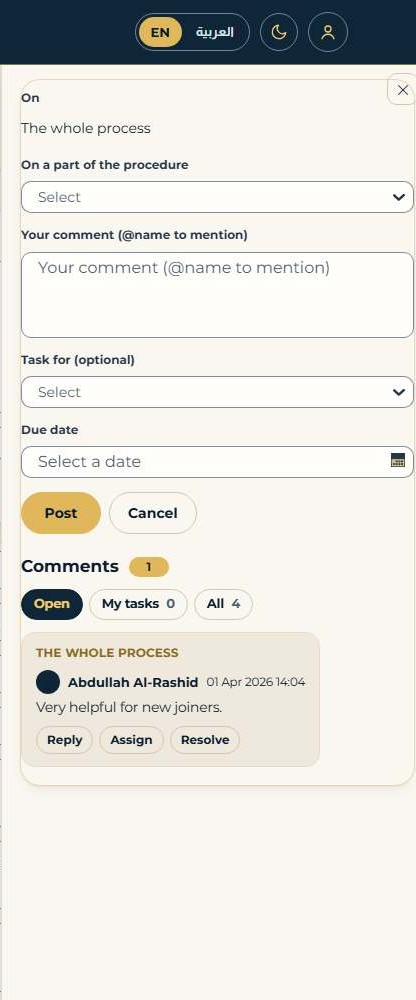
Figure 71 - The collaboration pane on the edit page: a comment, a task for a person with a due date, and the list of comments
49.2 My work and e-mail
A comment task is a Masar record, not a K2 task. It appears in My work on the Home page of the person it is for, and under My tasks in the pane; it is not in the K2 task list. My tasks on the Home page shows only the tasks of Masar workflows: approvals, reviews, feedback, archival and automation requests.
When e-mail is set up (section 30.4), people who are mentioned or given a task also receive an e-mail.
50 Dates
Masar writes every date the same way: day, short month and year, for example 27 Apr 2027 in English and the Arabic month name in Arabic, with Western digits in both languages. Where a time matters, it follows the date, for example 17 Oct 2026 11:29.
Where a Hijri date is shown, for example the review date in the attributes of a process, it follows the Gregorian date: 27 Apr 2027 (20 Dhu al-Qadah 1448 AH).
Date fields use the K2 date picker: type the date or pick it from the calendar. The field then shows it as dd MMM yyyy. The calendar icon is K2's own (Appendix D).
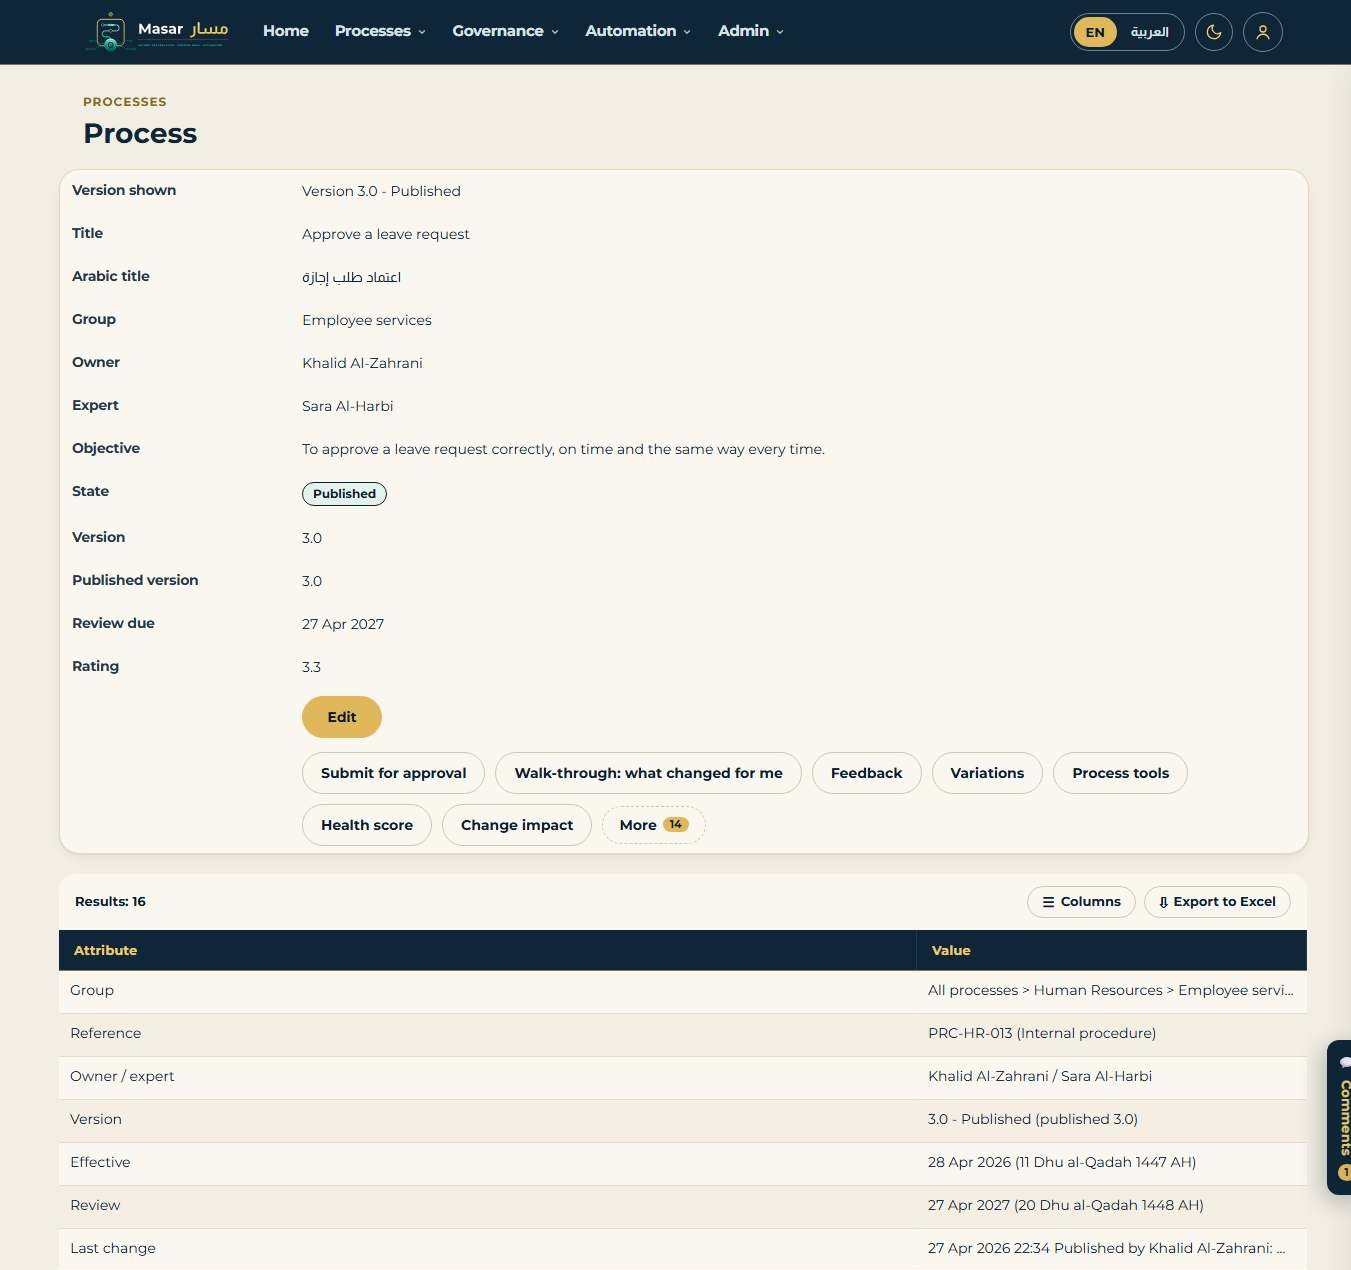
Figure 72 - Process page: the review date as 27 Apr 2027, and in the attributes with its Hijri date
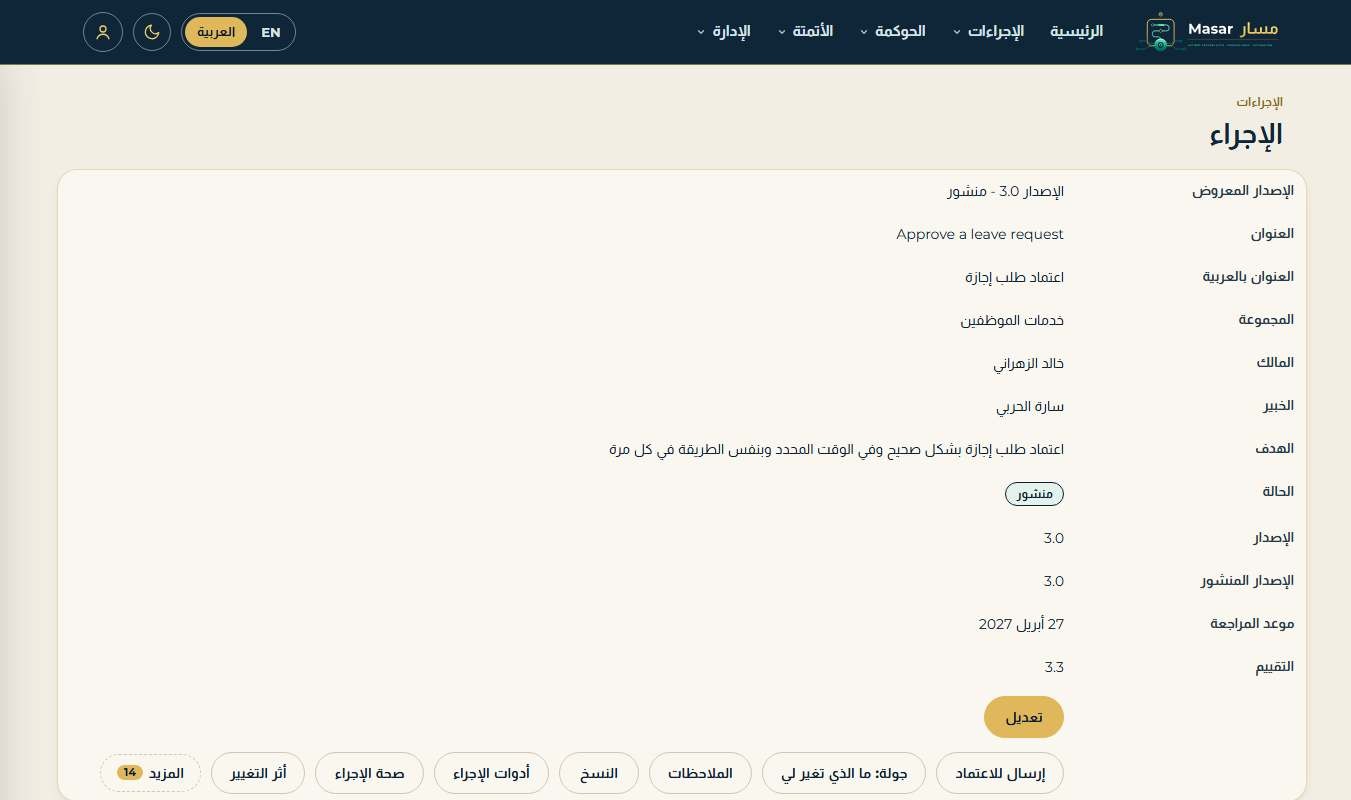
Figure 73 - The same page in Arabic: the review date in Arabic with Western digits
51 Step names in the model editor
The model editor shows each step with its English and Arabic names, on English and on Arabic pages, so both can be checked in one place. The Arabic name can be edited there.
- Open the process and click Edit the model.
- Select a step and change its Arabic name.
- Type a Change comment and click Save model. The Arabic name is kept with the step.
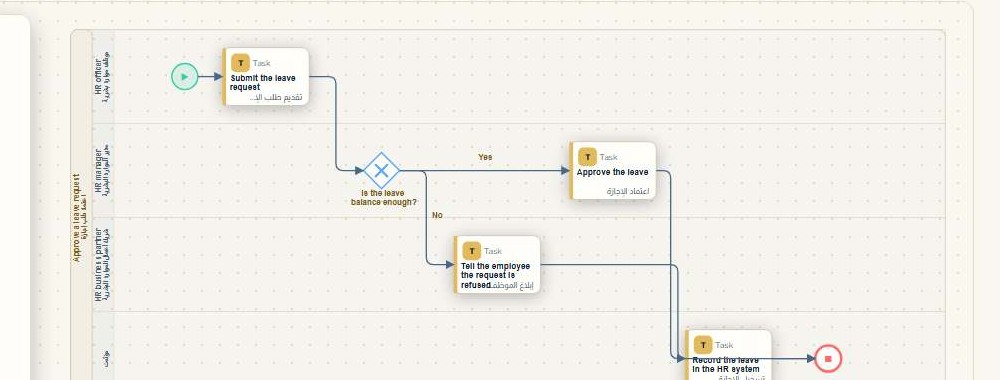
Figure 74 - Model editor: each step with its English name and, under it, its Arabic name
52 Owner and expert names
On the edit page, Owner (K2 user) and Expert (K2 user) still take a K2 user name, for example K2SQL:user1. Beside the K2 user, Masar shows the person's full name and e-mail address, taken from People in the administration tools (section 30.3), so you can check that you picked the right person.
- Type the K2 user in Owner (K2 user) or Expert (K2 user).
- Check the full name and e-mail shown beside it.
- Click Save summary.
Elsewhere people are shown by name: in the summary of the process page, in lists and in the collaboration pane.
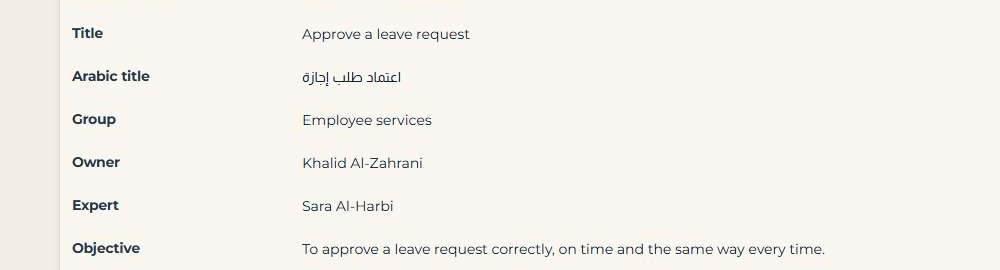
Figure 75 - Process page: the owner and the expert shown by name
53 Pages on tablets and phones
Masar pages fit the width of the screen:
- Desktop (1200 px and wider): labels beside the fields and lists with all their columns.
- Tablet (768 to 1199 px): labels above the fields; list columns of low priority step aside so that the list fits.
- Phone (below 768 px): one column; every list row becomes a card with its fields one under the other; nothing scrolls sideways. The menus are behind the menu button of the header.
Nothing has to be set up: the page uses the layout that fits the screen. Tested: desktop 10/10, tablet 18/18 and phone 24/24.
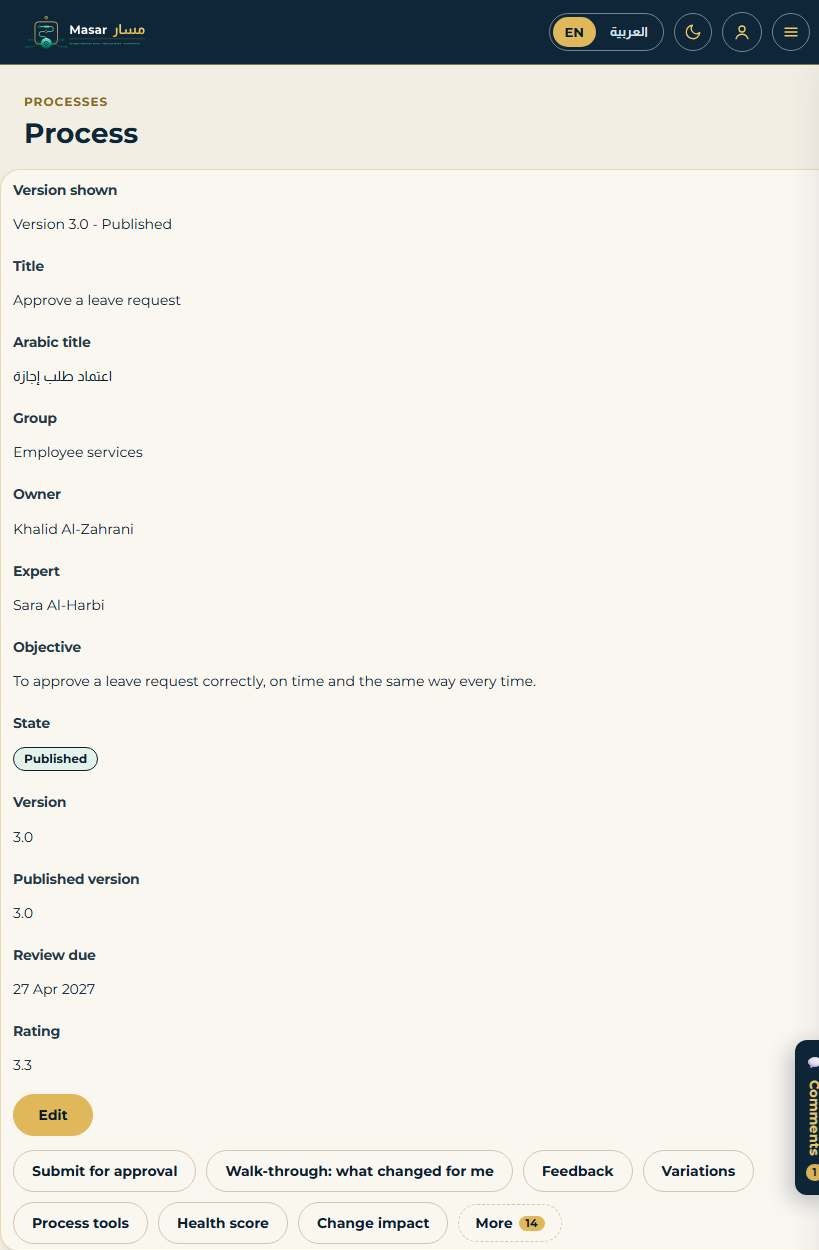
Figure 76 - Process page on a tablet: labels above the values
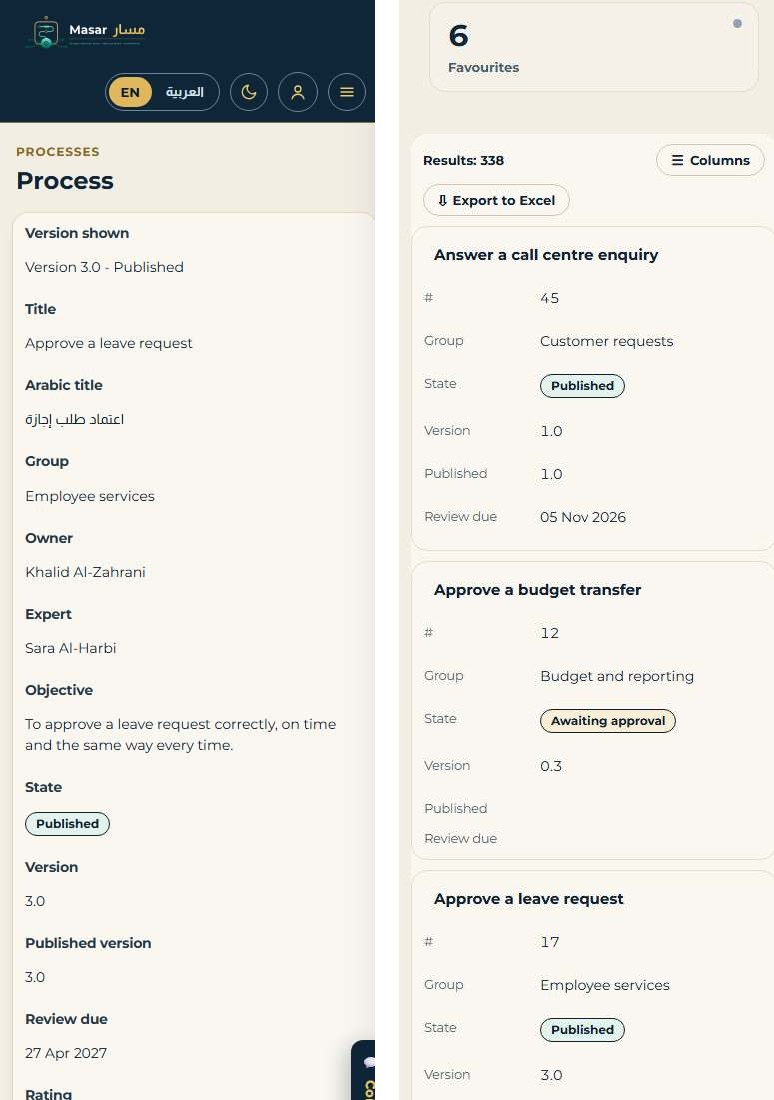
Figure 77 - On a phone: the process page in one column (left) and the library list, whose rows become cards (right)
54 Arabic pages
Every page was reviewed in English with the light look and in Arabic with the dark look: texts in both languages, people shown by name, labels never cut, one language at a time, and K2's task list in the Masar look. Arabic pages run right to left; the map, lists and buttons are mirrored.
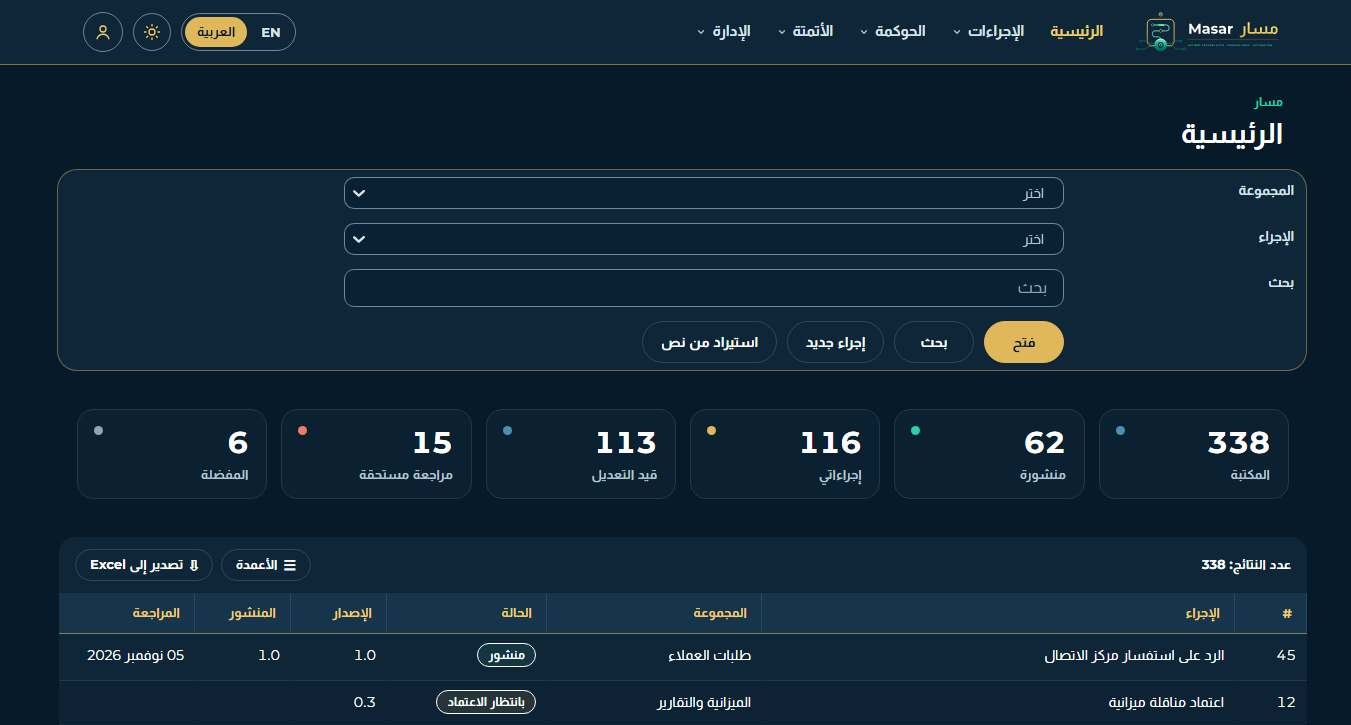
Figure 78 - The Home page in Arabic with the dark look
Part G - Release 2.5 additions
Chapters 55 to 66 describe what release 2.5 adds: small additions to search, notes, links, feedback and automation, authoring and the map, import and packages, decision rule tables and automation, access levels by K2 / AD group, risk and compliance, incidents and improvements, training and competency, the AI Process Generator, process capture and MCP access for an AI assistant inside your network. Chapter 66 is for the administrator: the model gateway and the MCP server. The earlier chapters still apply.
Release 2.5 was built and tested on Nintex Automation K2 5.9.1 from 17 to 19 Oct 2026: database self-checks 50/50 files; SmartObject cases 723/723; the workflow tests of the control sign-off, the control sweeper, the incident, the training sign-off and the AI draft passed; the MCP client test passed 16/16. In the release test pass every browser test of chapters 55 to 65 passed, and every page passed in English and Arabic, with the light and the dark look, at desktop, tablet and phone width.
55 Small additions: search, notes, links, feedback and automation
Release 2.5 adds seven small items to pages you already know.
55.1 Search box in every list
Every smart table with more than 5 rows has a box Search this list above it. It searches all columns as you type. Arabic is matched loosely: hamza and alef forms, ya and ta marbuta, diacritics and Arabic digits do not stop a match.
- Type a word in Search this list. Only the matching rows stay, and Results shows "n of N".
- Page through the matches or use Export to Excel: the export holds the matching rows only.
- Click the cross in the box to show all rows again.
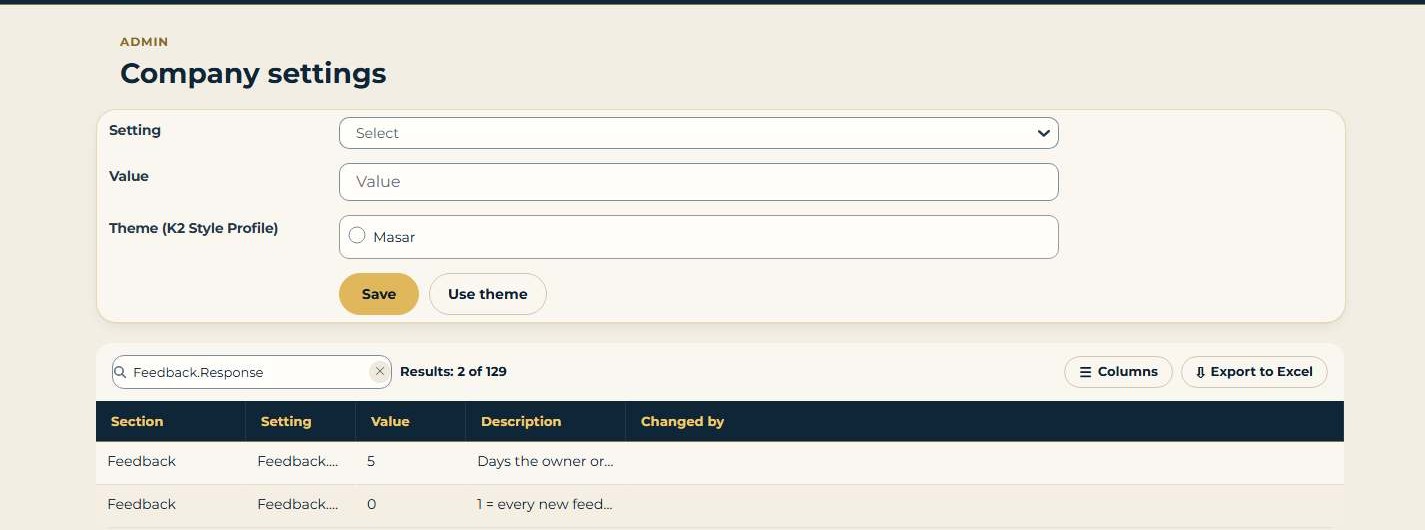
Figure 79 - Company settings: the search box finds the two feedback settings among all settings
55.2 Collapse or expand all notes
Above the written procedure on the edit page, and above the tasks and notes on the process page, Collapse all notes folds every note to one line; Expand all notes opens them again. Click the label of one note to open that note only. Print always shows the full notes.
55.3 Warning before an outside link
A link to another site (a web link, a document link) opens a warning first: You are leaving Masar, with the full address. Check the address and click Open (it opens in a new tab) or Cancel. Links inside Masar, View Flow links and e-mail links open without the warning.
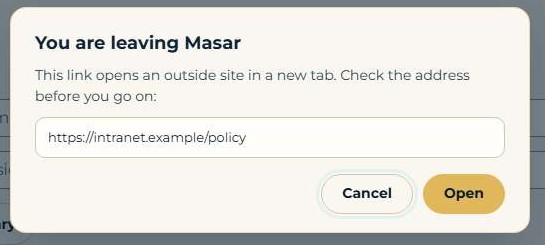
Figure 80 - The warning before an outside link opens: the full address, Cancel and Open
55.4 A response is required on every feedback (App Admin)
With the company setting Feedback.ResponseRequiredMandatory = 1, the box I need an answer on the feedback page is ticked and locked, and every new feedback asks the process owner for a response. Replies to feedback are not forced. The default is 0.
55.5 View Flow link on an automated step
In the written procedure of the edit page, an automated step shows AUTOMATED, its K2 workflow, the workflow version and a View Flow link to the latest instance (or "No instance yet"). The Automation overlay of the process map shows the same link. The address comes from the company setting K2.ViewFlowUrl.
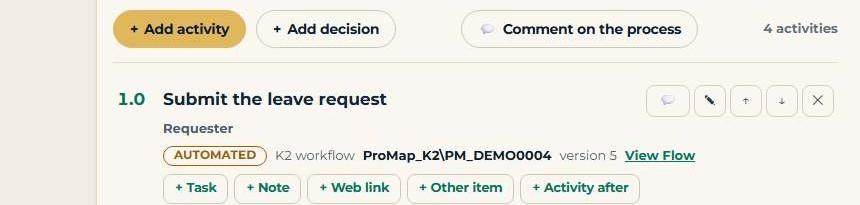
Figure 81 - An automated step with its K2 workflow, its version and the View Flow link
55.6 Versions and running instances
Automation > Automation requests states the K2 rule: every running instance stays on the workflow version it started on; a new version applies only to instances started after it is deployed.

Figure 82 - Automation requests: the rule for running instances
55.7 Formatting bar
Formatted text boxes in the item editor have a light bar: Bold, Italic, Bulleted list and Link. A link must start with https:// (or mailto:); anything else is refused with "Type an address that starts with https://". Masar still cleans the text on the server when it is saved.
Who may use it: search, notes and outside links: everyone who sees the page; the formatting bar: whoever may edit the process (Editor and above); the feedback setting: the App Admin.
Tested: database self-checks 9/9 for these items; 10/10 browser tests passed in the release test pass (217 steps).
56 Authoring and the map
56.1 Save the map as an image, print the map
The map frame on the process page, the edit page and the full-screen map has two buttons: Save map as image saves the whole map as a PNG picture at twice the screen size; Print map prints the map only, on A4 landscape, with the title, the version and the date (mirrored on Arabic pages).
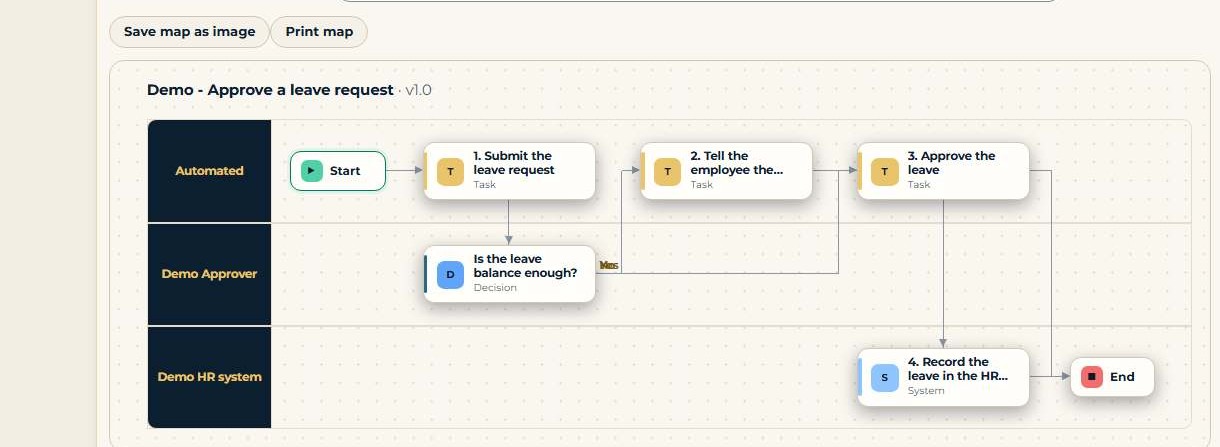
Figure 83 - The map frame with Save map as image and Print map
56.2 A picture instead of the map
For a policy or a procedure-only process, or a map drawn elsewhere, you can show an uploaded picture instead of the map.
- Open the process, then Process tools.
- In Upload a map picture (png, jpg or svg) choose the file and pick Show the picture as (Image, Policy or Procedure only).
- Click Upload the picture and use it as the map. The file is checked like every upload; a refused file is removed with the reason.
- Remove the map picture brings the drawn map back.
Admin settings: Map.PictureAllowed (png;jpg;jpeg;svg) and Map.PictureMaxKB (2048).
56.3 Save as a new process, copy a version
On the edit page, Save as a new process (next to Save version) saves your draft as a new process at version 0.1; the process you opened stays as it was. On the process page, pick a version under Copy a version from the list and click Copy this version: any stored version, published or older, becomes a new process at version 0.1, with you as owner and the change-log note "Copied from <title> v n".

Figure 84 - The edit page: Save as a new process next to Save version
56.4 Element id and links in the model editor
In the model editor, the flyout of a selected element shows its Element id (read only, with Copy) and Links: up to 10 web links (https) or library documents of the process. An element with links shows a link icon with the count.
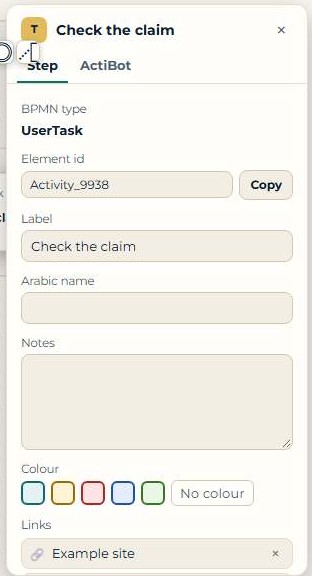
Figure 85 - Model editor flyout: element id with Copy, and the links of the step
56.5 Variations: preview before sync or transfer
On the Variations page, Preview the sync of linked steps shows what would change in each variation (added, replaced, unchanged); only then Confirm the sync applies it. In Transfer a step, pick the step, the variation and the place, click Transfer this step to variation... (preview), check the preview and click Confirm the transfer. If the steps changed after the preview, Masar asks you to preview again.
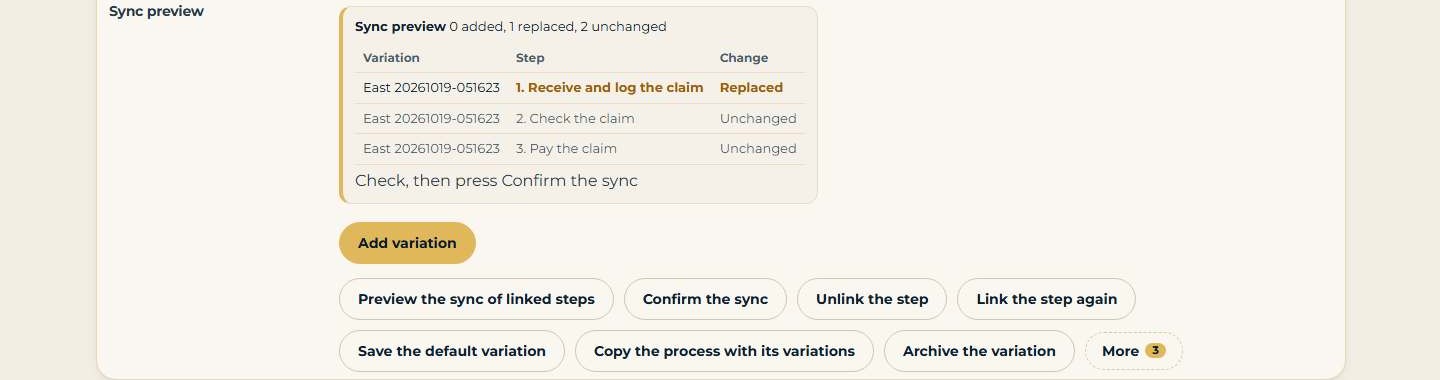
Figure 86 - Variations: the sync preview before Confirm the sync
Who may use it: save and print the map: everyone who may read the process; picture, element links, sync and transfer: whoever may edit the process; copy: whoever may create processes (Editor and above) and read the process.
Tested: database self-checks 20/20 for these items; 10/10 browser tests passed in the release test pass (337 steps).
57 Import, export and packages
The tools are on Admin > Platform tools.
57.1 Import processes from Excel
- Click Download the template (English first) or Download the Arabic template. The sheet has the columns Number, Step, Role, Tasks, Note, System, Minutes, Decision and Outcome, and a Help sheet.
- Fill one row per step. A decision row has its question and an Outcome such as "Yes -> 4 / No -> 3". Column names may be English or Arabic; Arabic digits are read.
- Choose the Group, the Title and the file, and click Preview the Excel sheet. The preview lists the steps found, the columns not known (not imported) and the rows not read, with the reason.
- Click Import the Excel sheet. The process is made as a draft in the group.
The sheet is read on your server. 200 Arabic rows are read in about half a second.
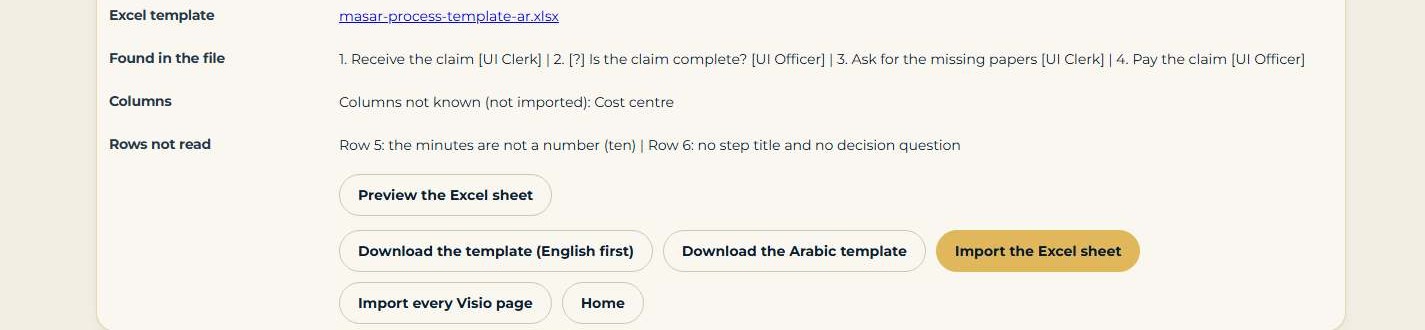
Figure 87 - Platform tools: the preview of an Excel sheet and the template downloads
57.2 Import every page of a Visio drawing
Import every Visio page makes a parent process and one linked process for each page; a single page still imports as one process.
57.3 Group packages and signed packs
Group tools exports a group as one package: the group and its sub-groups, their processes and the list of their documents (name, size and SHA-256). Import the pack into the group (from a file) or Import the pasted pack into the group makes the group tree again under the chosen group. Packs are signed with a certificate in SQL Server: Check the pack checks the signature; a pack that was changed is refused; Trust the publisher adds a publisher certificate to the trust list.
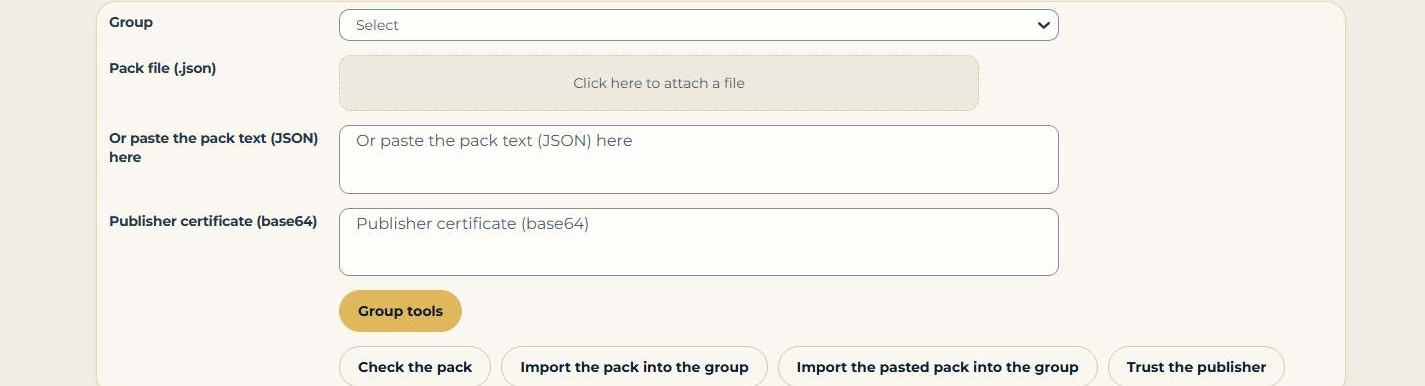
Figure 88 - Platform tools: content packs and group tools
57.4 Re-import a K2 workflow: accept or reject each change
When a deployed K2 workflow was changed in K2, Re-import from K2 compares it with the documented process. Compare with K2 now lists each change (added, removed, renamed, a different recipient). Type its number in Change number and click Accept the change or Reject the change; a renamed step takes the K2 name, a recipient change takes the role K2 used.
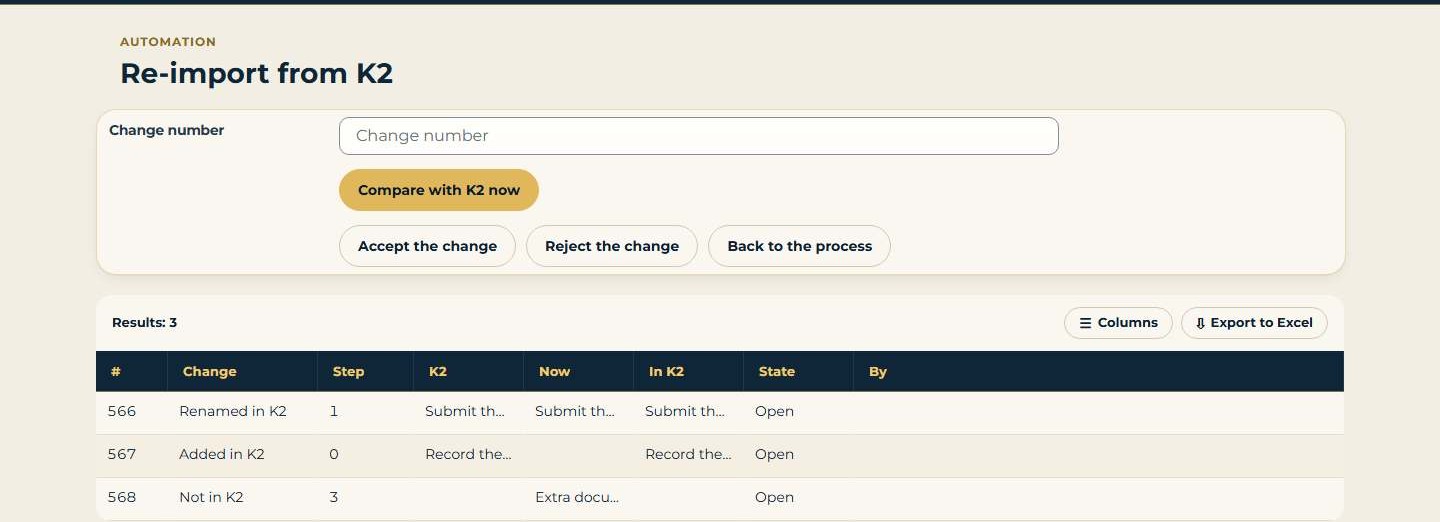
Figure 89 - Re-import from K2: each change with Accept or Reject
Who may use it: Excel and Visio import: whoever may create processes in the group (Editor and above); group export: the Export right; import: the Create right in the target group (a new group or an untrusted publisher needs the App Admin); re-import: whoever may edit the process.
Tested: database self-checks 11/11 for these items; 5/5 browser tests passed in the release test pass (104 steps).
58 Decision rules and automation
58.1 Rule tables on decisions
A rule table (made on Platform tools, rules library) can now be tied to a decision of the process. Open Requirements, sign-off and rules from the process, pick the Decision in the process and the Rule table, and click Tie the table to the decision. The tables are shown under Decision rule tables in the BRD and the automation request, printed in the BRD, and carried in the automation request to ActiBot.
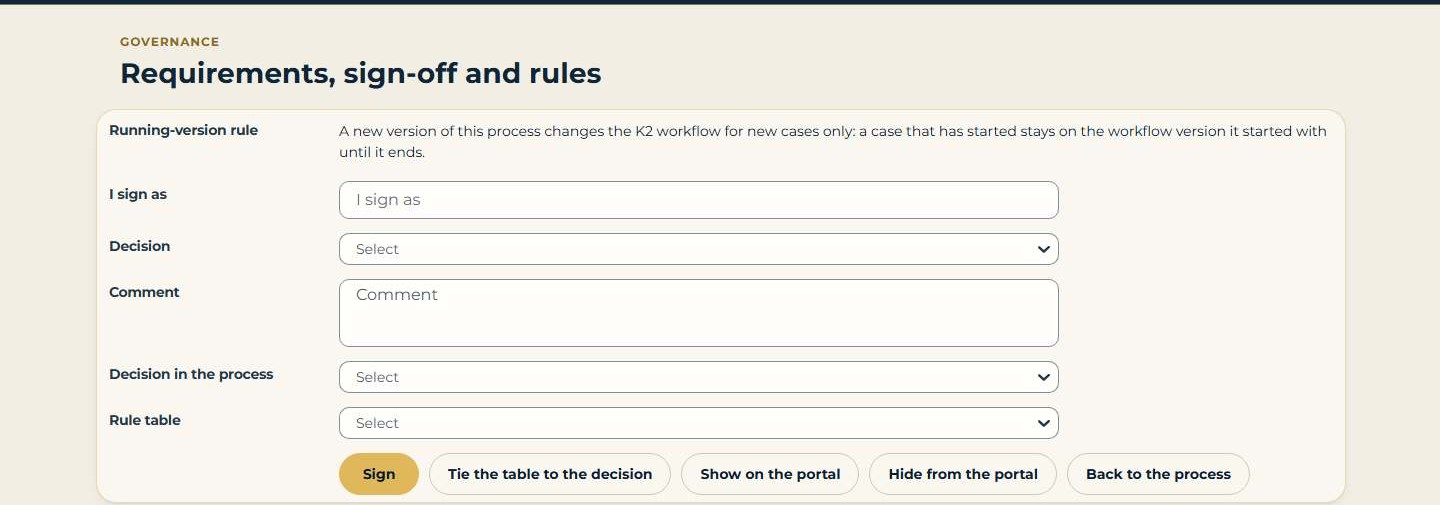
Figure 90 - Requirements, sign-off and rules: tie a rule table to a decision
58.2 The step panel inside K2 task forms
A K2 task form of an automated process can show the documented step beside the task: its tasks, notes, links and documents (What to do). It is shown in the task forms of the demo automated process; automation requests ask ActiBot for it on every task form.
58.3 Automation candidates
Automation > Automation candidates scores each process on volume, effort, manual work, systems, clear rules (a field rule or a rule table), stability and the K2 errors of its workflows in the last year. Automation business case works out the hours and cost saved and the payback in months for the steps you choose.
Who may use it: rule tables on decisions: whoever may edit the process; candidates: the Automation menu (automation specialists and administrators); the step panel: the person who has the task.
Tested: database self-checks 5/5; the live K2 task forms of the demo process passed 32/32 steps; 6/6 browser tests passed in the release test pass (110 steps).
59 Access levels by K2 / AD group
Users still come from K2 (Active Directory, Entra or another identity your K2 uses). Since release 2.5 the App Admin can give a Masar access level to a directory group or a K2 role, so people who join, move or leave a group get their Masar access changed with no extra link.
- Open Admin > Access levels.
- In Grant to choose K2 / AD group or K2 role, and type the group in User (K2SQL:name), role, or group (K2:DOMAIN\Group).
- Pick the Access level; optionally limit it to a Group of the library or a Process number.
- Click Grant. To take it back, type its number in Grant number to remove and click Remove grant.
Masar reads a person's groups and K2 roles (also nested groups) at every sign-in: on the Home page and when a process is opened by its link. Joiners, movers and leavers are written to the audit. If K2 cannot be read, the group levels are not given (the person keeps only their own grants). Who got access from which group lists each person with the group, level and last sign-in; Check everyone's groups now reads all groups again at once.
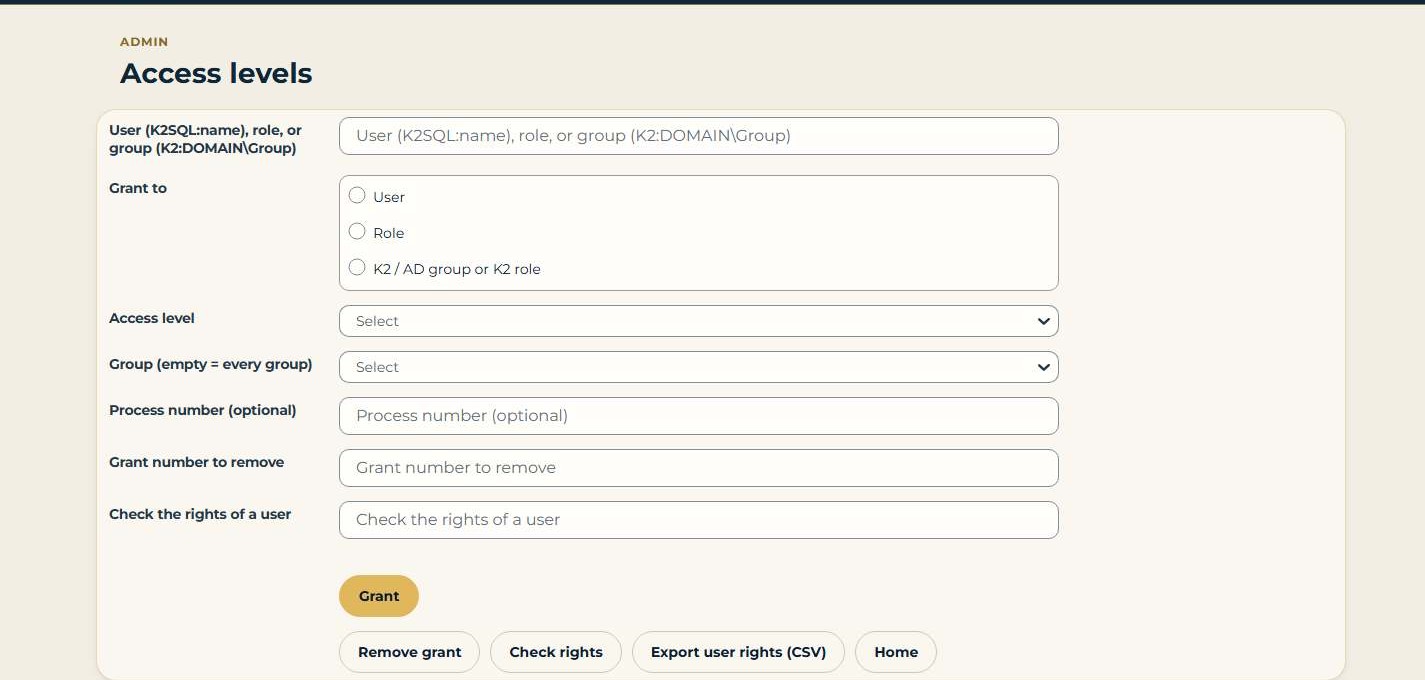
Figure 91 - Access levels: grant a level to a K2 / AD group or K2 role

Figure 92 - Access by group: who got access from which group
Admin settings: Access.GroupSync (1 = read groups at sign-in) and Access.GroupSyncMinutes (0 = every sign-in page).
Who may use it: the App Admin.
Tested: database self-checks 8/8; 4/4 browser tests passed in the release test pass (50 steps).
60 Risk and compliance
Governance > Risk register and Governance > Controls and sign-offs keep the risks of your processes, the controls that treat them, their sign-offs, control testing and evidence. Enterprise risk stays in GRC One and is linked here by its reference.
60.1 Add a risk
- Open Governance > Risk register. Type a new Risk code (an existing code changes that risk), the Risk title, its Arabic title, Portfolio and Risk owner (K2SQL:name).
- Score Likelihood before controls and Severity before controls (1 to 5), and the same after controls. Masar works out the inherent and residual score (likelihood x severity) and the level High, Medium or Low.
- Choose the Treatment (Reduce, Accept, Transfer or Avoid), the classes and, if you use it, the GRC One reference.
- Click Save the risk, then give the Process number and Step number and click Link to the process or step.
The page shows the Heat maps (inherent and residual), the Top 10 risks, the register and the Audit history. The same is in the paginated report Risk register.
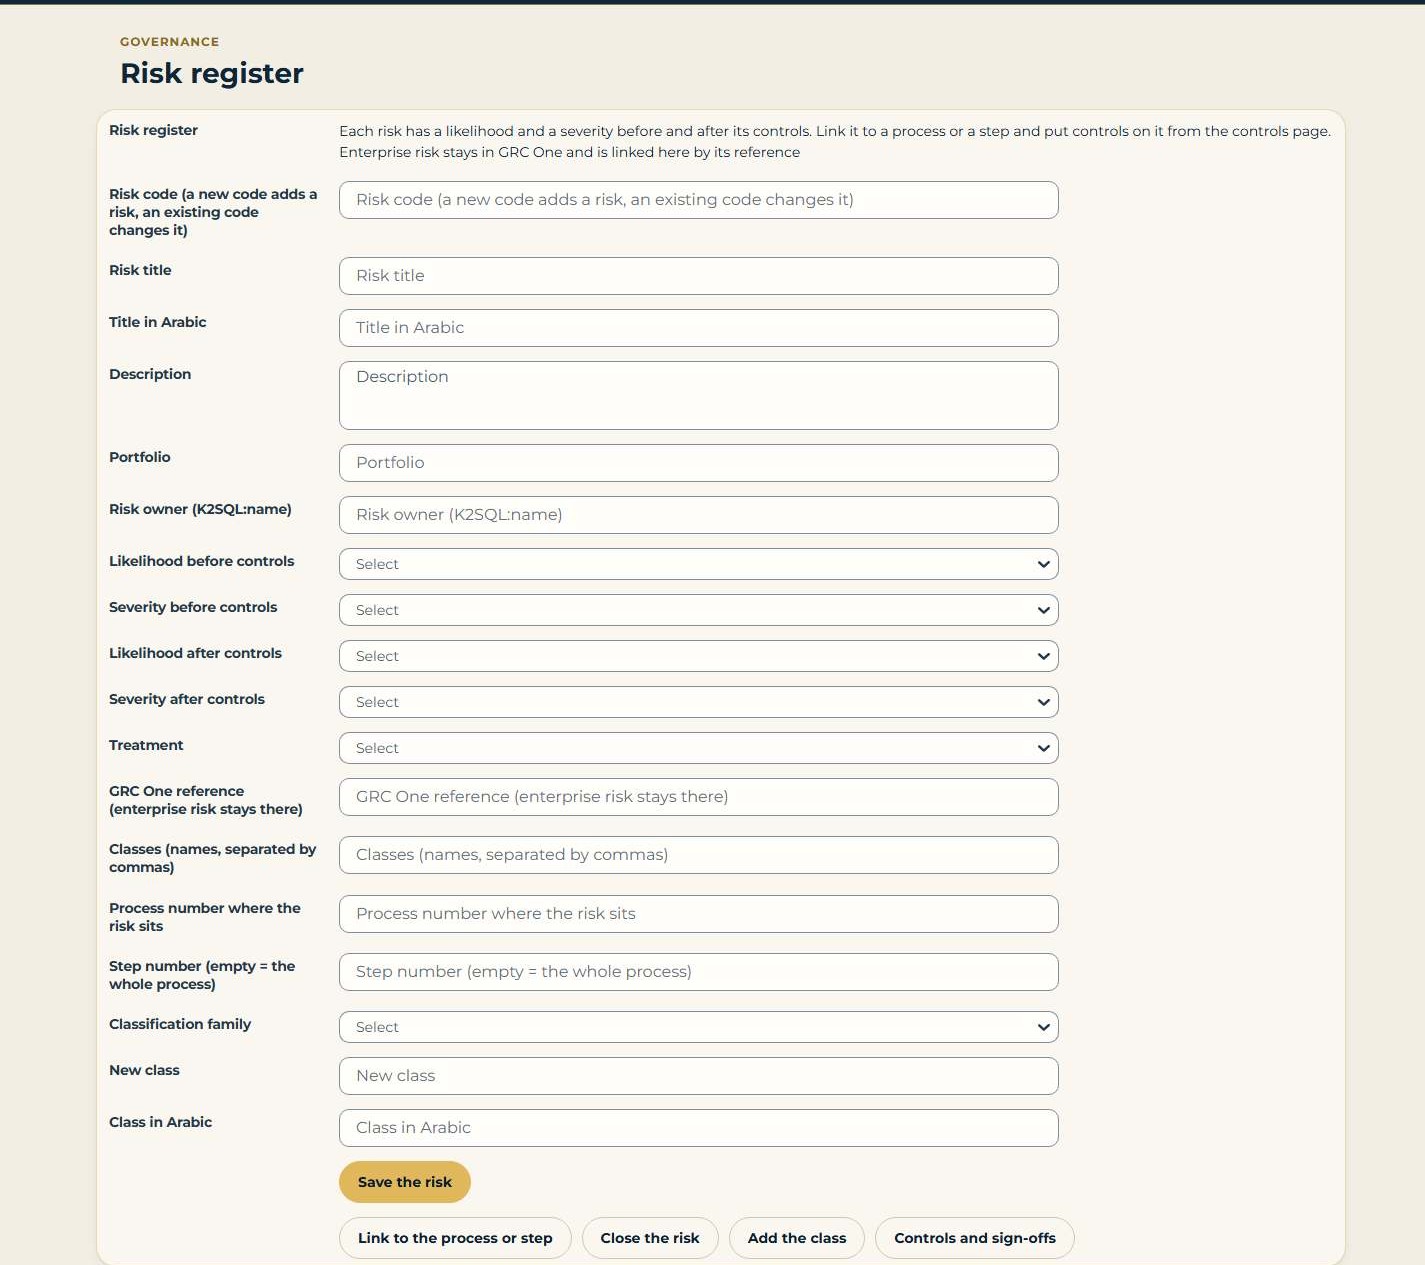
Figure 93 - Risk register: add or change a risk, with its scores before and after controls
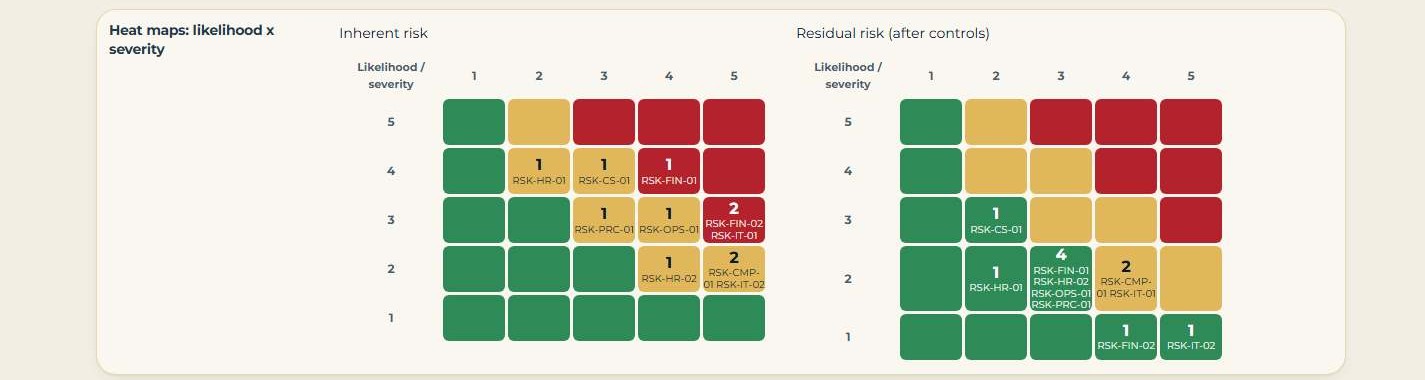
Figure 94 - Heat maps: inherent risk and residual risk after controls
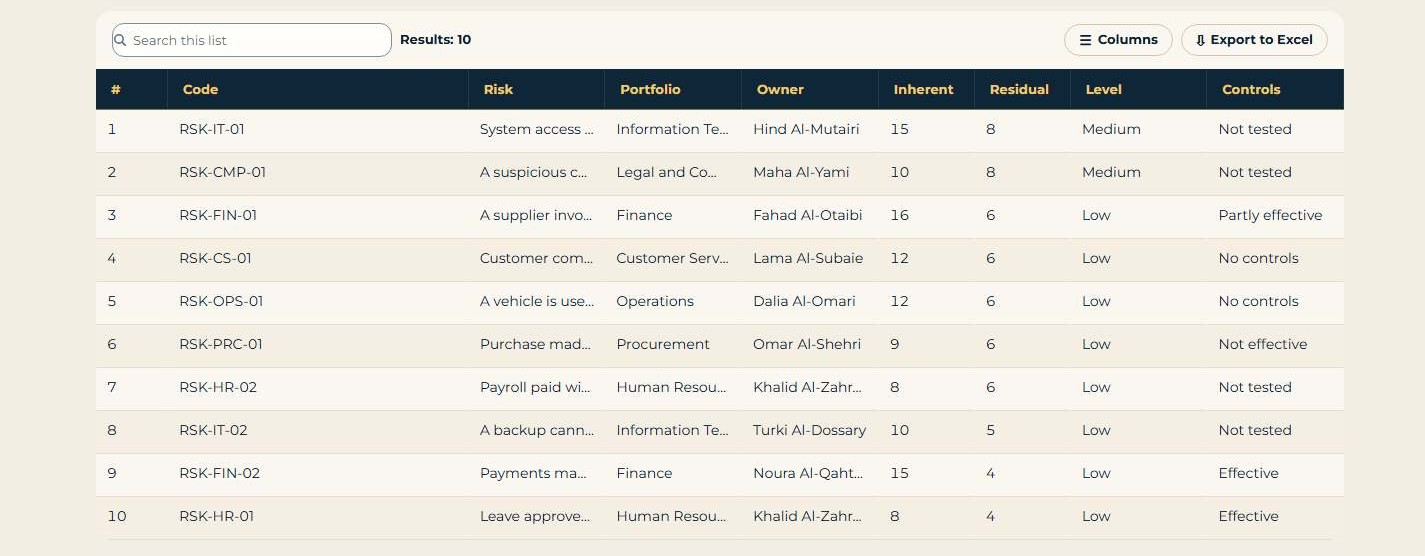
Figure 95 - The register: each risk with its owner, inherent and residual score, level and the state of its controls
60.2 Controls, sign-offs and evidence
- Open Controls and sign-offs. Type the Control code, title, what the control does, the Control owner, its type (Preventive, Detective or Corrective) and the Sign-off frequency (Monthly, Quarterly, Half-yearly, Yearly or No schedule).
- Give the Code of the risk it treats and the process and step number, and click Save the control and Put the control on the step.
- The control sweeper starts a sign-off task for the owner when it is due, and after a published change to the step (a "Change" sign-off). Ask for a sign-off now asks for one at once.
- The owner opens Sign off the control from My tasks, writes what was checked and clicks Effective or Not effective. Not effective, or no answer by the deadline, opens a finding.

Figure 96 - The task Sign off the control: why it is asked, the steps, the deadline, Effective or Not effective
Read the K2 run records looks in the K2 log of the linked workflow for skipped or late control steps, a step done outside its role and segregation-of-duties breaches, and records each as a finding. Control testing campaigns record test results (Pass, Partly passed, Fail) with evidence; a failure opens a finding. Evidence goes into the Evidence ledger: rows are only added, never changed, and each is sealed with SHA-256; Check the ledger seals checks the chain.
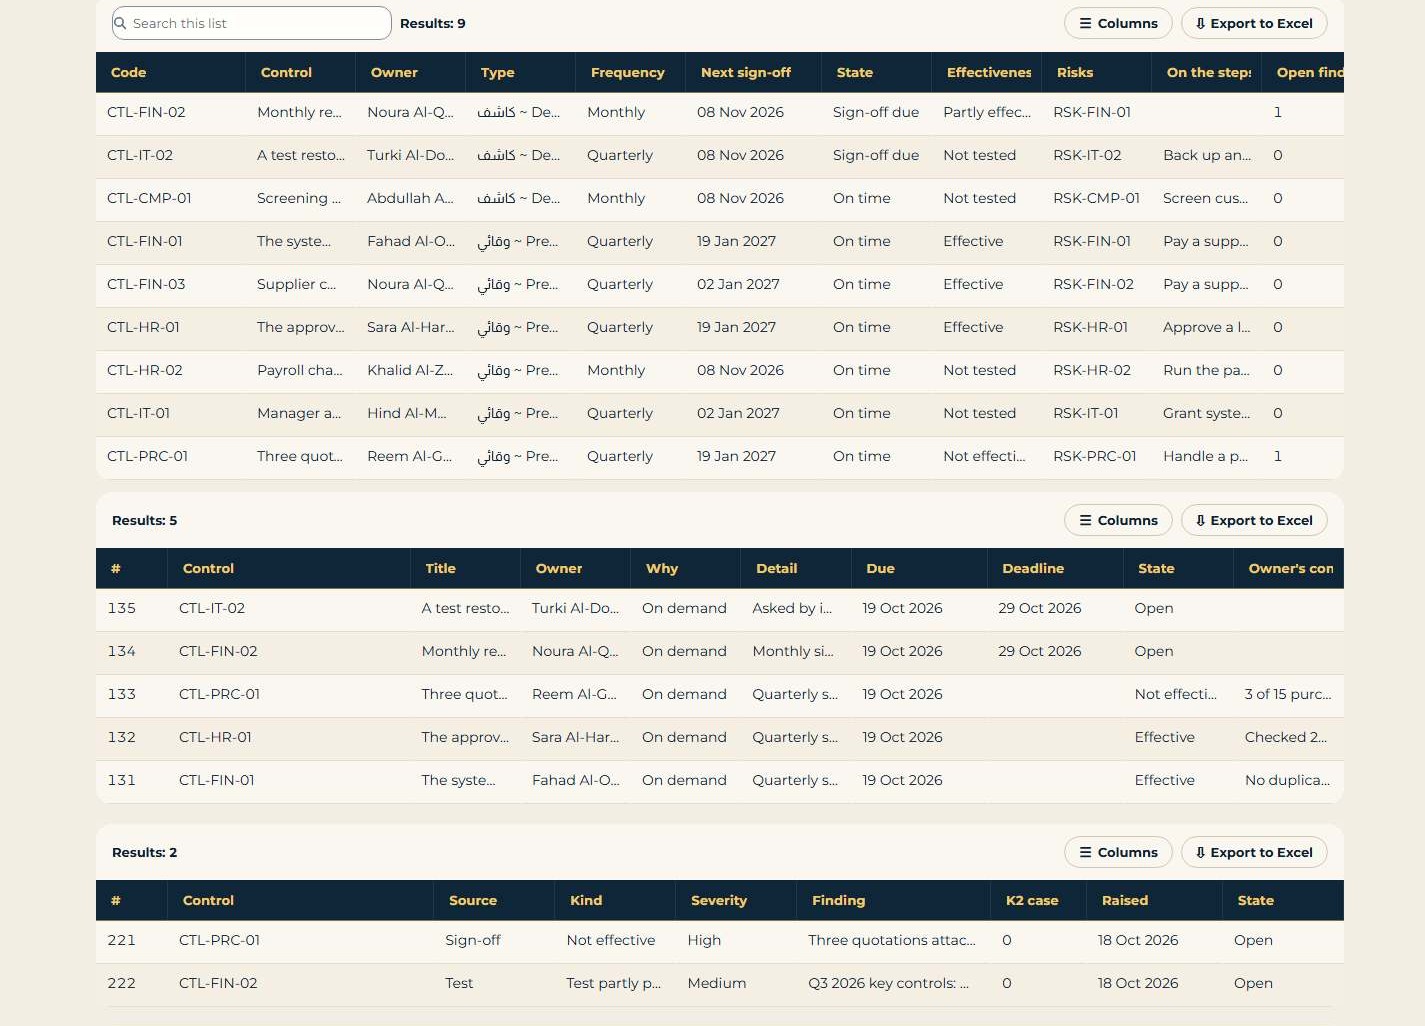
Figure 97 - Controls and sign-offs: the controls with their next sign-off and state, the sign-offs asked, and the open findings
Who may use it: risks and controls are kept by the App Admin and the new level RiskManager; Auditor and ProcessAdmin may read them; only the control owner (or a risk manager) signs off a control.
Admin settings: Risk.AutoStart, Risk.SweepMinutes (1440), Risk.SignoffDays (10), Risk.HighScore (15), Risk.MediumScore (8), Risk.RunEvidenceDays (90). Start the control sweeper once after installation (Start the control sweeper).
Tested: database self-checks 12/12, SmartObject cases 31/31, the sign-off and sweeper workflow tests passed, reports published; 6/6 browser tests passed in the release test pass (152 steps).
61 Incidents and improvements
Governance > Incidents and improvements records an incident, a near miss, a customer complaint, an improvement idea, a control failure or an SLA breach. Each type has its own fields.
- Choose the Type, write What happened and the Details, and set the Priority (Low, Medium, High, Critical), Portfolio and Location.
- Give the Process number, Step number and Risk code where they apply, and the fields of the type.
- Click Report. The incident gets a number (INC-nnnn) and the incident workflow starts.
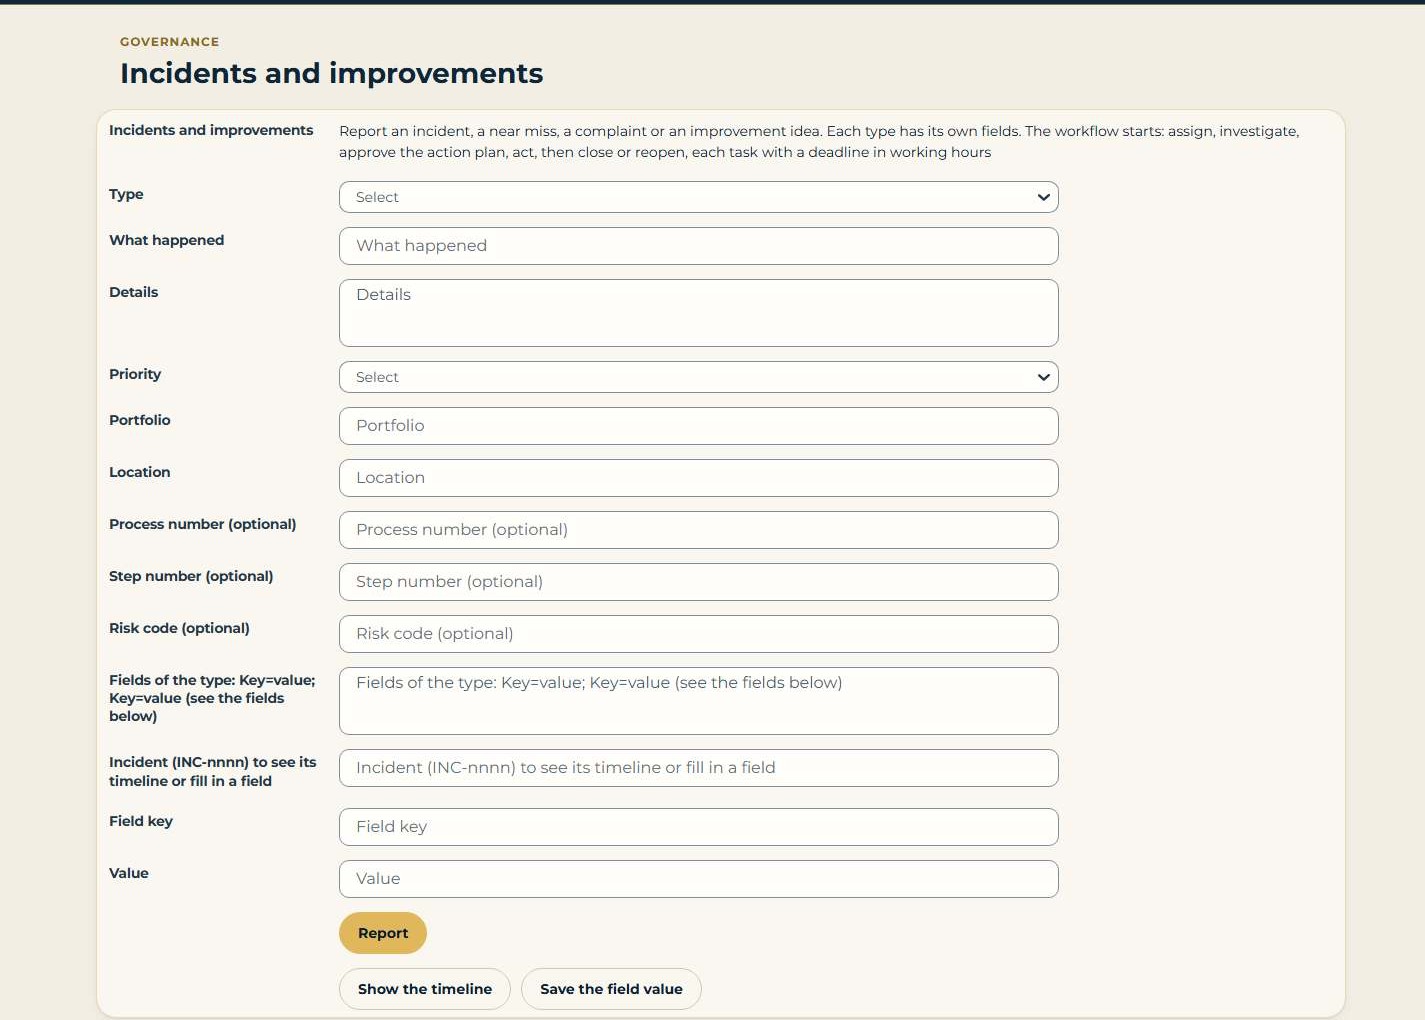
Figure 98 - Incidents and improvements: report an incident
The workflow gives these tasks, each with a deadline in working hours: Assign the incident (Assign or Not an incident), Investigate the incident (root cause and action plan), Approve the action plan (Approve or Rework), Carry out the action plan (Done) and Close or reopen the incident. A task past its deadline marks the incident Overdue and is given again. The statuses are New, Under investigation, Under action and Closed. Show the timeline lists every step.
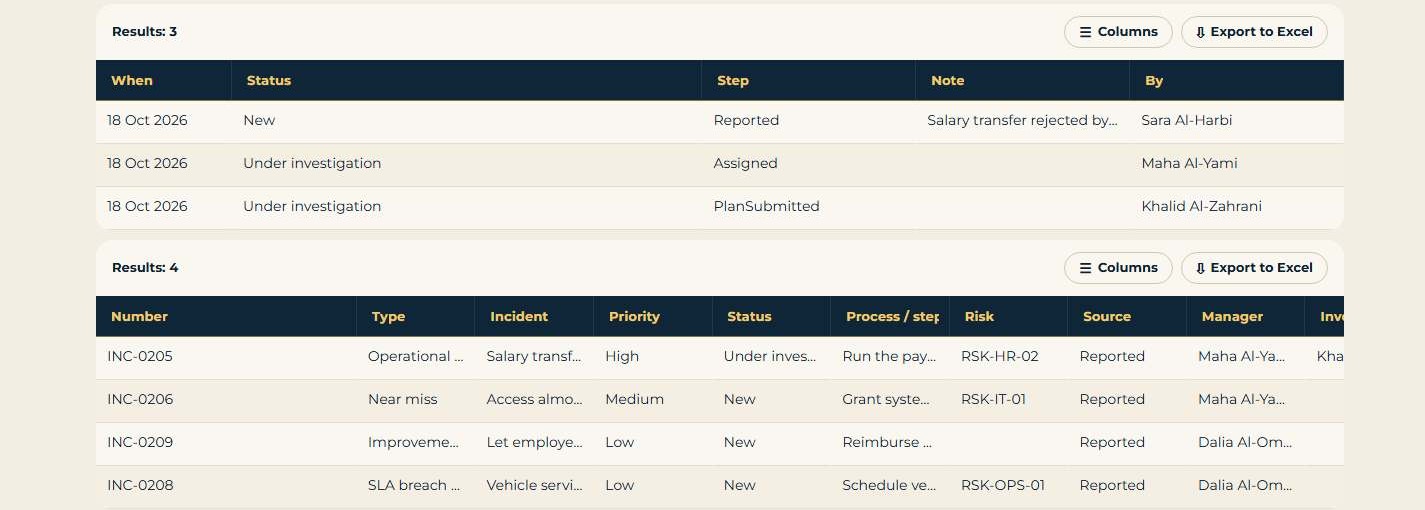
Figure 99 - The timeline of an incident, and the incidents you work on with their type, priority, status and risk
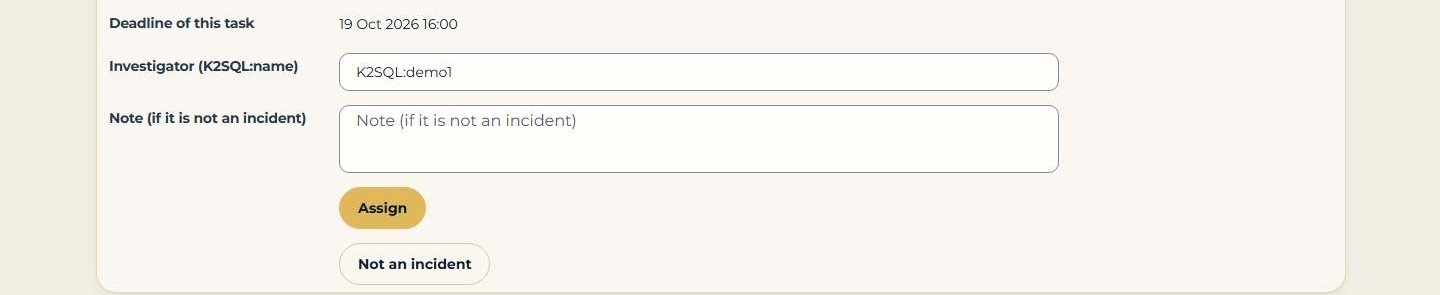
Figure 100 - The task Assign the incident: the investigator, Assign or Not an incident
An incident can also be opened from feedback (Open an incident (complaint)), from Process Discovery (Open an incident (bottleneck or SLA breach)) and from a control finding; with Incident.FromFindings = 1 a High finding opens one by itself.
Who may use it: everyone may report on a process they may read; the type's manager assigns; you see the incidents you reported or work on; risk managers see all and keep the types and their fields.
Admin settings: Incident.DefaultManager, Incident.FromFindings (1), Incident.WorkDays (Sun to Thu), Incident.WorkStart (8), Incident.WorkEnd (16), Incident.CloseHours (80).
Tested: database self-checks 7/7, the incident workflow test passed; 6/6 browser tests passed in the release test pass (115 steps).
62 Training and competency
Governance > Training and competency links training to your processes and keeps who did it.
62.1 My training
Under My training you see the units given to you: from your role's onboarding plan, a re-training after a published change, or a refresher before a unit expires. When you have done one, type its Record number, choose What you did (Attended or Passed), add a note and click Done - send it for sign-off. The trainer gets the task Sign off the training and clicks Signed off or Not passed. Signed off sets the expiry and the refresher date.
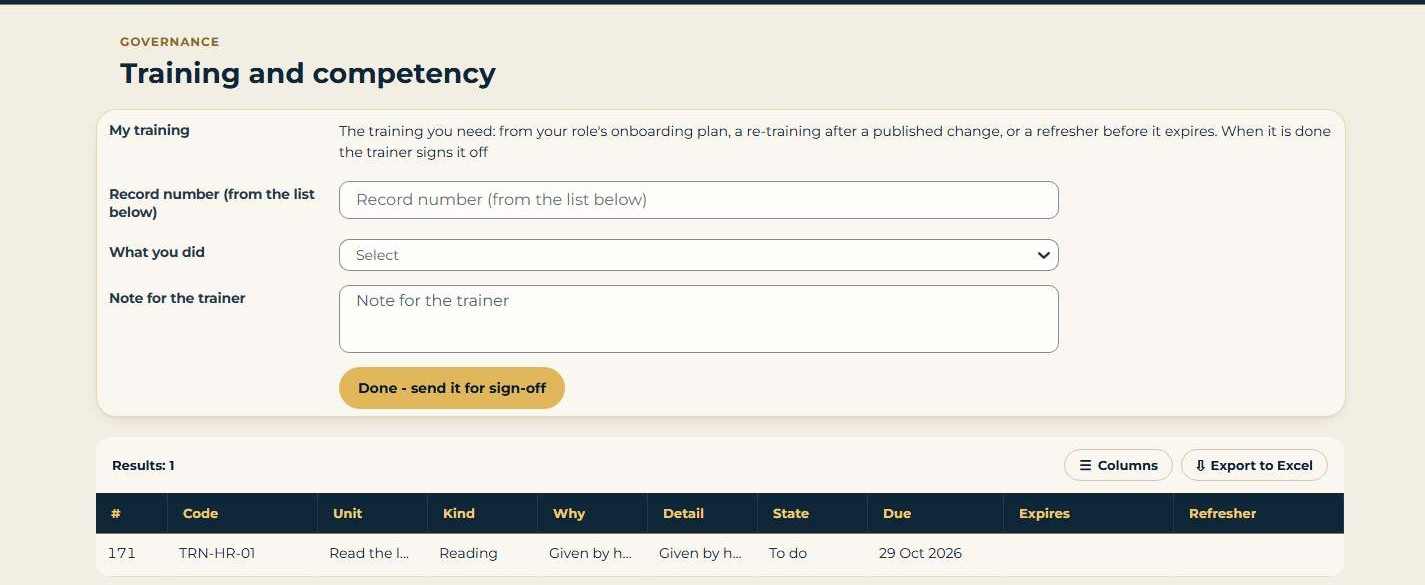
Figure 101 - My training: the units given to you, sent for sign-off when done
62.2 Training administration
- Type the Unit code, title, Kind (Course, Reading, On the job or Assessment), duration, Valid for months and the Trainer who signs off, and click Save the unit.
- Give the process, step or document it teaches and click Link the unit to what it teaches. Group units into a competency with Save the competency.
- Pick the Role and click Add the unit to the role's plan (or the competency), then Give the plan to the role's members.
- For a person who does not need a unit, type the record number and Why it is not required, and click Not required for this trainee.
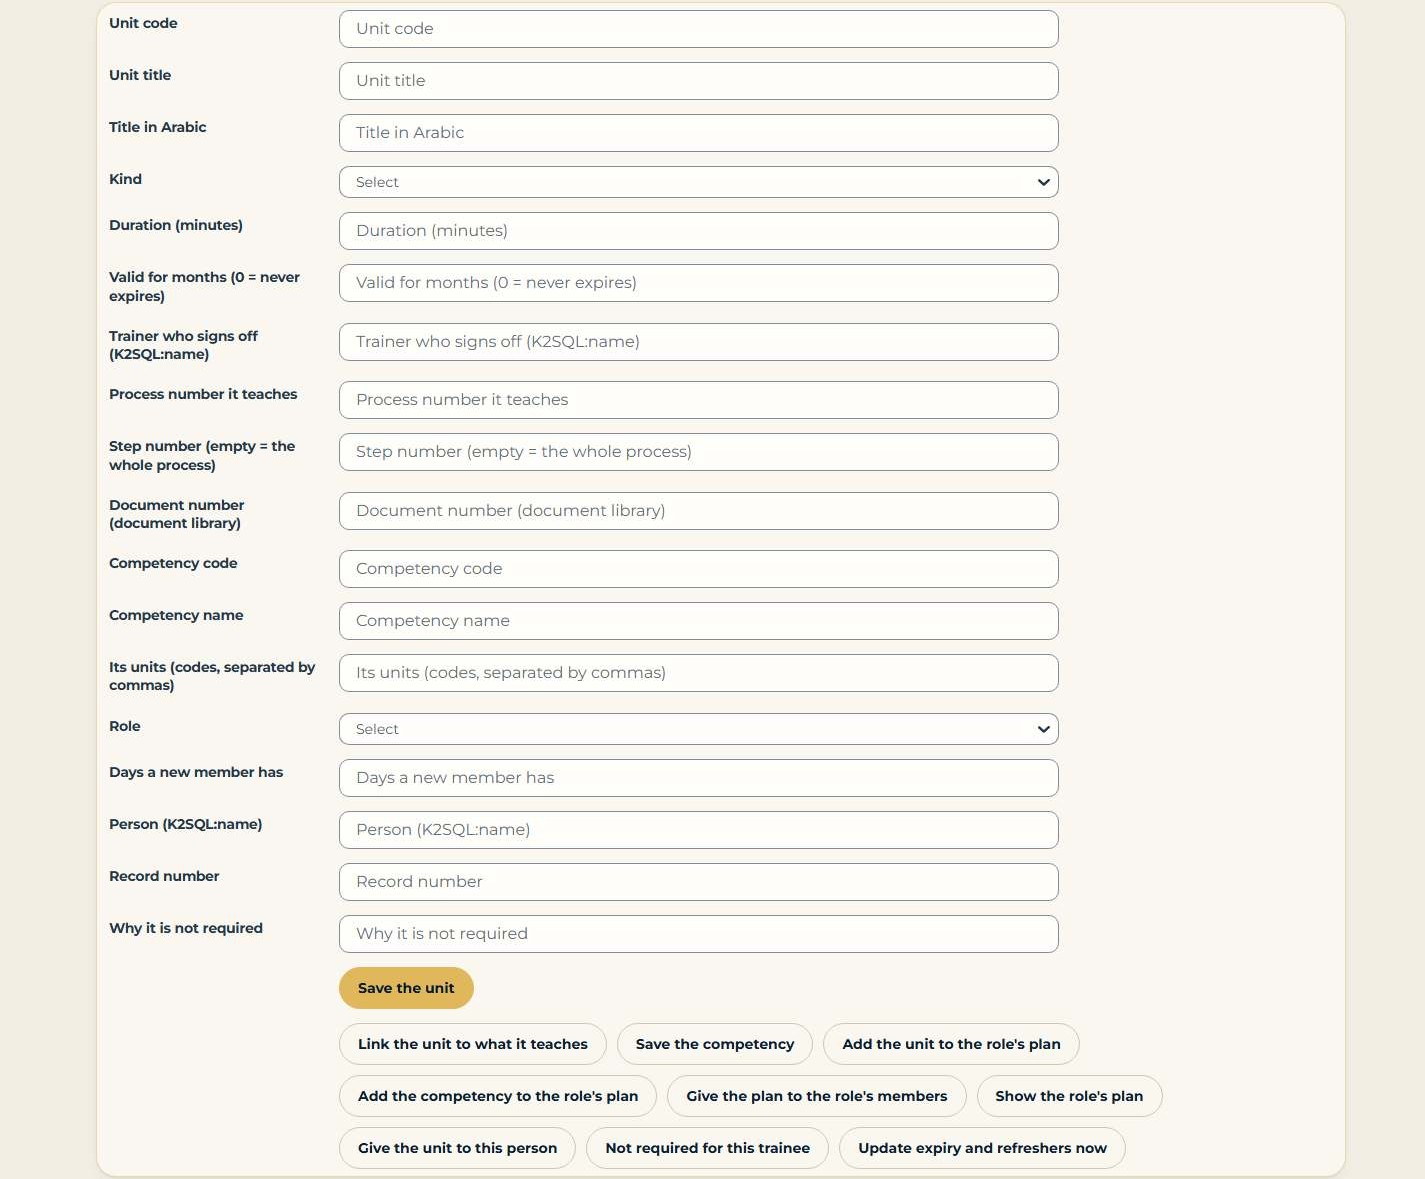
Figure 102 - Training administration: units, competencies and the onboarding plan of a role
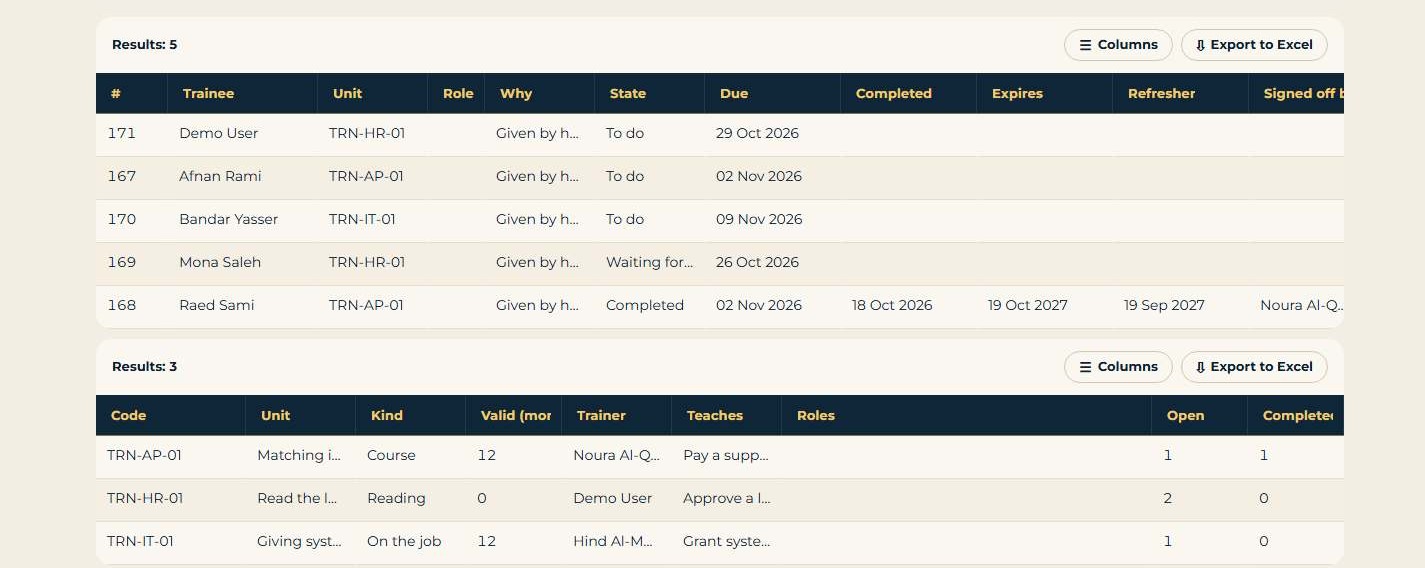
Figure 103 - The trainees with their records, and the units with their trainer and what they teach
When a new version is published, the people of the roles whose steps changed get a Re-training after a change; acknowledging the new version closes it. Update expiry and refreshers now runs the expiry round at once (the sweeper runs it every round).
62.3 My Dashboard
The Home page has three tabs after My work: Risks (risks and controls you own, sign-offs waiting for you), Incidents (open incidents you work on) and Training (your open training and refreshers due within 60 days).
Who may use it: My training: everyone; training administration: the App Admin, ProcessAdmin and the new level TrainingManager; the trainer signs off.
Admin settings: Training.DueDays (30), Training.RefresherDays (30), Training.DefaultTrainer, Training.RetrainOnPublish (1).
Tested: database self-checks 7/7, the training sign-off workflow test passed; 5/5 browser tests passed in the release test pass (79 steps).
63 AI Process Generator
Processes > AI Process Generator turns a title and an objective, or an SOP document, into a draft procedure that you review before it is saved. Nothing is saved until you click Save the draft as a process.
63.1 A draft from a title and an objective
- In What do you want choose A draft from a title and an objective.
- Type the Process title and the Objective (both needed), and, if you like, More instructions (optional), the Language of the draft and the Group.
- Click Ask the model for a draft. ActiBot AI on your own server writes the draft on its CPU, usually within 30 seconds (chapter 67); open it from My drafts or click Refresh.
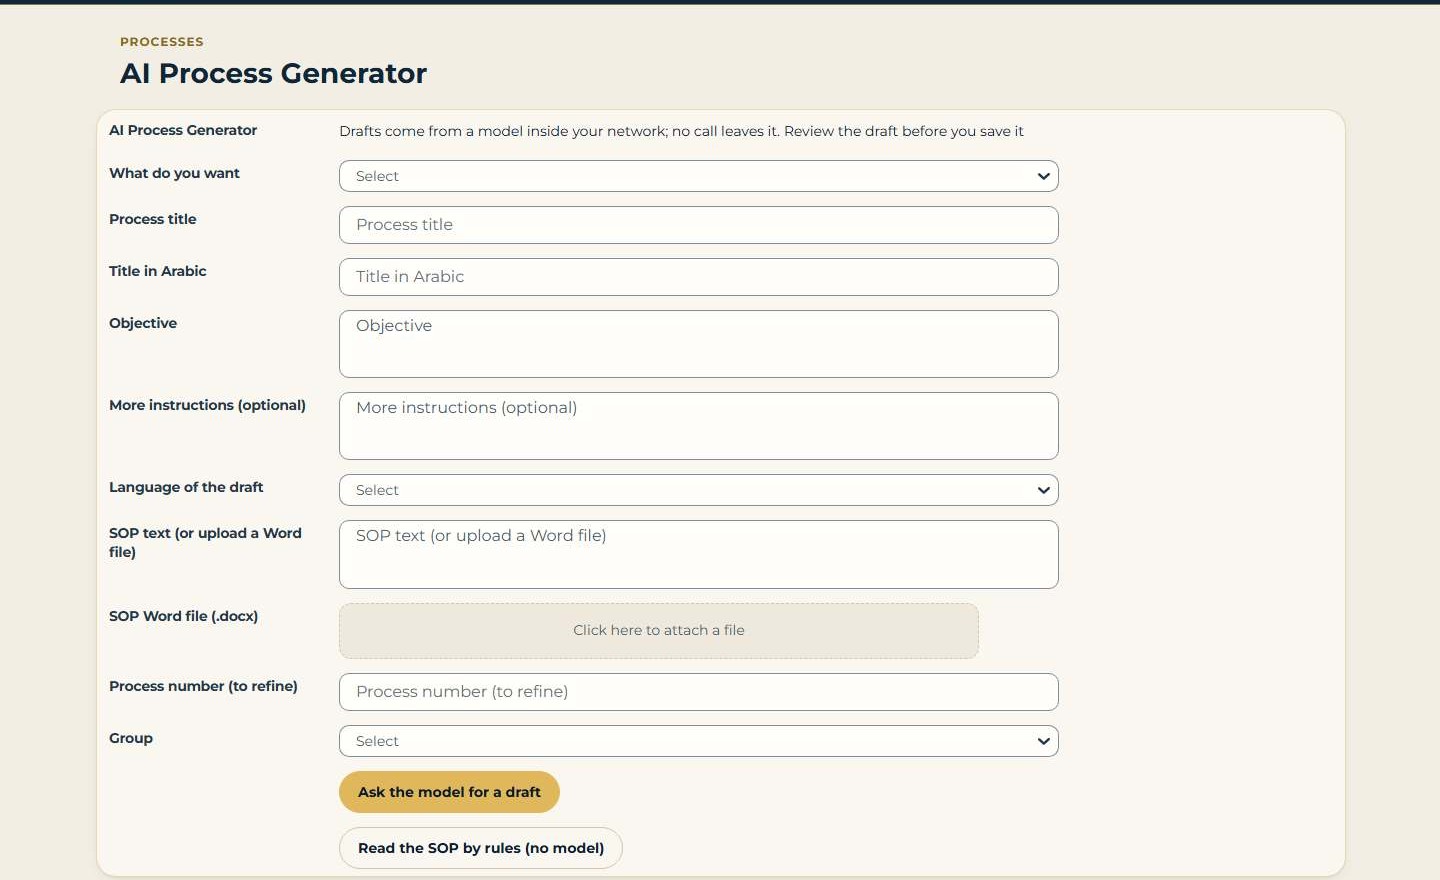
Figure 104 - AI Process Generator: what you want, the title, the objective and the SOP
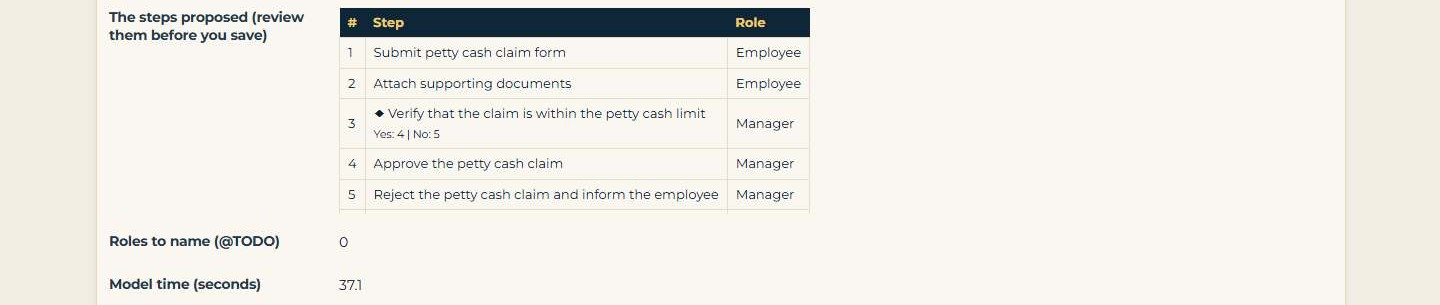
Figure 105 - A draft from the model: the steps with their roles and a decision, ready for review
63.2 A draft from an SOP
Choose A draft from an SOP (Word file or text), paste the text or attach a Word file (.docx), and click Read the SOP by rules (no model), or Ask the model for a draft when the gateway is on. A PDF is not read: copy its text into the box.
63.3 Review and save
- Check The steps proposed. A decision shows its Yes and No steps; a step whose role is not known shows @TODO, and Roles to name (@TODO) counts them.
- Change the steps in Steps text if needed: one line per step, the role in [brackets], DECISION: for a question.
- Type the Title of the new process and the Group, and click Save the draft as a process. The process opens on the edit page as a draft; @TODO steps become to-dos. Discard the draft throws it away.
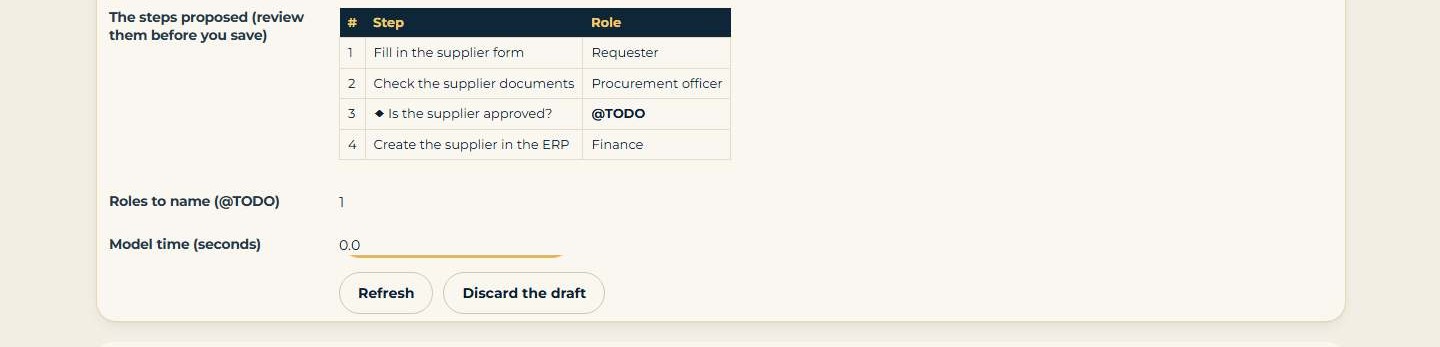
Figure 106 - An SOP read by rules: one role still to name (@TODO), Save the draft as a process
Refine the steps of a process made from a model puts the model's step titles and roles on a process converted from a model, by step number; it needs the gateway.
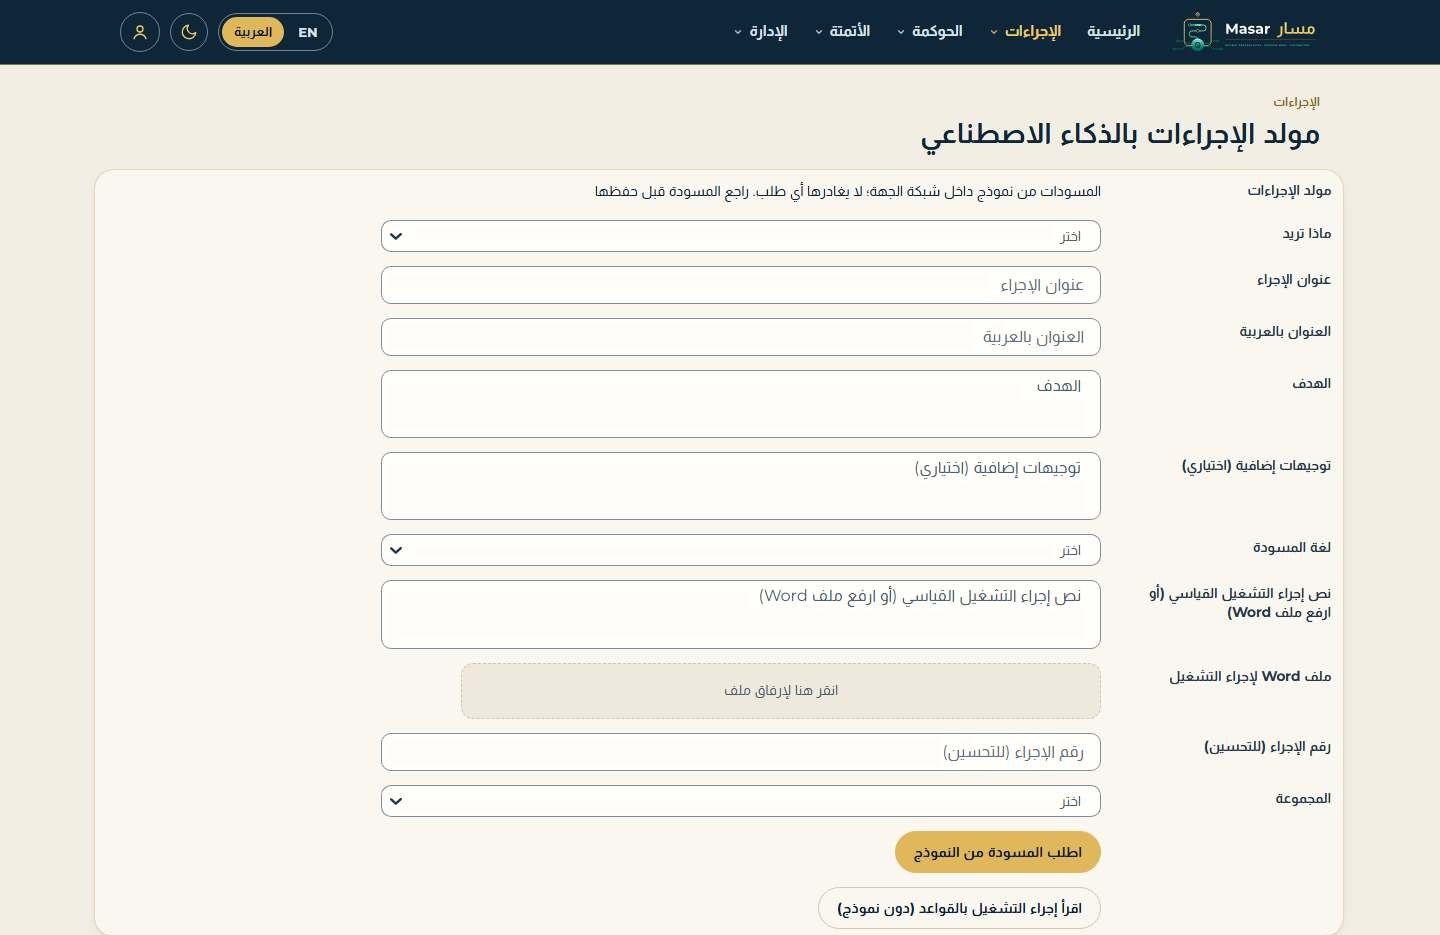
Figure 107 - The AI Process Generator in Arabic
Who may use it: whoever may create processes in the chosen group (Editor and above); refining needs the right to edit that process; only the author of a draft (or an App Admin) sees, saves or discards it. Every request, save and discard is audited, and the change log of the new process says how it was drafted and who reviewed it.
Admin settings: Ai.Gateway, Ai.Model, Ai.MaxTokens, Ai.Temperature, Ai.PromptFormat (chapter 66).
Tested: database self-checks 6/6, the AI draft workflow test passed; 2/2 browser tests passed in the release test pass (36 steps).
64 Process capture
Processes > Process capture builds a draft process in two ways: a guided interview, or the run data of a K2 workflow or another system. There is no desktop screen recorder: nothing is installed on PCs.
64.1 The guided interview
- Type the Process title (and the Arabic title, objective and group) and click Start the interview.
- For each step answer: Who does the step (the role), What they do (a verb first), In which system and What happens next: another step, a decision (its question and the step when the answer is yes) or the end. Minutes and a note are optional.
- Click Add the step. The procedure as it grows shows the steps so far; a step with no role shows "who?". Undo the last step takes one back.
- When the process ends, click Create the draft process. The draft opens on the edit page; a step with no role gets a to-do.
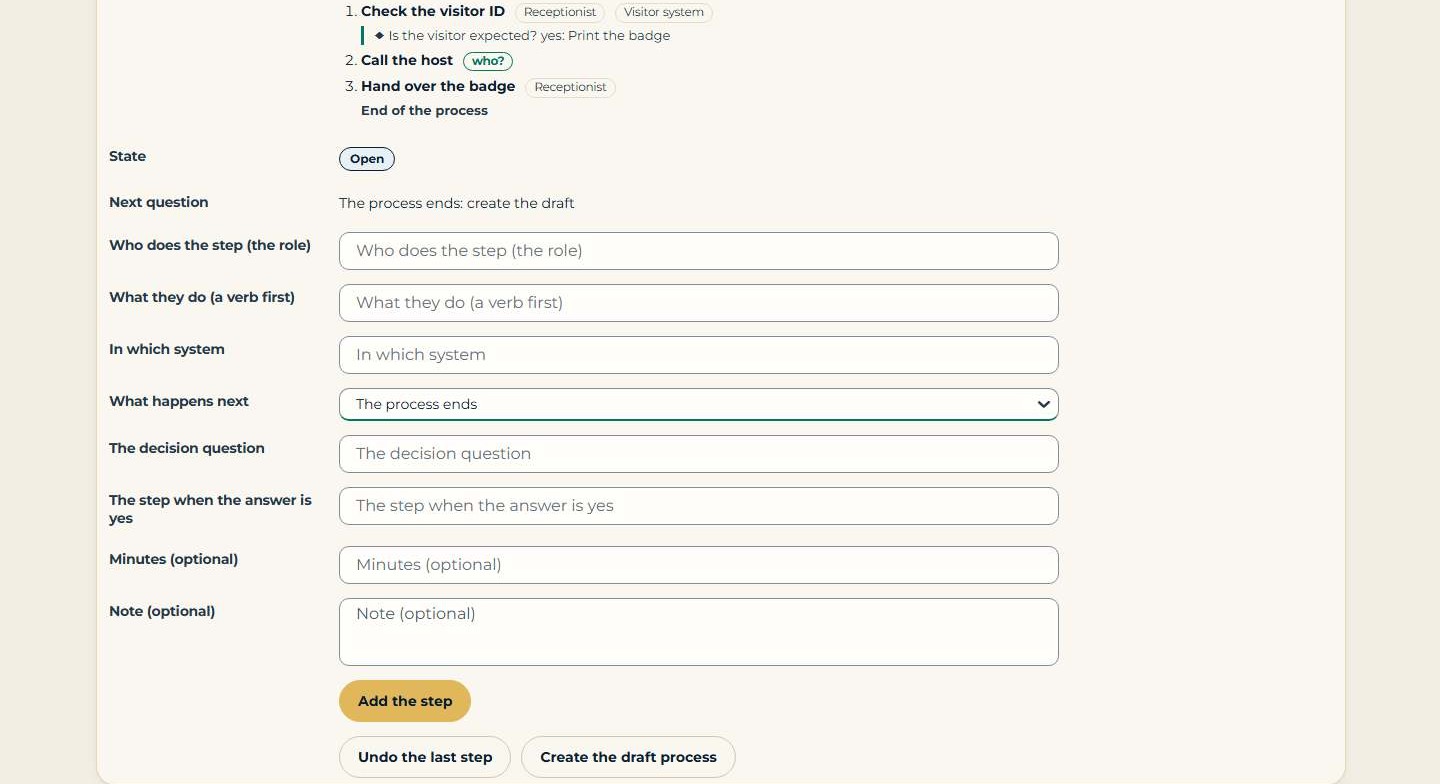
Figure 108 - The guided interview: the procedure as it grows and the questions for the next step
64.2 A draft from run data
In Source choose The K2 log of a workflow (give the K2 workflow name and Last how many days of the log), CSV event log (case, activity, time, resource) or XES event log (paste the log). Click Make a draft from the log: the most frequent path becomes the steps, with the people seen and the minutes; the other paths are added as a note.
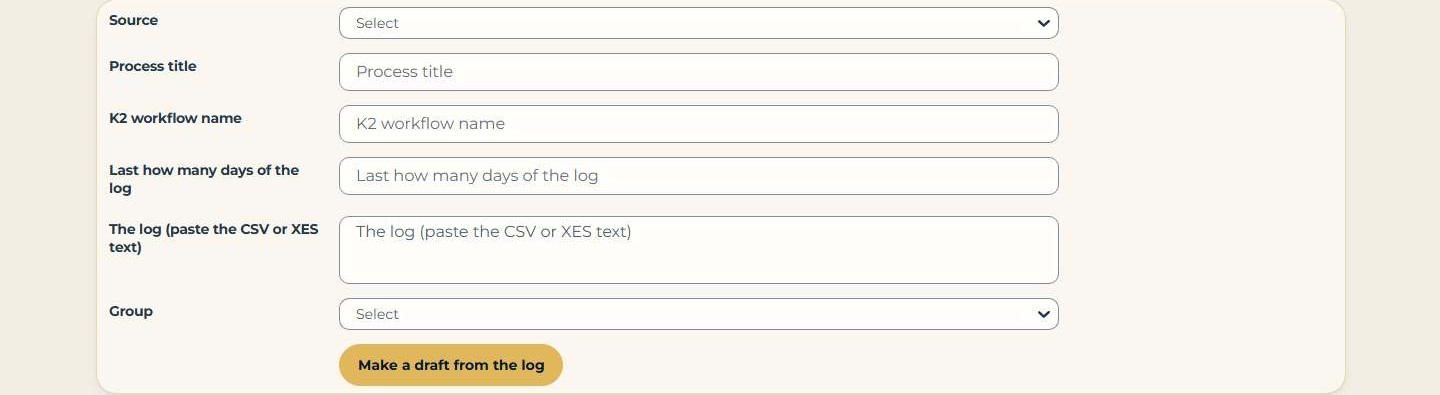
Figure 109 - Capture from run data: a K2, CSV or XES log
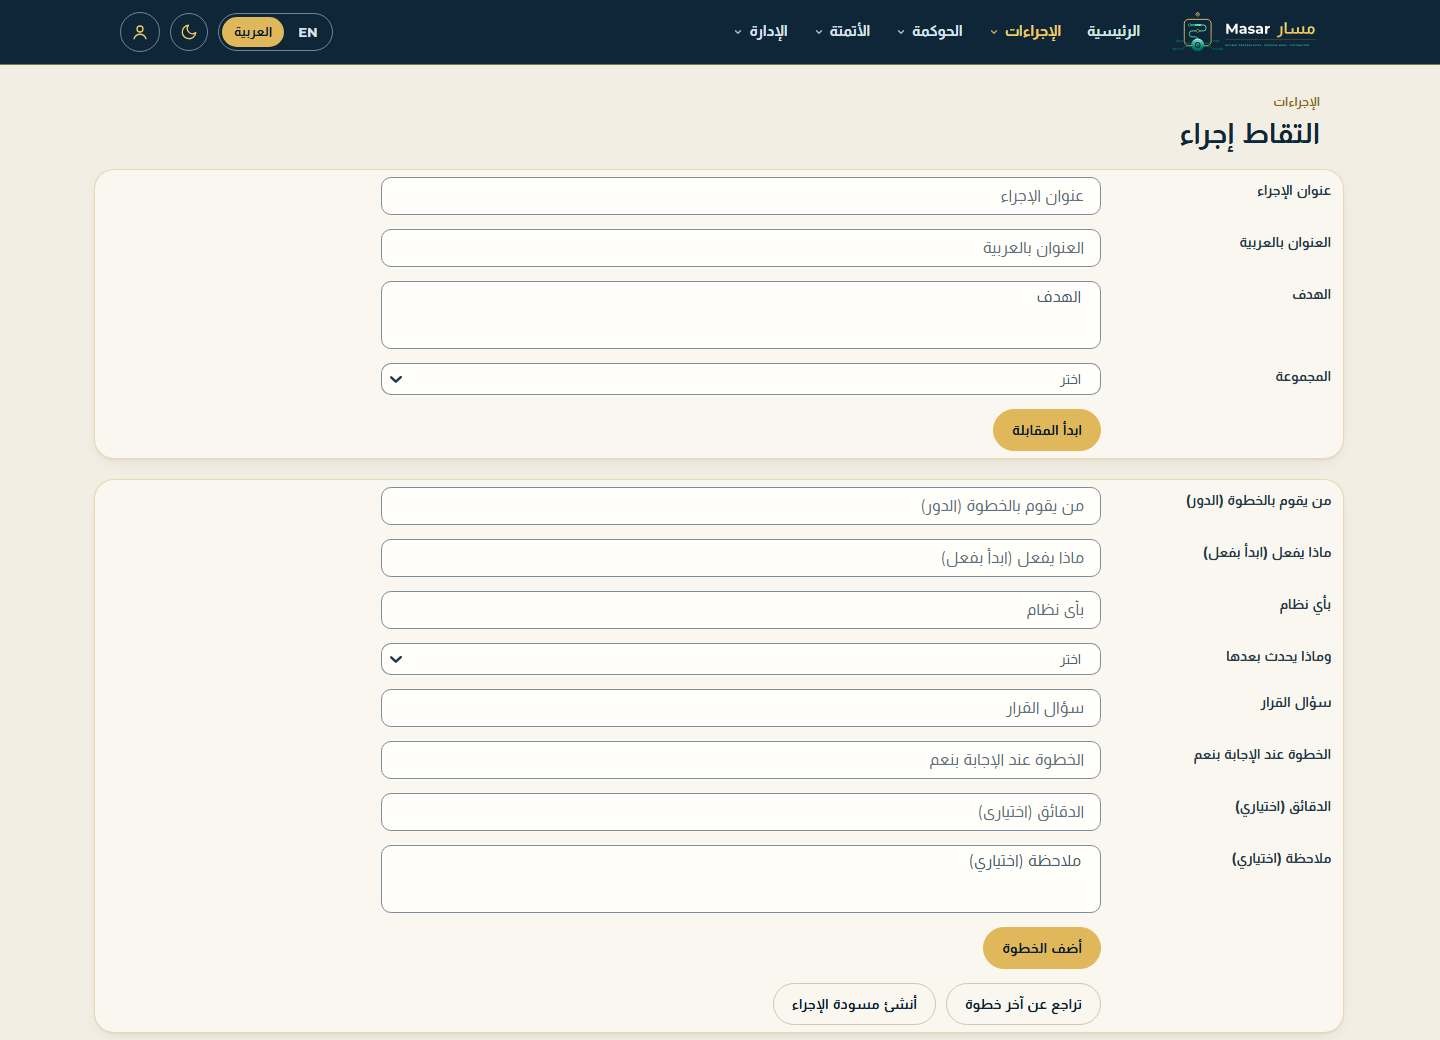
Figure 110 - Process capture in Arabic
Who may use it: whoever may create processes in the group (Editor and above); a draft from a log also needs the Process Discovery right. A capture belongs to the person who started it.
Tested: database self-checks 4/4 (a 10-step interview with a decision makes a draft); 3/3 browser tests passed in the release test pass (50 steps).
65 MCP access for an AI assistant
An AI assistant inside your network (for example an assistant on your PC that supports MCP) can read Masar for you: search processes, read a process, see the group tree, your tasks and documents. It reads only what you may read, and only published versions.
- Open My profile (the person icon in the header) and go to MCP tokens for an AI assistant.
- Type a Token name (for example "the assistant on my PC") and click Make an MCP token.
- Copy the token at once: it is shown only once. Give it to your assistant as MASAR_TOKEN (your administrator sets the assistant up, chapter 66). The token lasts the days of Mcp.TokenDays.
- To stop it, type its number from My MCP tokens in Number of the token to revoke and click Revoke the token with this number. It stops working at once.
My MCP tokens lists your tokens (Active, Expired, Revoked) with their uses; MCP calls made with my tokens lists every call: when, the tool, the inputs, the rows returned, and refused calls with the reason.

Figure 111 - My profile: MCP tokens for an AI assistant - make a token, or revoke one by its number
Who may use it: every signed-in person may make tokens for themselves; an App Admin may revoke anyone's; an auditor sees all calls. Masar keeps only a hash of the token.
Tested: MCP client test 16/16 (lists and reads with a personal token, a restricted process hidden, a revoked token refused, one audit row per call), database self-checks 8/8; 1/1 browser tests passed in the release test pass (22 steps).
66 Administration: the model gateway and the MCP server
66.1 The model gateway
Masar never calls a model on the internet. It asks ActiBot AI (chapter 67) through the K2 REST service instance ProMap_K2_ModelGateway, which is installed with Masar. The install step Set-MasarModelGateway.ps1 writes ActiBot AI's address and its key into the service instance; the key is read from the ActiBot AI key file and is never shown. ActiBot AI answers only calls that carry the key, on an internal address.
- Install ActiBot AI and run the install step Set-MasarModelGateway.ps1 on the K2 server (chapter 67). It sets the address and the key of ProMap_K2_ModelGateway and the AI settings.
- Run the install step again after every new registration of the Masar service instances (for example after an upgrade): the registration puts the gateway back to the package's address, with no key.
- Check it: run the method Health of the SmartObject ProMap_K2_ModelGateway; it returns Status ok.
- In Admin > Company settings check Ai.Model and Ai.PromptFormat = ChatML (both set by the install step), and if needed Ai.MaxTokens (1500) and Ai.Temperature (0: the same draft each time).
- Give Start and View on the workflow ProMap_K2_AiDraft to the K2 group of the people who will use it (section 24.2).
- The install step sets Ai.Gateway = Endpoint. To switch model drafts off, set it to None or run the install step with -RulesOnly; an SOP is then read by rules.
A review is always required: a draft becomes a process only when its author clicks Save the draft as a process. Every draft keeps the request, the answer, the model and the time; requests, saves and discards are audited.
66.2 The MCP server
The MCP server is the PowerShell file masar-mcp.ps1 (folder tools/mcp of the Masar delivery). It runs on a Windows computer inside your network, next to K2, with Windows PowerShell 5.1 (powershell.exe); nothing else is installed. The AI assistant starts it and talks to it over standard input and output (MCP). It only reads.
It needs two environment variables:
- MASAR_TOKEN - the personal MCP token of the person the assistant works for (chapter 65).
- MASAR_SQL - how to reach the Masar database: a SQL Server connection string; by default Server=localhost;Database=ProMap_K2_App;Integrated Security=True. Give the Windows account that runs it the right to run the Masar read procedures for MCP (Api_Mcp_...) only; the token decides what comes back.
In the assistant's MCP settings, the server is started with the command powershell.exe and the arguments -NoProfile -ExecutionPolicy Bypass -File <folder>\masar-mcp.ps1, with MASAR_TOKEN (and MASAR_SQL if it is not the default) as its environment. Keep the token out of shared files.
The tools it offers:
- search_processes - search the published processes you may read (title, objective, keywords, step titles); up to 50.
- get_process - one process by its key: the procedure with roles, systems and items, the map as a flow, and RACI.
- group_hierarchy - the group tree with the number of processes you may read.
- my_tasks - drafts to finish, reviews, feedback to answer, versions to acknowledge, to-dos, control sign-offs, incidents and training.
- documents - the documents of a process, or all you may read (up to 200).
Every call writes an audit row (the token, the person, the tool, the inputs, the rows, or the reason it was refused). A restricted process the person may not read looks the same as one that does not exist.
Admin settings: Mcp.Enabled (1; 0 switches off both new tokens and the server) and Mcp.TokenDays (90, at most 366).
Part H - Release 2.6 additions
Chapter 67 describes what release 2.6 adds: ActiBot AI, which is included with Masar and runs on your own server. The earlier chapters still apply; chapters 63 and 66 refer to it.
67 ActiBot AI, included with Masar
Masar 2.6 includes ActiBot AI for the AI Process Generator (chapter 63), so you do not have to choose, buy or host a model elsewhere. ActiBot AI is installed from the Masar package on your K2 server, with no internet, and runs on the server's CPU: no graphics card is needed. It can be switched off at any time; Masar then reads an SOP by rules and every other function works.
67.1 What is installed
- ActiBot AI: a language model for Arabic and English and the program that runs it, installed together as the Windows service ActiBotAiRuntime, with automatic start and restart after a failure.
- Where: your K2 server, on an internal address that only the K2 server calls.
- Key: its own random API key, readable only by Administrators, SYSTEM and LOCAL SERVICE. Masar calls ActiBot AI only through the model gateway, with this key (chapter 66).
- Licences: the third-party licence texts are in the package, in bundle\licences and bundle\THIRD_PARTY_NOTICES.txt.
67.2 Install ActiBot AI and switch on AI drafts
- Copy the folder ai/runtime from the Masar package to the K2 server, for example D:\Masar\ai\runtime.
- In an administrator PowerShell run .\Install-ActiBotAiRuntime.ps1 -Address <internal IP of the K2 server> -Service -AllowFrom <K2 server IP> -AcceptThirdPartyLicences. It checks every file against its SHA-256 before it installs anything, installs under C:\ActiBotAI\runtime, makes the API key, registers the service and ends with CHECK OK.
- After the Masar deployment, run .\Set-MasarModelGateway.ps1 in an administrator PowerShell. It checks ActiBot AI, points ProMap_K2_ModelGateway at it with the key, and sets Ai.Gateway = Endpoint, Ai.Model and Ai.PromptFormat, each with an audit row.
- As the last installation step, run Measure-ActiBotAiRuntime.ps1 (section 67.3).
To switch ActiBot AI off, run Set-MasarModelGateway.ps1 with -RulesOnly, or set Ai.Gateway = None in Admin > Company settings: the AI Process Generator then reads an SOP by rules. -DryRun checks everything and changes nothing. The installer refuses 0.0.0.0 and any address that is not internal, and ActiBot AI refuses every call without its key.
67.3 Infrastructure requirements
Masar and ActiBot AI run on the Nintex Automation K2 environment you already have, installed together from one package. Confirm these before the installation; the installation checks prove them.
- Platform: Nintex Automation K2 5.9.1 with SmartForms and Workflow; a SQL Server instance and a login that can create the Masar database; a K2 administrator for the installation; a TEST environment before PROD. Optional: Power BI Report Server for the reports and dashboards.
- Add to the K2 server: 4 physical cores (8 vCPU, x64 with AVX2), 12 GB memory and 10 GB disk.
- SQL Server: 2 GB more memory, and 5 GB for the Masar database in the first year.
- No internet: the installation is offline and every file is checked against a pinned SHA-256.
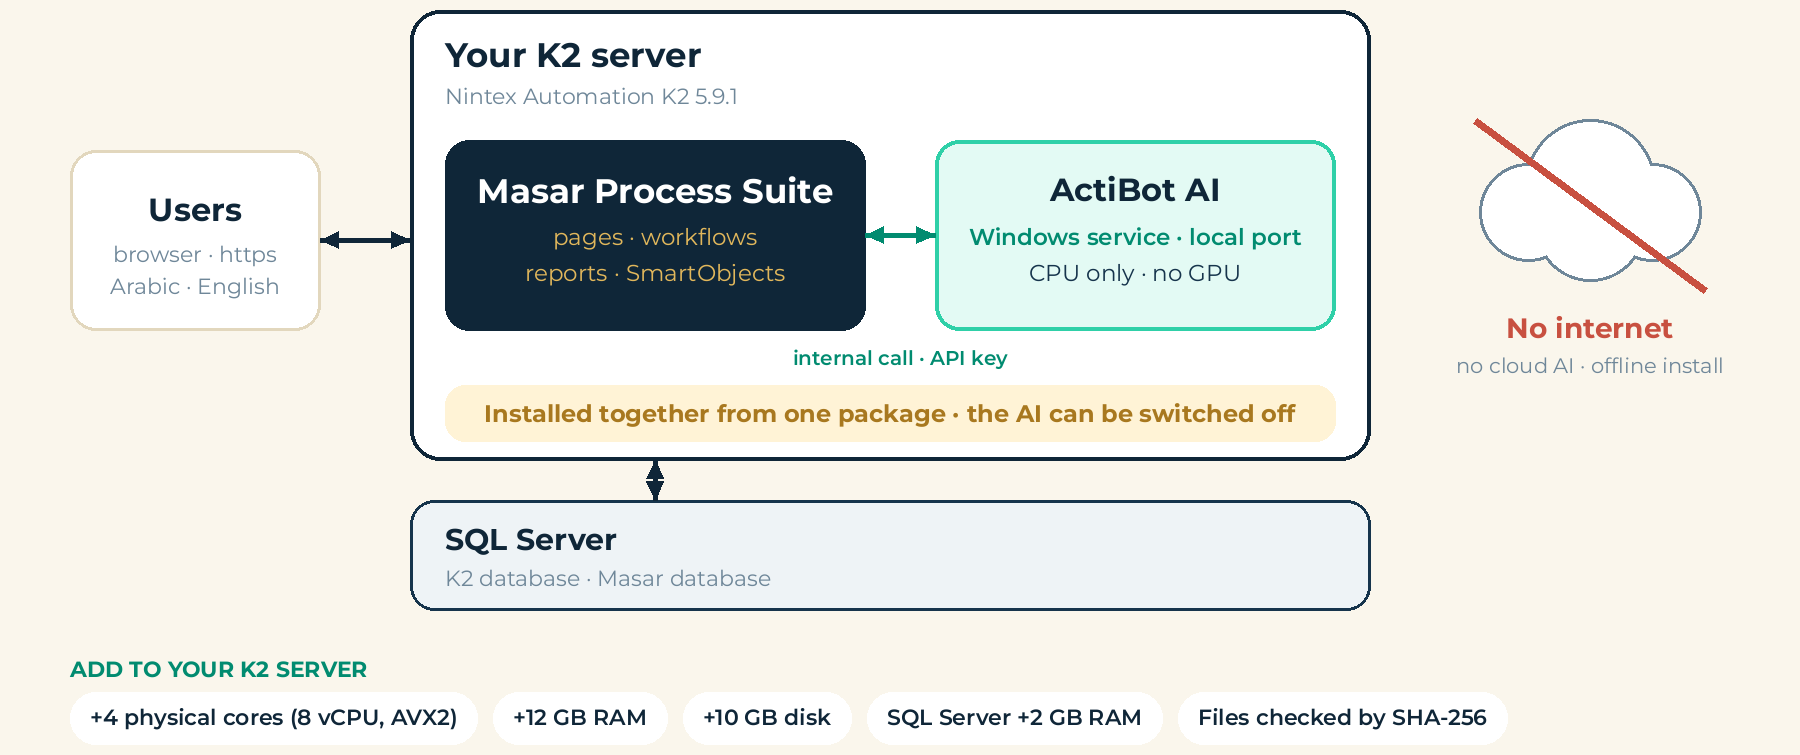
Figure 112 - Masar and ActiBot AI on your K2 server
Response time is an installation check. The target is a typical draft in 30 seconds or less, with one person drafting. Measure-ActiBotAiRuntime.ps1 measures seconds per draft, answer speed and memory with 6 made-up demo requests; it sends no customer data and writes nothing to the Masar database. Its result goes into the installation record. When two people draft at the same time, each draft takes about twice as long.
67.4 Reviewing a draft
ActiBot AI drafts at temperature 0 (Ai.Temperature = 0), so the same text always gives the same draft. A draft is a proposal: check it on the review page before you save it.
- Steps: every numbered step of the SOP is in the draft; two small steps may come out merged into one.
- Decisions: each decision has a Yes and a No; check that they are not reversed.
- Roles: every role is named in the text, or is @TODO. Where a passive sentence names no one, ActiBot AI may put a role from the text instead of @TODO.
- End states: every way the process can finish appears.
- Refine: a refined process may keep a wrong order or miss a branch.
67.5 AI governance
- On-premises: ActiBot AI is installed from an offline bundle on your own K2 server, and every file is checked against a pinned SHA-256. No cloud AI service is used; prompts, answers and documents stay in your network.
- No training on customer data: ActiBot AI only answers requests, and its files do not change while it runs. Masar ships no tool that trains or fine-tunes it, and ActiBot receives no prompts or answers.
- Logged: every draft is a row in dbo.Pm_AiDraft with the input, the full prompt, the answer, the timings, the state, who asked and when; discarded drafts keep them too. Changes to the AI settings are written to Core_Audit.
- People in control: a draft is a proposal. Only its author or an App Admin saves it, after review, and the change log of the new process records that it was drafted with ActiBot AI, the draft number and who reviewed it.
- Optional: ActiBot AI can be switched off at any time; Masar keeps working and reads an SOP by rules.
Appendix A - Glossary
Table 26 - Glossary
| Term | Meaning |
|---|---|
| Activity | One step of a process, done by one or more roles, possibly with systems. |
| ActiBot | The Nintex partner that implements Masar and runs the Automate with ActiBot service, which builds, tests and deploys a K2 workflow from a request. |
| BPMN 2.0 | International standard notation and file format for process models. |
| Branch | The activities that the branching outcome of a decision runs before the process ends. |
| Change comment | Text explaining what changed in a saved version. |
| Decision | A question with two outcomes, Yes and No; one outcome branches. |
| Folio | The name of a K2 workflow instance as shown in the worklist. |
| Group | A folder of the process library, with a champion. |
| K2 recipient | The K2 user, group or role that receives tasks of a role when a process is automated. |
| K2 Link | The part that turns a published process into a K2 workflow with ActiBot and documents K2 workflows as processes. |
| Message board (outbox) | Table where one part writes events that other parts and reports read. |
| Package | The JSON description of a process and its step map that ActiBot builds a workflow from, with its SHA-256. |
| Process key | The unique id of a process across all parts. |
| RACI | Responsible, Accountable, Consulted, Informed. |
| Readiness check | List of what is still missing before an automation request can be sent to ActiBot. |
| SmartObject | K2 business object that reads and writes data; its rights protect the data. |
| Snapshot | Full copy of a process kept for each version. |
| Step map | For each activity, which K2 step it becomes (Task, Decision, SmartObject, Email, Placeholder); made from the request. |
| Style Profile | K2 theme applied to the forms. |
| Swim-lane map | Diagram with one lane per role and the activities in order. |
| ActiBot request | What Send to ActiBot e-mails: the request PDF, the JSON (ActiBot.Request/1) and the BPMN file of the process. |
| Acknowledgement | A stakeholder's confirmation that they read a newly published version. |
| Checklist | A run of a published process as a list of items one person ticks off by a due date. |
| Conformance | Share of real cases that followed the documented process. |
| Drift | A difference Process Discovery found between the real paths and the documented process. |
| Event log | A list of case, activity and time from any system, as CSV or XES, that Process Discovery can mine. |
| Flow efficiency | Work time divided by work plus waiting time (the Lean overlay). |
| Model editor | The bpmn.io diagram editor in the product, which saves a drawing as a new process version. |
| Overlay | Badges on the map: times, cost, Lean, systems, automation or live Discovery figures. |
| Process Discovery | The part that mines workflow logs to find real paths, times and bottlenecks. |
| Variation | A named copy of a process for a branch or region, linked to the standard process. |
| Look | The colours of the pages: light (ivory, the default) or dark (navy). |
| Smart table | A list with sorting, a choice of columns, pages and export to Excel. |
| Collaboration pane | The side pane of the edit and process pages for comments, @mentions and comment tasks. |
| Comment task | Work given to a person in the collaboration pane, with a due date and a state; a Masar record listed in My work, not a K2 task. |
| Risk register | The list of risks with their likelihood and severity before and after controls, owner, treatment and classes (chapter 60). |
| Control | A check that treats a risk, put on a process step, signed off by its owner on a schedule or after a change. |
| Evidence ledger | The record of control evidence; rows are only added, never changed, and each row is sealed with SHA-256. |
| Incident | Something that went wrong, a near miss, a complaint or an improvement idea, worked through the incident workflow (chapter 61). |
| Training unit | A course, reading, on-the-job unit or assessment linked to a process, step or document (chapter 62). |
| Model gateway | The K2 REST service instance through which Masar asks ActiBot AI, included with Masar, on your own server, for a draft; set by the install step (chapters 66 and 67). |
| ActiBot AI | The AI included with Masar: a language model for Arabic and English and the program that runs it on the CPU of your K2 server, as the Windows service ActiBotAiRuntime (chapter 67). |
| MCP | Model Context Protocol: the way an AI assistant asks a tool for data; Masar answers read-only through its MCP server (chapters 65 and 66). |
| Personal MCP token | A key made on My profile, shown once, that lets an AI assistant read what you may read; revocable and audited. |
Appendix B - Setting keys quick reference
Table 27 - Setting keys and defaults (details in section 20.1)
| Key | Default | Key | Default |
|---|---|---|---|
| Company.Name | Masar | Review.EscalateDays | 14 |
| Company.DefaultLanguage | ar | Feedback.ResponseDays | 5 |
| Company.TimeZone | Arab Standard Time | Approval.Enabled | 1 |
| Appearance.Theme | Masar theme | Print.UncontrolledFooter | 1 |
| Editing.RequireCommentOnPublished | 1 | Timeframes.HoursPerDay / DaysPerWeek | 8 / 5 |
| Editing.EnableDecisions | 1 | Timeframes.Currency | SAR |
| Review.DefaultMonths | 12 | Admin.RoleApprover | (set at install) |
| Link.WorkflowCategory | ProMap_K2 | ActiBot.RequestEmail | (set at install) |
| Company.SiteUrl | (set at install) | Env.* (7 keys) | (set at install) |
| Discovery.WorkflowFolders | ProMap_K2 | Discovery.BottleneckFactor | 1.5 |
| Presence.Minutes | 10 | Outbox.KeepRunning | true |
| Appearance.Mode | light | Map.Theme | canvas |
| Feedback.ResponseRequiredMandatory | 0 | Access.GroupSync | 1 |
| Access.GroupSyncMinutes | 0 | Risk.AutoStart | 1 |
| Risk.SweepMinutes | 1440 | Risk.SignoffDays | 10 |
| Risk.HighScore | 15 | Risk.MediumScore | 8 |
| Risk.RunEvidenceDays | 90 | Incident.DefaultManager | (empty) |
| Incident.FromFindings | 1 | Incident.WorkDays | Sun,Mon,Tue,Wed,Thu |
| Incident.CloseHours | 80 | Training.DueDays | 30 |
| Training.RefresherDays | 30 | Training.DefaultTrainer | (empty) |
| Training.RetrainOnPublish | 1 | Ai.Gateway | None |
| Ai.Model | (set by the install step) | Ai.MaxTokens | 1500 |
| Ai.Temperature | 0.2 | Ai.PromptFormat | ChatML |
| Mcp.Enabled | 1 | Mcp.TokenDays | 90 |
Appendix C - Version numbering rules
- A new or imported process starts at 0.1.
- Every Save version adds 0.1 to the minor number (0.1, 0.2 ... 0.9, 0.10).
- Every publish (approval) moves to the next whole number with minor 0 (1.0, 2.0 ...).
- Saving after publishing continues from the published number (1.1, 1.2 ...); the Published version keeps the last approved number.
- Submit, Decline, Review and Archive do not change the number.
- Restore of an earlier version saves its content as the next minor version.
- A change comment is required on every save once the process has been published (setting Editing.RequireCommentOnPublished).
- Nothing can be changed while the process is AwaitingApproval.
Appendix D - Known limits
Table 28 - Known limits
| Area | Limit | Status |
|---|---|---|
| Language | Each page shows one language at a time: Arabic right to left, English left to right; switch with EN / Arabic in the header. K2's own system texts follow the browser language. Documents (PDF, Word) are in either language, the Arabic PDF right to left with a mirrored map. | Built (release 2.4) |
| Formatted text | Formatted items are cleaned on the server; since release 2.5 a light bar gives bold, italic, bulleted lists and https links; other formatting is typed as simple HTML with a live preview | Known limit |
| RACI | Only Responsible and Accountable rows are derived | Backlog |
| Reviews | Started with the Start review button, or by the scheduled review sweep when the review date comes (release 2.1) | Built |
| Outside (anonymous) users | Outside users sign in with an external K2 account (own user name and password) and see only what the administrator allows; this needs the K2 external-user licence add-on. A link that opens with no sign-in is not offered | Needs the K2 licence add-on |
| National identity and e-signature | Not built in: approval is the K2 approval workflow per RACI, sealed against tampering; a step can be marked Nafath or E-signature as a placeholder for the customer's own tool | By design |
| Outbound blocking | No outside calls from the pages; every test passed with all outbound internet blocked on the server. Repeat the check on the customer server at installation | At installation |
| Risk and compliance | Risk register, controls, sign-offs, control testing, incidents and training are part of Masar since release 2.5 (chapters 60 to 62). Enterprise risk stays in GRC One, linked by its reference; regulatory control libraries are the customer's content | Built (release 2.5) |
| Date picker | The calendar icon of date fields is K2's own and does not follow the Masar look; the dates themselves are shown as dd MMM yyyy | Known limit (K2) |
| Model editor names | The model editor shows each step's Arabic and English names together, also on English pages | By design |
| Arabic texts | The Arabic texts of the pages are drafts until the customer's Arabic reviewer approves them | Customer review |
| Model drafting | Needs ActiBot AI, included with Masar (chapter 67); without it an SOP is read by rules and Import from text works as before. A draft may merge two small steps, a decision's Yes and No may come out reversed, and a refined model may keep a wrong order or miss a branch: the reviewer checks every step, role and decision (chapter 67.4). Response time is checked on your server at installation | Known limit |
| Process capture | No desktop screen recorder: process capture is the guided interview and run data (K2, CSV and XES logs) | By design |
| MCP server | Read only; Windows PowerShell 5.1; tested with Masar's own MCP test client, not yet with a third-party AI assistant | Known limit |
| View Flow | The View Flow link of an automated step opens K2's View Flow page; the diagram itself depends on the K2 View Flow sign-in | Check at installation |